Important Information
o Practitioners are added to the Bluechip database via BC Secure, a user-restricted and password-protected application external to Bluechip itself.
o Typically, only Practitioners or Practice Managers have access to BC Secure, due to the high permission level required.
o Before running BC Secure, ensure all users are logged out of Bluechip, and it is closed on all computers.
o It is recommended that you perform a backup prior to making any changes in BC Secure.
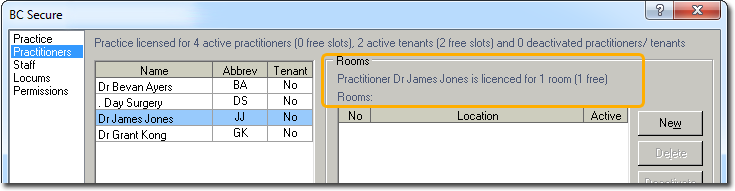
o Be aware that the number of active practitioner records you can add to BC Secure is limited by your practice’s Bluechip licence.
o The recording and setup of new practitioner records involves a number of steps in both BC Secure and the Bluechip database. Alternatively, contact MedicalDirector Customer Service for assistance, as they are available to assist you with this.
Stage 1a: Adding a New Practitioner to BC Secure
Overview
o A practitioner record must be added to BC Secure first, to record the Practitioner’s licence details (name and provider numbers). This is required first, for the practitioner to exist in the Bluechip database.
o From within BC Secure you also define a variety of system settings for the practitioner, used throughout Bluechip.
o It is imperative that the following steps are completed in BC Secure:
• Adding a New Practitioner
• Adding a Location(s) for a New Practitioner
• Setting Permissions for the New Practitioner (refer to the User Permissions table if required)
Procedure
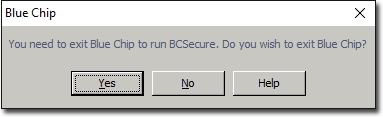
1. To access BC Secure, from within Bluechip, select BC Tools > Utilities > BC Secure. You will be prompted that Bluechip must exit.
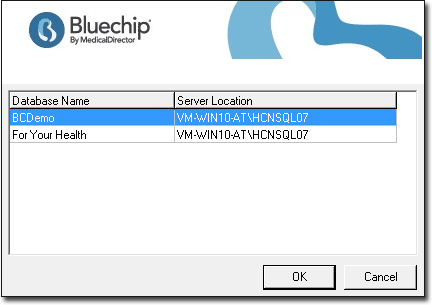
2. The Select Database window appears. Select your desired (live) database.
3. Click  The Login window appears.

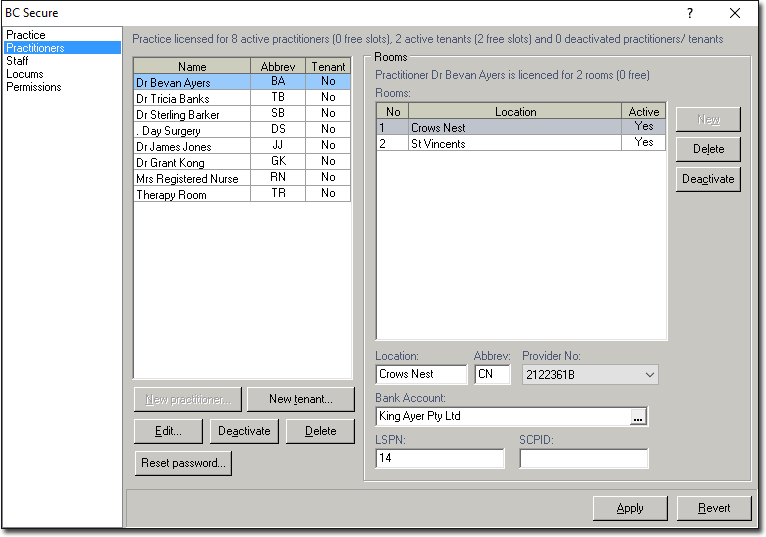
4. Log into BC Secure using your Username and Password (your Bluechip login). When the BC Secure window appears, select the Practitioners menu.
5. Click  The Practitioner Licence Details window appears.
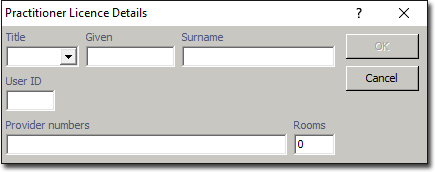
6. Enter the Practitioner’s licenced full name, which will automatically populate the User ID initials (initials become the User Name for the Bluechip login).
7. Record one or more Provider Numbers. Separate multiple provider numbers with a comma.
8. Indicate the number of Rooms (the required number of provider numbers / locations).
9. Ensure the details are correct, and then click The practitioner is now active.
Stage 1b: Recording a Location for a New Practitioner
Overview
After creating the practitioner record in BC Secure is created, the Rooms prompt will confirm the number of rooms entered in the Practitioner setup. A location and bank account details are required for each room and provider number entered for the Practitioner.
Procedure
1. From the Practitioners menu, select the practitioner you wish to configure settings for.
2. Within the Rooms section, click  A new room is created for you, complete with default settings.
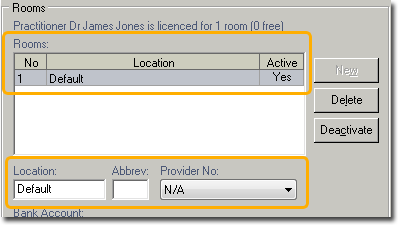
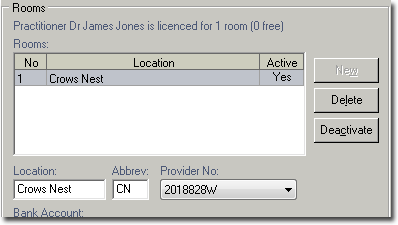
3. Change the Location from ‘Default’ to the location you wish.
4. Record an abbreviation for the location.
5. Select the appropriate Provide No. from the associated drop-down menu. If the Practitioner’s provider number is not available from the drop down menu, it is because it was not recorded when you created the practitioner record. Edit the Practitioner’s setup now, to add provider number and room.
6. Locate the Bank Account field, and click the associated src="../../images/Button-Elipses-Bluechip.png" alt="" style="border: none; display: inline-block; max-width: 100%; height: auto;" border="0" /> button. The Bank Accounts window appears.
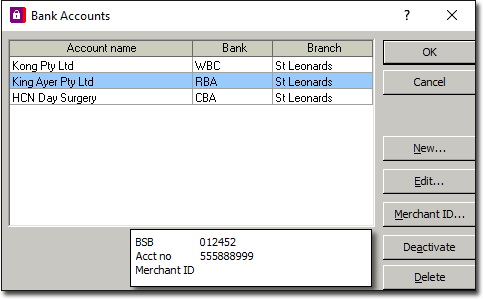
7. To associate a bank account with this practitioner, either;
o Select an existing bank account from the window, and click
o Click to create a new bank account.
8. The Bank Account Details window appears. Enter the Account Name, Bank, Branch, BSB, and Account No.
o Merchant Details are only required if a Practice uses a TRYO payment system.
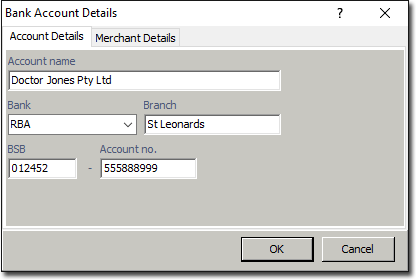
9. Click to confirm. You will be returned to the Bank Accounts window, with the new bank account pre-selected for you. Click to select the account. You will be returned to the main BC Secure window, where the new bank account now appears, associated with the selected room.
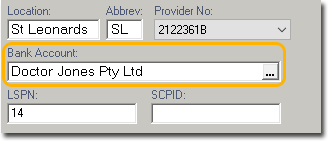
10. Enter the Practitioner’s LSPN number if required, and then click  to save. Note: LSPN number is required for all diagnostic imaging and radiation oncology sites.
11. Exit BC Secure.
Stage 1c: Setting a New Practitioner’s Permissions
Overview
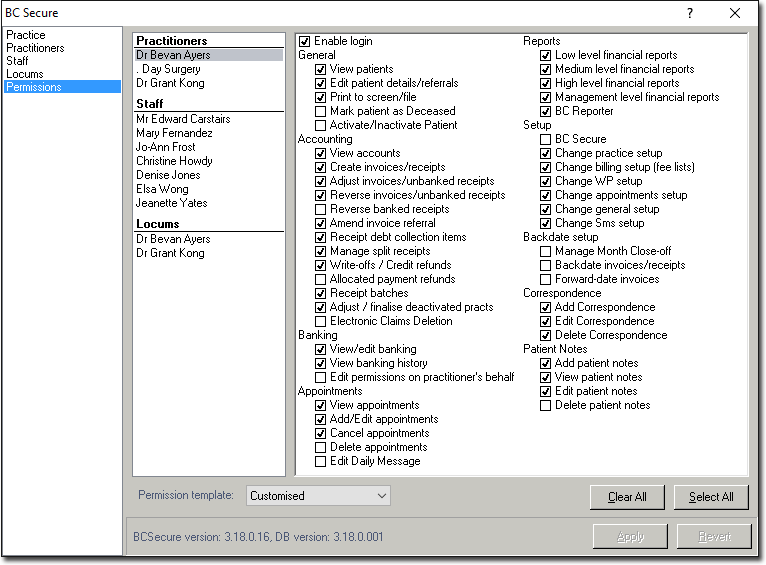
Permission levels are required to be configured for all users within Bluechip. These determine access to certain functions and modules. Bluechip provides pre-defined set of permissions that can be selected from the Permission Template drop-down menu, or by customising a selection of permissions by enabling/disabling various check boxes.
Procedure
1. From the Permissions menu, select the practitioner you wish to configure permissions for.
2. Either;
o Select a pre-defined set of permissions via the Permission Template drop-down menu, or
o Create a customised permission set by selecting permission check boxes as required.
3. Click to save.
o Refer to the User Permission Table below. This will assist you to determine permission access for users.
BC Secure User Permissions Table
|
BC Secure User Permissions |
|
|
General |
|
|
Accounting |
|
|
Banking |
|
|
Appointments |
|
|
Reports Note that selecting a higher report permissions level does not grant permissions for lower-level reports. |
|
|
Setup |
|
|
Backdate Setup |
|
|
Correspondence |
|
Stage 2a: Configuring the New Practitioner in Bluechip
Overview
After adding the new practitioner to BC Secure, their record becomes available to Bluechip itself, where further configuration is now required.
It is imperative that you complete the following:
o Practitioner Details: Class Usage and Options; determine classes and fee lists for billing purposes
o Fees: customised/managed per practitioner or class
o General: select default class and service types
o Appointments: appointment book setup
o Permissions: setup banking and earning permissions
o Templates: setup letterhead templates for each location
Practitioner Details Configuration - Overview
Practitioner Details configuration covers a number of steps, defining how the system determines classes, fee lists, appointment book, and further banking and earning permissions to suit the practice and practitioner requirements.
Practitioner Details Configuration - Procedure
1. In Bluechip, select Setup > Practitioner > Practitioner Details. The Practitioner Setup window appears.
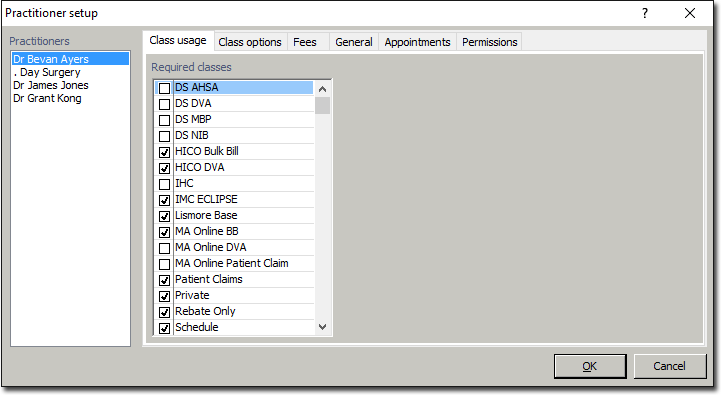
2. Select the practitioner you wish to configure settings for. By default, the Class Usage tab is selected.
3. Select all the Classes you wish this practitioner to bill for.
4. Select the Class Options tab.
o Select the class you wish to configure.
o Highlight each class in turn, and via the Applicable Service Item List, select the fee list(s) to be associated with the class. In the example below, we have indicated that we want to use the Medicare fee list (service item list) with the HICO Bulk Bill class.
o Each Class can have multiple fee lists associated with it.
o Repeat this for each Class you wish to use with this practitioner
5. Select the Fees tab.
o Select the class you wish to configure. In our example, we have selected the Private class.
o In the Filter Items field, enter a service item number to modify. In our example, we have entered “10”. This filters the list of service items to show all items that begin with “10”.
o In the Fee field, enter the practitioner’s private fee for the selected service item. In our example, we have entered “$150.00”.
o To save changes, click onto the item number within the list.
o Repeat steps a-d for each service item requiring a private fee.
Note: Fees can be based on the Medicare Benefit Schedule, the Medicare Benefit Schedule Rebate, the AMA fee, or they can be set arbitrarily by the practitioner.

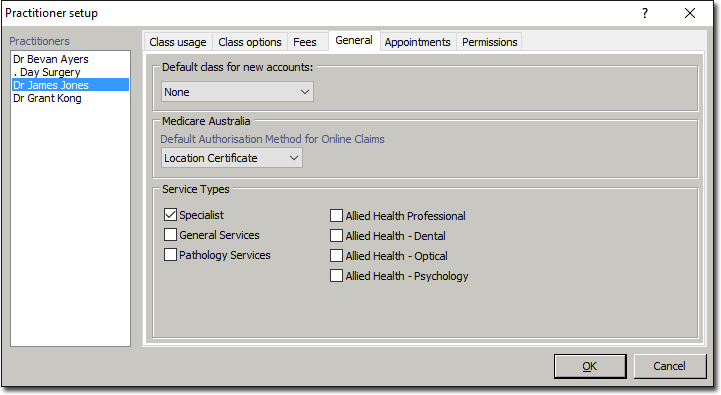
6. Select the General tab.
o Via the Default Class for New Account drop- down list, select the Practitioner’s default class for new patient accounts.
o Select one or more check boxes to indicate the Service Type categories associated with the practitioner. These categories will be available for selection when issuing an invoice.
7. Access the Appointments tab. Define Appointment Types by entering a Description, Abbreviation, and Usual Length (duration in minutes).

8. A Practitioner’s plan must be configured. Click  The Plan Configuration window appears.
o Enter the Plan Start Date.
o Indicate the number of Weeks per Cycle (each plan is based on one or more week-long schedules or ‘cycles’). In the example below, we have indicated that Plan 1 consists of a 2-week cycle.
o Enter the working hours in the Start, Finish and Offset times for each day. If your cycle consists of multiple weeks, ensure you select the week you want to edit. In the example below, we are displaying Week 1 of 2.
o Allocation AM and PM Locations for each day if required.
o Define time slots for each day if required

The Holidays button allows you to mark closed periods, or modify the working hours for a specific day for a specific practitioner.
Note: If you require further information on Practitioner Appointment Book setup, refer to Appointment Settings.
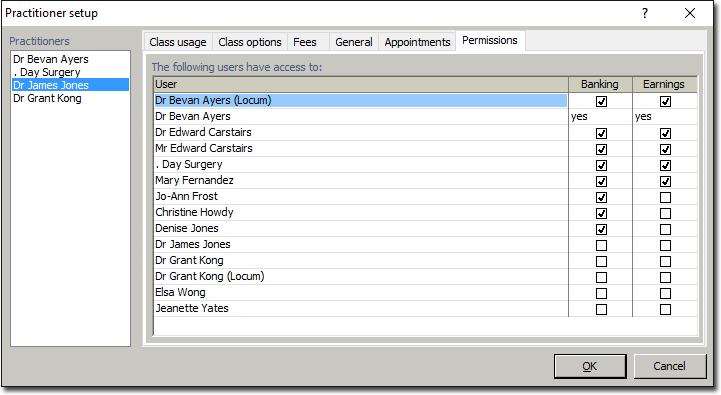
9. Select the Permissions tab. The current practitioner automatically has access to their banking and earnings. Selecting the check boxes for each user enables Banking and Earnings Permissions for this practitioner.
10. Once setup of all the practitioner tabs is complete, click to save.
Stage 2b: Template Configuration
Template Configuration - Overview
Letterhead templates govern the actual letterhead that appears on invoices, receipts, estimates, statements and transaction listings (financial documents).
Bluechip billing is based on a per-practitioner Location (or Room) basis; there must be a separate letterhead template for each location for the practitioner. A new practitioner requires letterhead templates to be created in Bluechip for each location for billing.
Template Configuration - Procedure
1. In Bluechip, select Setup > Templates > Letterheads. The Letterhead Setup window appears, displaying all your current templates.
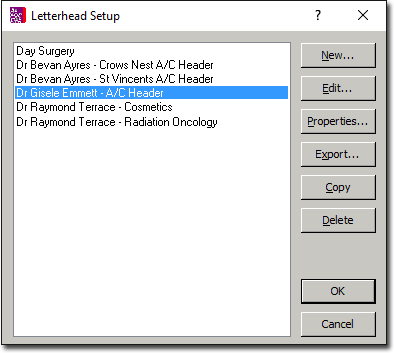
2. Rather than creating a new template, it is recommended that you copy an existing letterhead template, and amend it with the new Practitioner’s details. Select an existing template, and click 
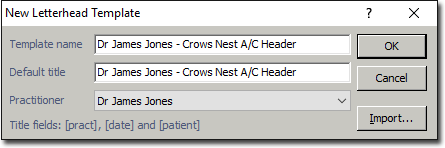
3. The Edit Letterhead Template window appears. Modify the Template Name and Default Title to suit the new Practitioner’s details. Select the new practitioner from the Practitioner drop-down menu. Click
4. To open the template either double-click it, or select it and click 
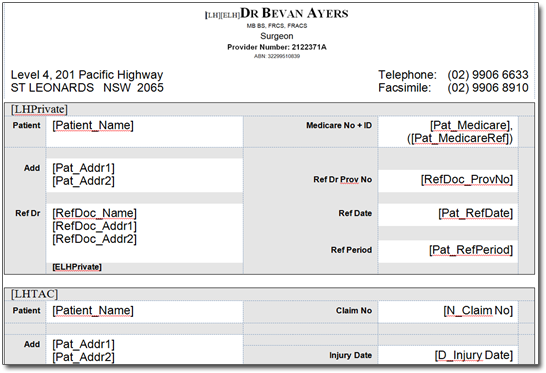
o Ensure not to edit the [LH][ELH] fields, or the body of the document. You may, however, make other changes to the letterhead for the practitioner.
5. Click  and then Exit the template. Repeat this process for each different location.