The Holding File contains Investigations Results returned from your provider that have not yet been examined and saved to a patient's record, along with other correspondence scanned/imported here or from the Scan/Import Correspondence window (provided you have enabled the 'Show Scan/Import Correspondence in Holding File' option within Investigation Options). From within the Holding File you can also scan or import results and other documentation, assigning them to patients.
The Holding File is accessible to practitioners with top-level access only. Non-clinical staff, and practitioners without top-level access can still import/scan files via the Scan/Import Correspondence window. The Permissions Matrices at the end of this topic indicate which functionality is available to different user types. See also Document Management Scenarios.
Holding File for a Specific Patient
From within the patient's record, select Correspondence > Check Holding File (All Patients) and then follow the same steps you would for all patients, below.
Note that if this is a new patient record (has never received results) you will have to view and acknowledge at least 1 result for this patient from within the Holding File (For All Patients) first, for future results (from that laboratory to be auto-assigned to the patient. Likewise, if you receive results from a laboratory you haven't used for this patient before, you must assign at least one of these 'new' results to the patient before further results (from that laboratory) are automatically assigned to the patient.
Holding File for All Patients
1. Select Correspondence > Check Holding File (All Patients).
2. You
will be prompted to select one or more recipients whose results
you wish to examine.
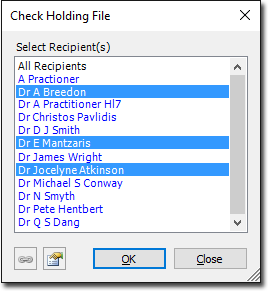
3. From this window select the recipient(s) whose results you wish to examine:
o Select a single recipient by clicking their name, and then clicking OK to open the Holding File to display only their results. Alternatively you can double-click a name to simultaneously select them and open the Holding File.
o Select multiple recipients by clicking each name. To deselect a name, simply click it again. Then, click OK to open the Holding File to display only the results of the selected recipients.
o Select
all recipients by clicking the All Recipients option. Clicking
OK then opens the Holding
File to display results for all recipients. Alternatively you
can double-click the All Recipients option to simultaneously select
all recipients and open the Holding File.
Note that, as making a selection from this window locks the results
associated with the selected recipient, it is recommended that
you select only a specific recipient, as selecting All
Recipients will prevent others from accessing any results
whilst you have the Holding File open.
4. You will then be presented with the Holding File.
5. (Optional)
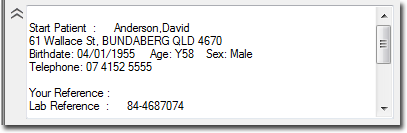
Upon opening the Holding File, the first result in the list is
automatically selected and displayed. If Clinical cannot determine
which patient the result relates to, you will be prompted to either
add a new patient to the database (by clicking  ), or select from a list of patients the result
could possibly belong to, as seen in the following example.
), or select from a list of patients the result
could possibly belong to, as seen in the following example.
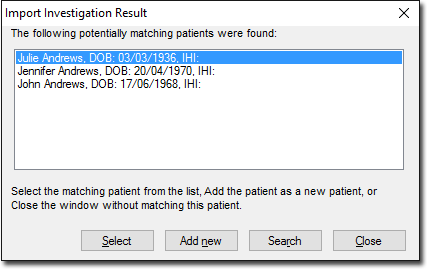
You may also be presented with these prompts as you browse through
the list of results.

o Rearrange the column order by clicking and dragging a selected column, and dropping it to a new location.
o Sort
the list of Results by clicking on any column heading. The sort
order of a column is indicated via the direction of the ![]() icon.
icon.
o Multiple records can be selected simultaneously using the CTRL or SHIFT keys, as per standard Windows functionality.
o Simple/Advanced
filtering can be applied to this window. In the example above,
the Recipient/Doctor column has been filtered;
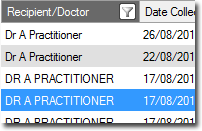
See Filtering/Searching
Correspondence Records for more information.
6. Within the Holding File you can check-off Results. See Checking Off New Results for information.
7. Review the table below for information on using the Holding File.
Items of interest on the Holding File window: |
|
Upper Section |
|
Clear Filters |
|
Comment |
|
Date Collected |
|
Date Created |
|
Date Notified |
|
Delete |
|
Document Details |
|
Edit > Copy Result |
|
File > Add Cervical Screening |
|
File > Mark for Recall |
|
File > Outstanding Requests |
|
Hide/Show Preview |
|
Import |
|
Move Location |
|
Notation |
|
Open Externally |
|
Patient |
|
Patient > Open |
|
Patient > Open Patient |
|
Preview |
|
Print / Print To *Include Patient Header |
|
Print List / Print List To |
|
Recipient/Doctor |
|
Refresh |
|
Result |
|
Scan |
|
Sender/Provider |
|
Source |
|
Subject |
|
Type |
|
User Name |
|
Zoom |
|
Lower Section |
|
Action |
|
Add Recall |
|
Assign/Reassign Patient |
|
Assign/Reassign Recipient |
|
Audit History |
|
Close |
|
Discuss |
|
Edit Patient |
|
No Action |
|
Return Urgently |
|
Open Patient |
|
Previous/Next |
|
View Signature |
|