This topic discusses how to filter correspondence records, or search for content within the list of records. This functionality is available wherever Correspondence records are located.
Overview
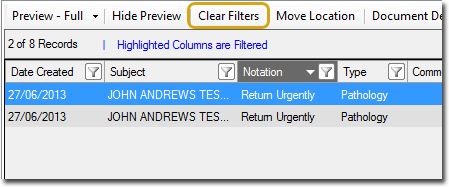
Upon applying a filter, the list of records refreshes to show only those results that match your selection. In the example below, the Notation column header is highlighted in dark grey to indicate that a filter has been applied to it. Although the image shows a single column as having been filtered, it is possible to apply a filter to multiple columns simultaneously (see Advanced Filtering, below)
Clear a filter by clicking Clear Filters.
Quick Filtering
1. To quickly filter information, either
o Click 
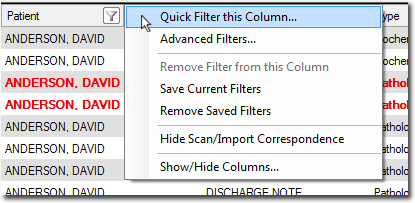
o Right-click a column header in any of the correspondence windows, and select Quick Filter this Column from the menu that appears.
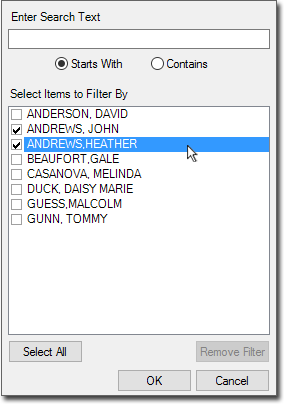
2. You will be presented with a list of filter options, such as in the example below which shows patient names. Select the items you wish to filter for, and then click OK Alternatively you can enter text to filter by.
Advanced Filtering
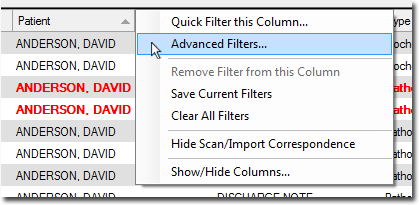
1. To access advanced filtering, right-click a column header in any of the correspondence windows, and select Advanced Filters from the menu that appears.
2. The Advanced Filters window appears.
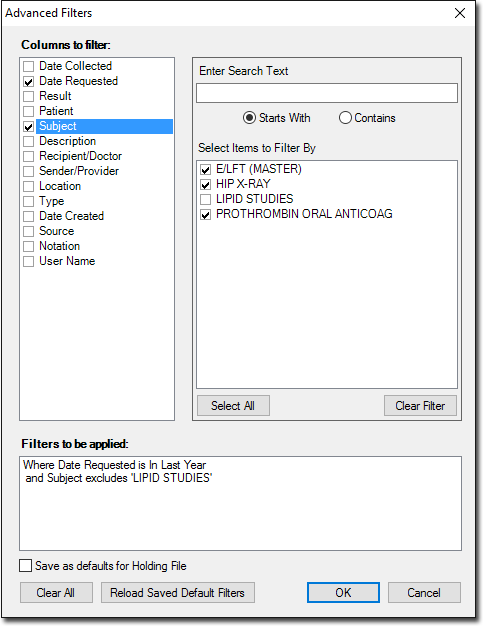
3. Select the columns you wish to filter via the Columns to Filter section.
4. Each column type offers numerous filtering options to select from. In the example above, the Subject column is selected, and on the right-hand side of the window are the filter options available to the Subject column.
The lower-right section of this window lists the filters to be applied.
5. (Optional) You can save your filter configuration as a default for the Holding File, by ticking the associated check box at the bottom-left of the window.
6. When you are ready to apply the filter, click OK
Filtering by Date Range
When applying an Advanced Filter, you can specify to filter records by Date Collected and/or Date Requested. These two options are further broken down into specific periods, as described in the following table.
|
Filter |
Rule |
|
Blank |
|
|
Today |
|
|
Yesterday |
|
|
Since Yesterday |
|
|
In Last Week |
|
|
In Last 2 Weeks |
|
|
In Last Month |
|
|
In Last 3 Months |
|
|
In Last 6 Months |
|
|
In Last Year |
|
|
In Last 2 Years |
|
|
Custom |
Filtering by a Selected Value
This is another quick-filter method for filtering the entire list of records to display only those that match a specific value.
Examine the image below. Say for example you wish to display only those records where the Notation is 'Return Urgently'. To do this, right-click the value you wish to filter by (in this case it would be the text 'Return Urgently' within the Notation column), and then select Filter by this Value from the menu that appears.
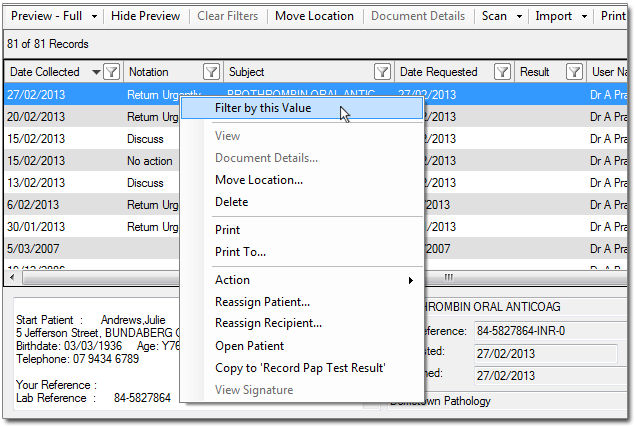
The example above is taken from the Holding File. The right-click menu varies, depending on which component of Clinical you call it from.
Saving Filters
Save a filter by right-clicking a column heading and selecting Save Current Filters. Note that saved filters are per practitioner, and are applied to each patient’s record thereafter, until cleared manually.
Clearing Filters
Once a filter has been applied, a Clear Filters button appears at the top of the window. Clicking this clears all filters that have been applied to the window.
Note that all filters are cleared by default upon closing a patient's record, unless you elect to save the filter first by right-clicking a column heading and selecting Save Current Filters. Note that saved filters are per practitioner, and are applied to each patient’s record thereafter, until cleared manually.
Searching for Content within Records
You can search correspondence records for specific keywords, by clicking Search, located in the upper tool bar of any correspondence window.
![]()
1. Click Search. The Perform Keyword Search window appears. Note that the first time you perform a search for a give patient, an index of their documents will be generated. This generally takes less than a minute and is only performed once.
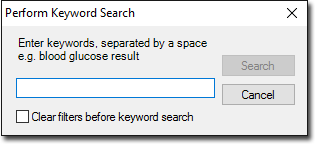
2. Enter the keywords you wish to search for, separating each with a space e.g. blood glucose. Note that characters such as % [ ] { } will be ignored.
3. (optional) Indicate that you wish to clear any filters that may currently be applied to the set of records, by ticking the associated check box.
4. Click  to commence the search. Documents that contain the keyword(s) will be highlighted in yellow, along with any occurrences of the keyword(s). To reset all search results (and clear any keywords), click Clear Search.

Managing the Notation Filter
Data displayed in the notation column of the Actioned Items window is sourced from recordings made via the Action window (available from the Holding File or from within the patient's record).

You can filter records in the Actioned Items window by 'notation'. For example:
- The right-hand image is taken from the Actioned Items window - we've clicked the button to reveal a list of filter options for filtering the Notation column. This list shows the various notations used when recording actions. Note that there is an extra entry in this list for 'Phone'. If an entry like this exists in the Notation column, but a corresponding entry doesn't exist in the Action window, it's because the user didn't click
 when they first recorded it in the Action window. In other words, their notation was created ad-hoc - not also simultaneously added to the list of available notations to select from later (by clicking ).
How to Remove Items from the Notation Filter
The following instructions explain how to remove entries from the list of available notations, and how to replace notations recorded against patient correspondence. Clinical does not currently keep an audit trail of these actions. An enhancement request has been logged with the MedicalDirector Development team to implement such.
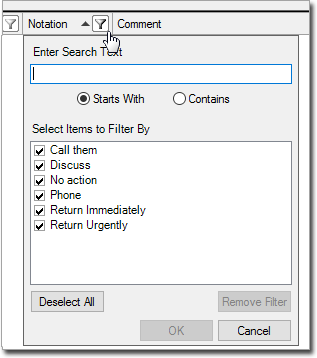
Note that in our Notation filter window (above-right), there are a few entries that are similar:
o "Call them" and "Phone"
o "Return Immediately" and "Return Urgently".
You may decide that you don't want multiple, similar entries like this, and you can tidy-up this list by removing the items you don't want.
In the instructions that follow, we're going to remove all the entries for "Call them", and replace them with "Phone". Simply replace our criteria for yours.
It is recommended you read these instructions in their entirety before proceeding, as the process is a little complicated, and can be time-consuming. It is also recommended you perform a backup first.
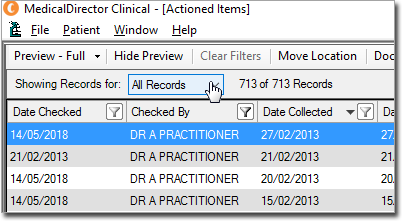
1. From the MedicalDirector front screen, select Correspondence > Actioned Items. The Actioned Items window appears.
2. (Optional) Filter the list of records to show those from different periods. In our example, we've decided to show all records.
3. Locate the Notation column, and click its associated button.
4. Because we want to change all the "Call them" entries to "Phone", we select only the "Call them" filter option.
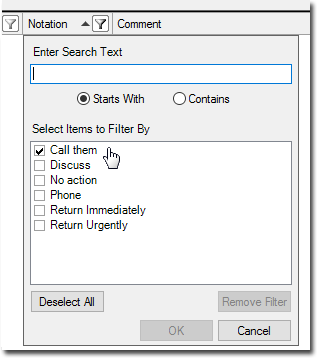
5. Click OK to apply the filter. You should now see a list of Actioned Items where the notation is "Call them". To change these so that they read "Phone", each entry must be changed manually, as explained following.
6. Right-click a record, and select Open Patient. The corresponding patient's record opens.
7. Within the patient's record, select the Correspondence tab.
8. Locate the Notation column, and filter this column by "Call them". You should now see only those records where the notation is "Call them".
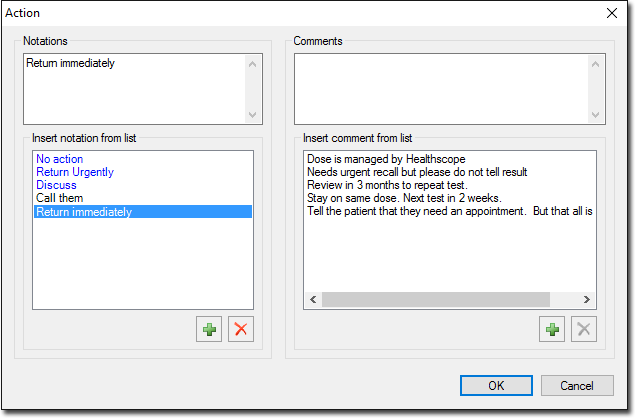
9. Select a record, and then locate and click  at the bottom of the window. The Action window appears.
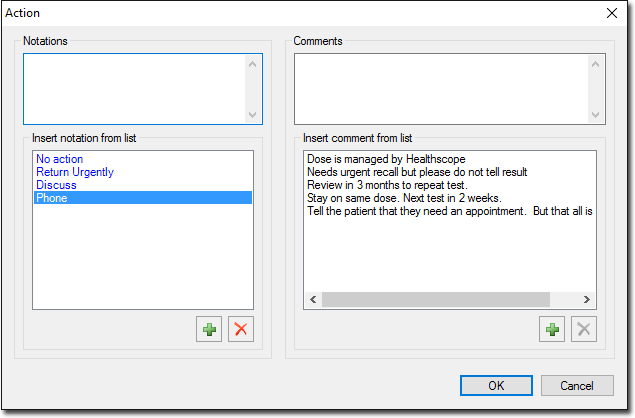
10. Locate the Insert Notation from List section, and check for the Phone entry (as shown above).
o If the Phone option is available, proceed now to Step 11.
o If the Phone option isn't available, you must add it. To do this, type "Phone" into the Notations section, and then click . 'Phone' will be added to the Insert Notation from List section. Proceed now to Step 11.
11. Select the Phone option, and click OK
o The selection is saved, replacing "Call them" for "Phone".
o The Date Checked column value is updated to reflect the current date.
12. Repeat steps 9-11 for each entry in the patient's record you wish to modify.
13. When you have finished with this patient, close their record. You will be returned to the Actioned Items window.
14. Click Refresh, located at the top of the window, to refresh the list.
15. Repeat Steps 6-14 for each record you wish to modify. Once you have removed every "Call them" entry, you can now remove that option from the list of available notations. To do this, continue now to Step 16.
16. Within the Actioned Items window, locate and click Holding File, located at the top of the window. The Holding File opens.
17. Within the Holding File, select Action > Action (or press Alt + A). The Action window appears.
18. Locate and select the "Call them" entry, and click  to remove the item from the list. You will be prompted to confirm this action.
19. IMPORTANT: On the Action window, now click Cancel to close it - do not click 'OK'.
20. IMPORTANT: Ensure you now remind users to check the list of available notations before they decide to add new entries.