The following information explains how to manage VMO payments from NSW Health. It covers the steps necessary for setup, invoicing, batching, and generating a VMoney export file for uploading your transactions to the VMoneyWeb application.
Step 1: Configuration - Creating the VMoney Batch Type
1. Select Setup > Practice > Batch Types. The Batch Setup window appears.
2. Click  The New Batch Type window appears.
o Name the batch type.
o Ensure the method selected is 'Company'.

3. Click  You are returned to the Batch Setup window. Enter any other information you wish.
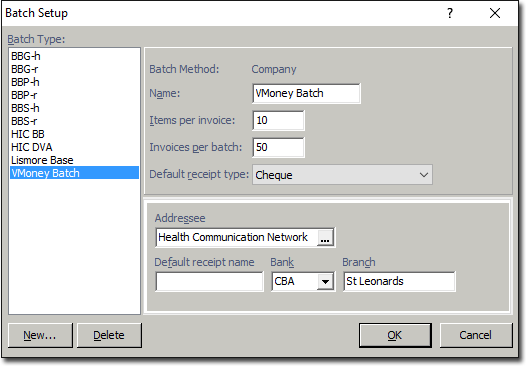
4. Click to close the window. This concludes the steps necessary for creating a batch type for VMoney.
Step 2: Configuration - Creating the VMoney Class
1. Select Setup > Practice > Classes. The Class Setup window appears.
2. Click The Copy window appears.
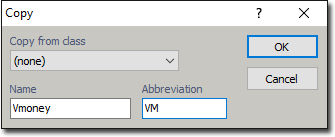
o Ensure the 'Copy from class' selection is 'none'.
o Name the class.
o Record an abbreviation for the class.
3. Click You are returned to the Class Setup window.
4. Select the General tab.
o Select the account group you wish to bill for. We have selected "Hospitals".
o Enter the Account Contact
o In the Number Fields section, record "AUID". This custom field is required later, when you create the account based on this class.

5. Select the Payment Options tab.
o From the Batch type drop-down list, select your VMoney batch type you created earlier.
o From the Addressee drop-down list, select the addressee you wish to associate with this class.
o From the Multiple procedure drop-down list, select the scale you wish to use with this class.
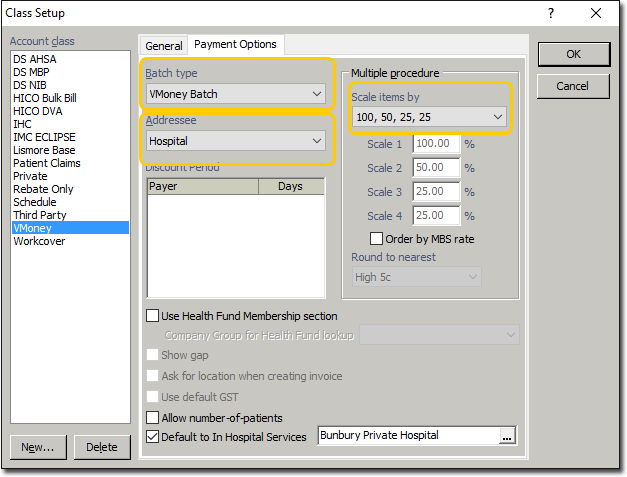
6. Click to save the class. This concludes the steps necessary for creating a class for VMoney.
Step 3: Configuration - Associate the VMoney Class with a Practitioner
1. Select Setup > Practitioner > Practitioner Details. The Practitioner Setup window appears.
2. Select the practitioner who will bill with the VMoney account.
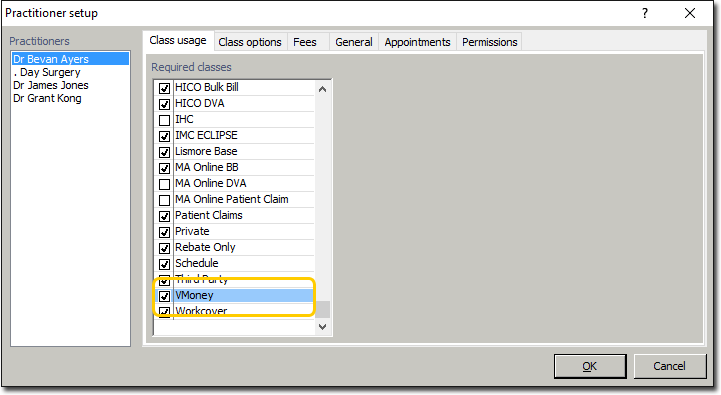
3. Select the Class Usage tab.
o Select the VMoney class you created earlier.
4. Select the Class Options tab.
o Within the Class section, select the VMoney class you created earlier.
o Within the Applicable service item lists section, select one or more Service Item Lists to use when billing for the VMoney account.
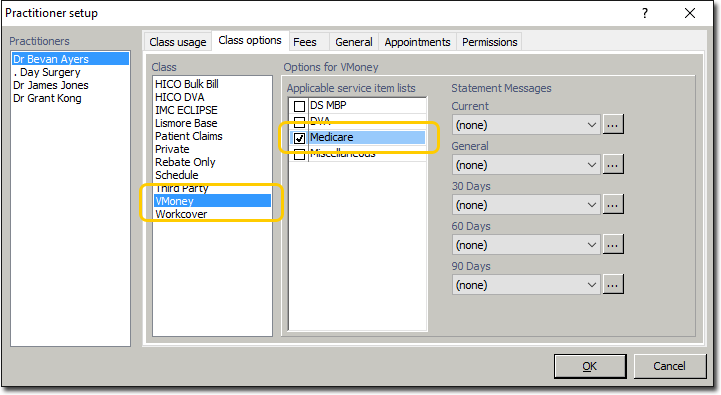
5. Click to save. This practitioner record is now configured to use the VMoney class.
Step 4: Configuration - Creating the VMoney Account
1. Open the patient's record you wish to create an account for.
2. Within the Margin Menu, select Accounts.
3. Click  The New Account window appears.
o Select the practitioner who will bill for this account.
o Select the VMoney class you created earlier.
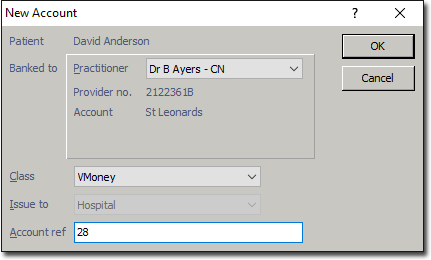
4. Click The Account Details window appears.
o Ensure you record the AUID for this account, an example of which is shown below.
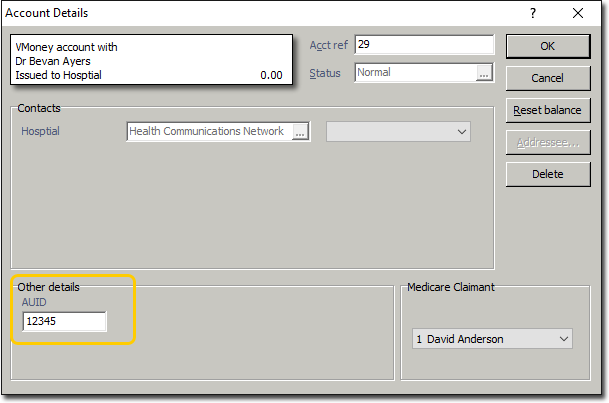
5. Click to save the new account. This concludes the steps necessary for creating an account for billing for VMoney.
Step 5: Invoicing
1. Open the patient's record.
2. From the Margin Menu, select Accounts.
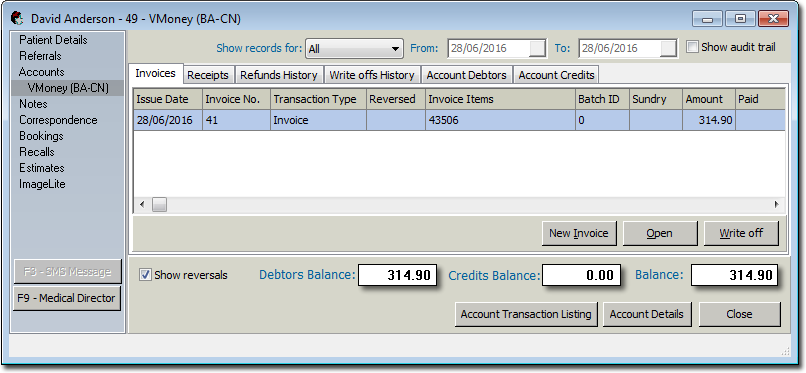
3. Locate and select the account you created for VMoney.
4. Click The account opens.
5. Select the Invoices tab.
6. Click  A new invoice is started for you.
![]()
7. Complete the invoice as normal. See Creating Invoices for an overview of the process.
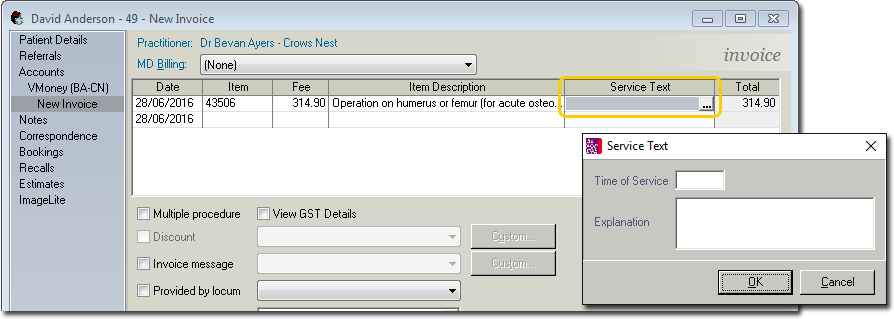
8. (Optional) For each Service Item, to record the exact time the service was performed, click within the Service Text field, and then click the  that appears, as shown below. You can enter the exact time there, and an explanation if you wish.
Note that if you do not enter the exact time for each Service Item, the time at which the invoice is created will be used instead.
9. Click  to issue the invoice.
10. (Optional) You will be prompted to select a referral.
11. The Issue Invoice window appears. Enter the date on which you issued the invoice - the default is today's date.
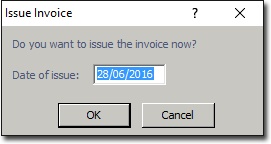
12. Click You will be prompted to print the report (invoice), after which you will be returned to the Invoices tab.
Step 6: Batching
1. Open the Practice Explorer.
2. Within the Margin Menu, locate and select Batches.
3. Locate and select the VMoney batch.
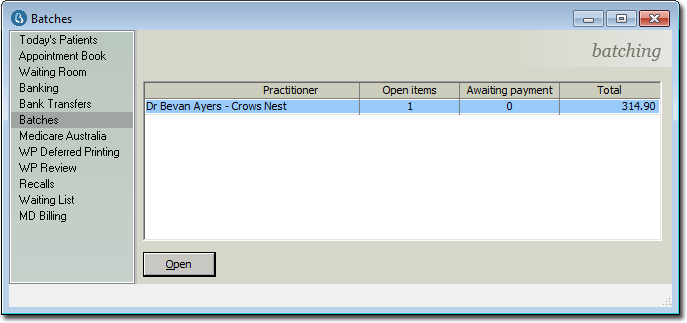
4. Click 
5. From the Margin Menu, select Process Batch.
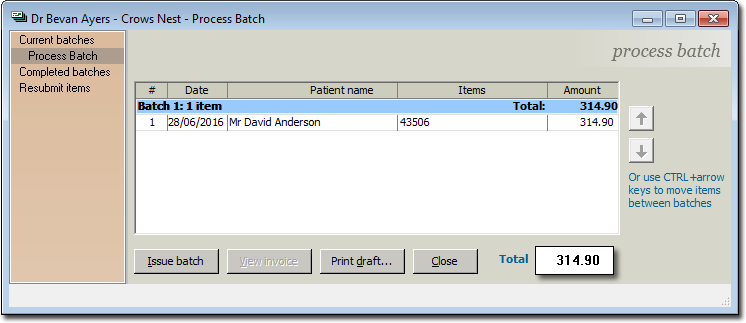
6. Click  You will be prompted to confirm that you wish to issue the batch.
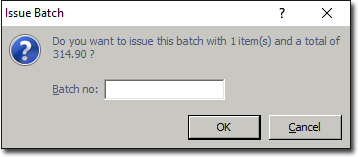
7. Enter a batch number, and then click to confirm.
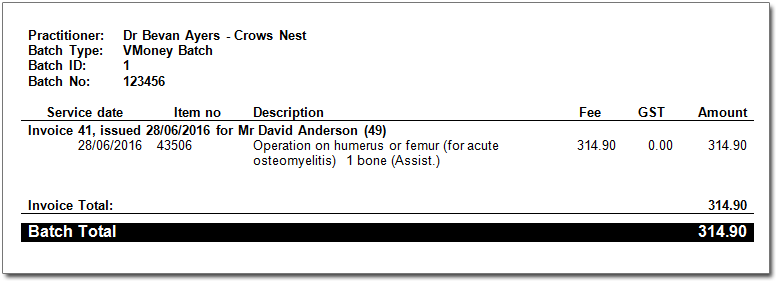
8. You will be prompted to print the batch summary. Print the batch summary if you wish. An example is shown below.
9. Continue below for information no how to receipt the VMoney batch.
Step 7: Receipting
*continued from Step 9 above...
Note that this step assumes you have received payment for the VMoney invoice, and you now need to manually-receipt the batch.
1. Within the Current Batches screen, select the VMoney batch you wish to receipt.

2. Click The Batch Receipt Amount window appears.
3. Enter the amount paid to you in the field provided. Note that this amount may not equal the total submitted with the batch. In our example, we were paid the full amount of $314.90, so we have entered that amount, as shown below.
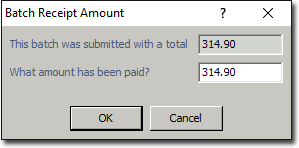
4. Click You are presented with the Receipt Batch details.

5. Click  The Batch Receipt Type window appears.
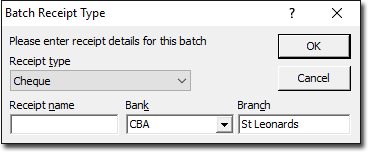
6. Enter the details of the type of receipt for this batch. Click to confirm. This concludes the steps necessary for receipting the VMoney batch.
Step 7a: Receipting when you do not receive the full amount
If you do not receive the full amount, you can choose to;
o Claim write-off
o Claim write-off, and resubmit
o Leave unpaid

Generating the VMoney Extract
Please refer to VMoney Export for detailed instructions on this process.