See also: In Hospital Claiming
1. Open the patient's record, and select the Estimates entry in the menu.

2. Click 
3. Select the appropriate account under which the invoice has to be created from ‘Select Account’ screen. Click  to continue.

You may be prompted to verify the patient if you have not previously done so, or if you have enabled ‘patient verification’ within the batch-type configuration for IHC. Patient verification ensures that claims can be made for bona fide patients. Click to initiate the verification process. Alternatively you can ignore the verification process at this time.

4. The New Invoice window appears.
o Additional Service Items (Accommodation – ACC1, Case payment) can be added to the invoice. For each item, you can;
• Modify the date the service was performed.
• Enter the service item number (by clicking into the Item field, and then either typing the number or pressing Enter to search for items). As this invoice is specifically for IHC, only fees that have been configured for IHC will be accepted.
• Modify the fee (if you want to alter the default fee value).
• Modify the Item Description (if you want to alter the default).
o Optional:
• Ad an invoice message.
• Indicate the hospital where hospital services were performed.

5. Click  to issue the invoice. You will be prompted to indicate whether this invoice is associated with a referral for the patient. Select a referral, or choose the Not Applicable option, and then click
  to continue.

6. The Issue Invoice window appears, prompting you to enter the date on which the invoice was issued (with the current date being the default).
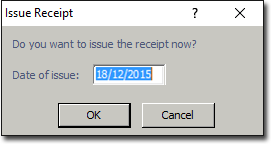
7. Click to confirm. You are returned to the patient's record, where the new invoice is now visible on the Invoices tab for the account.

8. Before you can submit this invoice for processing, you must first record the episode in Day Surgery. Select the invoice and click  The invoice window opens.

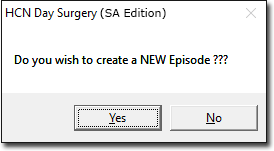
9. Click  The Day Surgery Module opens. You will be prompted to create a new 'episode’.
10. Click  The Day Surgery module appears. Episode details can be recorded by entering information in all the tabs. You will be prompted for any required data before you can close the module.
 Once the episode is completed, the Day Surgery module can be closed. You are returned to the patient’s record.

11. Click  to continue the claim creation. You will be prompted that a Day Surgery episode must be completed prior to IHC submission.
o Click  to acknowledge that a Day Surgery episode has been completed.
o Click  to stop now, and proceed to Day Surgery to complete an episode.

12. The New In Hospital Claiming (IHC) form appears. All relevant data from the Day Surgery episode and Bluechip comes pre-populated on this form.

The New In Hospital Claiming (IHC) form includes seven tabs of fields. All fields marked in bold are mandatory, and must be completed in order to submit the In Hospital Claim. It is recommended you check all data for accuracy.
o Claim/Patient tab: Displays both patient details and the claim summary. Most of the patient data here is pre-populated from patient details in Bluechip. The patient's Medical Record ID is pre-populated from Day Surgery. In the Claim Summary section, the Total Hospital Charge amount and Total charge amount must reflect the total invoice amount.
o Episode tab: Consists predominantly of data extracted from Day Surgery.
o Accommodation/ SVB tab: Displays the accommodation details of the episode. If the accommodation is charged as per diem, bundled, or DRG case payment, the accommodation fee on the invoice is displayed in the Charge Amount of this tab. The Day Band of the episode is also populated from Day Surgery.
o Services tab: Split into Principal Services, Multiple Services, and Miscellaneous sections. Service items of service type ‘MBS’ are displayed in the Service Code field. The Prosthesis Code is displayed here with a prefix (e.g. PX00AL005).
o DRG Morbidity: Displays the DRG code, principal diagnosis, and additional diagnosis.
o Certificates/Transfers: Displays certificate and transfer information.
o Remarks: Provides for the recording of general/additional notes regarding the claim to be sent to Medicare.
13. Click;
o  to save the claim information for sending later
o  to send the claim information. If there are any incomplete, mandatory fields, you will be prompted to complete the form as necessary
o  to reload episode information if the information is changed for any reason.