
1. Ensure you have configured Clinical for using eOrders.
2. Ensure you are viewing the patient's record.
3. Then either;
o Click
o Press Shift + F4
o Select Correspondence > Pathology Request
The Pathology eOrders Request window appears.
If the standard pathology request window appears instead, it will be because you have not met the prerequisites for eOrders.
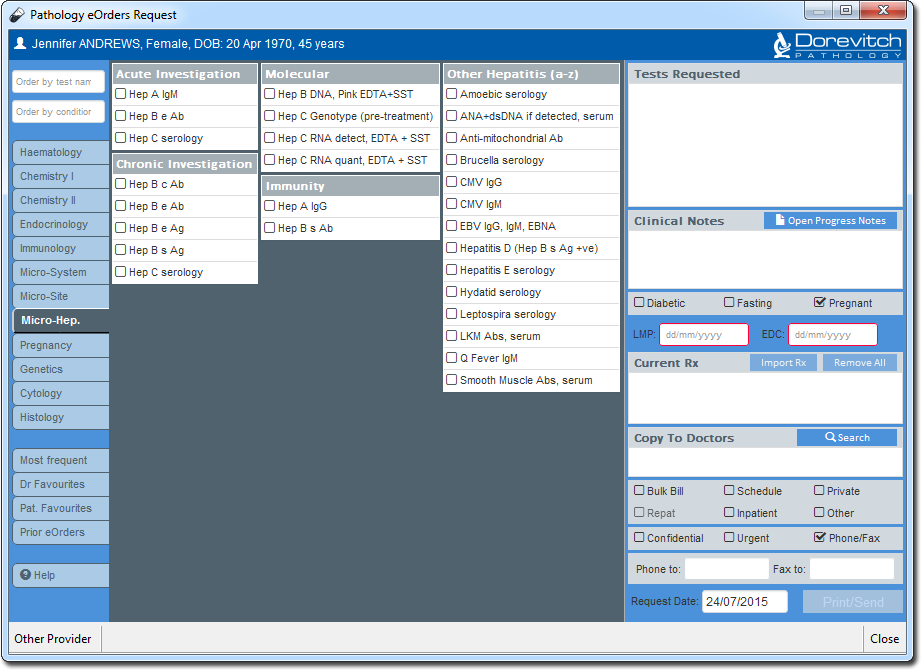
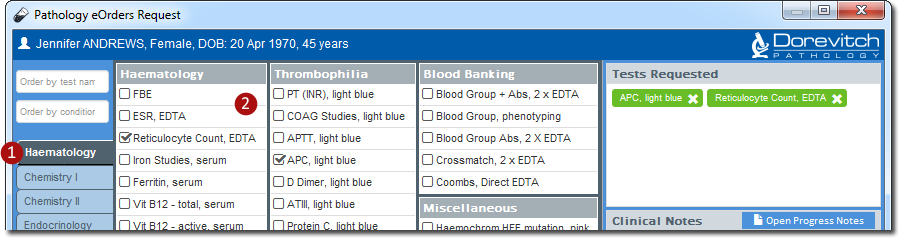
4. Use one of the following methods for requesting tests:
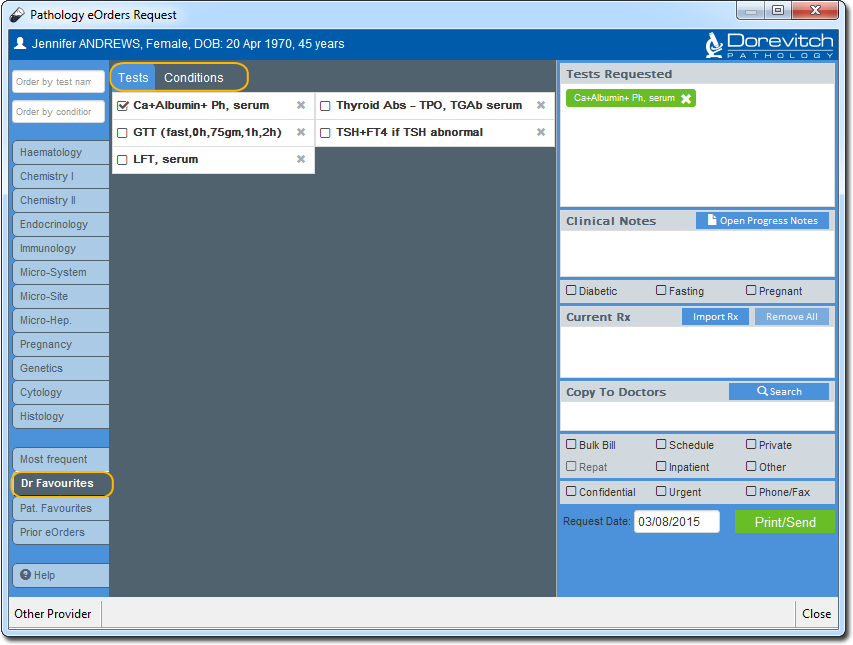
Method 1
1. Enter a test name or condition into the fields provided (Order by Test Name, and Order by Condition). As you type, a list of corresponding tests is generated.
2. Place a tick against each test/condition you wish to request.
3. A list
of requested tests/conditions is generated at the right-hand side of this
window. You can edit this list as desired.

Method 2
1. Select one or more tests from the specialty groups located at the left-hide side of the window.
2. Place a tick against each test you wish to order.
3. A list of requested tests is generated at the right-hand side of this window. You can edit this list as desired.
(continuing from Step 4 above)
5. Perform any of the following optional steps:
Option 1: Include the day's Progress Notes
1. To
add information from the patient's Progress
Notes for the current consultation, locate the Clinical
Notes section, and click 
![]()
2. The
Progress Notes window appears,
displaying any notes you have recorded for this patient, for the current
consultation.
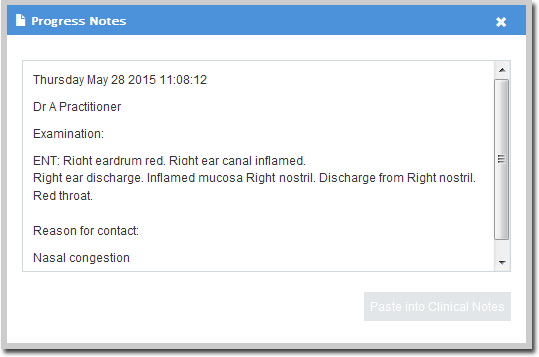
3. Highlight
any notes you wish to add to the eOrder.
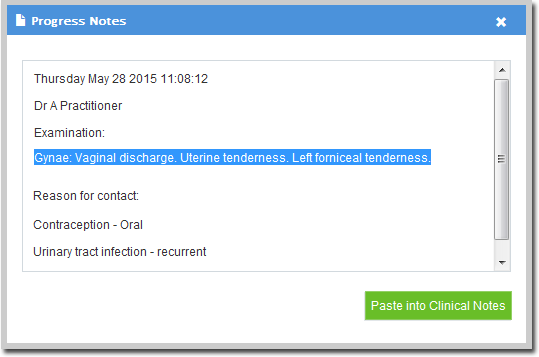
4. Click
 . The selected notes will be
copied to the Clinical Notes section
on the eOrders window.
. The selected notes will be
copied to the Clinical Notes section
on the eOrders window.

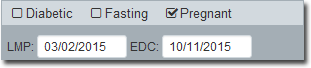
Option 2: Indicate if the patient is Diabetic, Fasting, or Pregnant.
Locate these details at the right-hand side
of the eOrders window, placing a tick against any that are relevant.

If you choose the 'Pregnant' option, you must
also record the LMP and EDC dates. Note that if the patient already has
a current pregnancy recorded,
these details will be displayed by default.
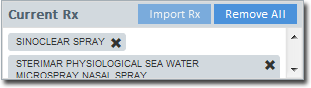
Option 3: Include one or more of the patient's current medications.
Note that medications you elect to display here will be sent electronically to the laboratory, but will not be printed on the patient's request order form that you hand to them.
1. Locate
the Current Rx section at the
right-hand side of the eOrders window.
![]()
2. Click
 . If this button
is unavailable, it is because the patient does not have any current
medications. The Current Rx section becomes populated with
all of the current medications for this patient. You can remove any you
don't wish to display.
. If this button
is unavailable, it is because the patient does not have any current
medications. The Current Rx section becomes populated with
all of the current medications for this patient. You can remove any you
don't wish to display.
Option 4:
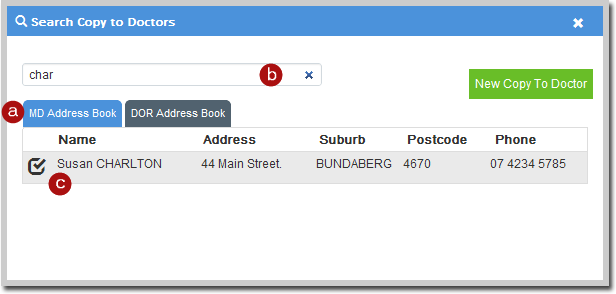
1. Locate
the Copy To Doctor section at
the right-hand side of the eOrders window.
![]()
2. Click
 . The Search Copy
to Doctors window appears.
. The Search Copy
to Doctors window appears.
o Select an Address Book.
o Enter the name of the recipient. As you type, a list of related names is generated.
o Place
a tick against any name in the list to select this person as a recipient.
3. (Optional)
Click  to add details of a recipient who is not
already in your address book(s). Note
that any recipients you add here will not be added to the Address Book itself.
to add details of a recipient who is not
already in your address book(s). Note
that any recipients you add here will not be added to the Address Book itself.
4. The
Copy To Doctors section is now
populated with recipients. You can edit this if desired.

5. Once
you have finished adding doctors, click  to close
the Search Copy to Doctors window.
to close
the Search Copy to Doctors window.
(continuing from Step 5 above)
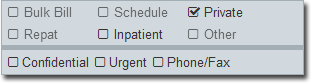
6. Indicate any of the following options:
7. Indicate the date of the request. The default is the current date.

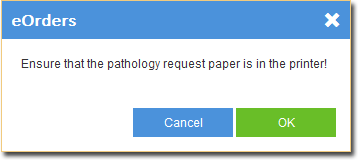
8. Click  You will be reminded to place pathology request paper in the printer. Remember, although eOrders are sent electronically, you still need to print a copy for you patient.
9. You will be presented with an order number.

10. Click Close at the lower-right of the Pathology eOrders Request window. This concludes the process for placing an eOrder. You can monitor the status of this order.