Overview
The Address Books in Helix provide a number of services:
o Act as shared repositories for addresses added to Helix. Addresses are accessible to all users at your practice.
o Allow an administrator to approve new addresses added to Helix.
o Allow an administrator to deactivate addresses. An inactive address is not available to use in correspondence.
There are two different Address Books in Helix:
o Clinical Management Address Book:
• This book contains recipients added by HCPs. For example, a HCP may wish to compose a new letter, but discovers that the recipient is not in the Helix database. Helix allows them to add the new recipient on-the-fly.
• Addresses added in this way are immediately available to all other HCPs at your practice.
• Later,
an administrator user can manage these addresses, approving them
for continued use, or making them inactive (as explained below).
![]()
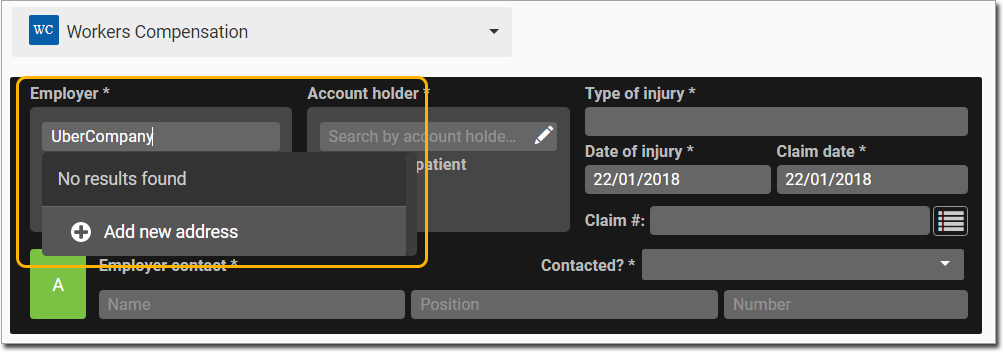
o Practice Management Address Book:
• This book contains recipients added by practice staff, typically when a patient's visit is being recorded. For example, a patient may wish to bill for Workers' Compensation, but their employer does not exist in the Helix database, and must be added.
• Addresses
added in this way are immediately available to all other HCPs
at your practice.
Accessing the Address Books
There are two ways to access the Address Books in Helix:
Via the main menu shortcut:
1. From
the main menu, click on the ![]() icon.
icon.
2. The icon should be available by default
to both the Practice Manager and Receptionist roles.

Via Settings
1. Locate
and click ![]() at the lower-left.
at the lower-left.
2. Select the Settings option.

The Settings window appears.
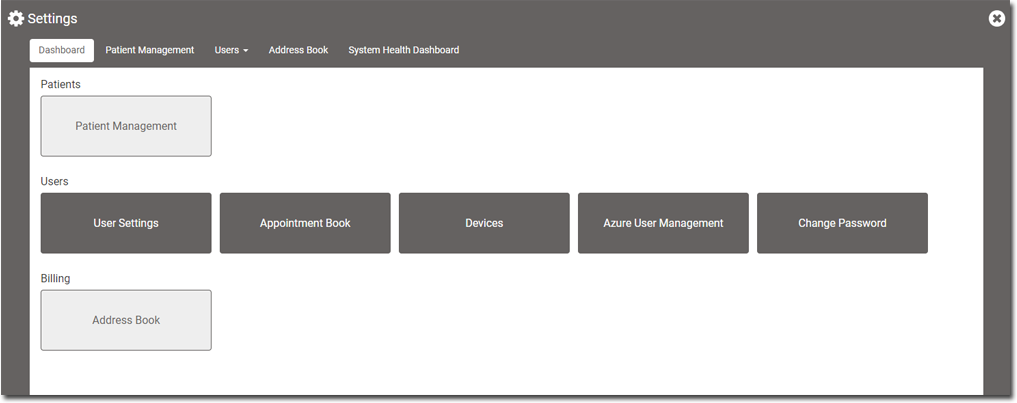
NOTE: Depending on your role, you may see both Fees Schedules and
Address Book under Address Book.
3. Within the Billing
section, click  The Address
Book window appears.
The Address
Book window appears.
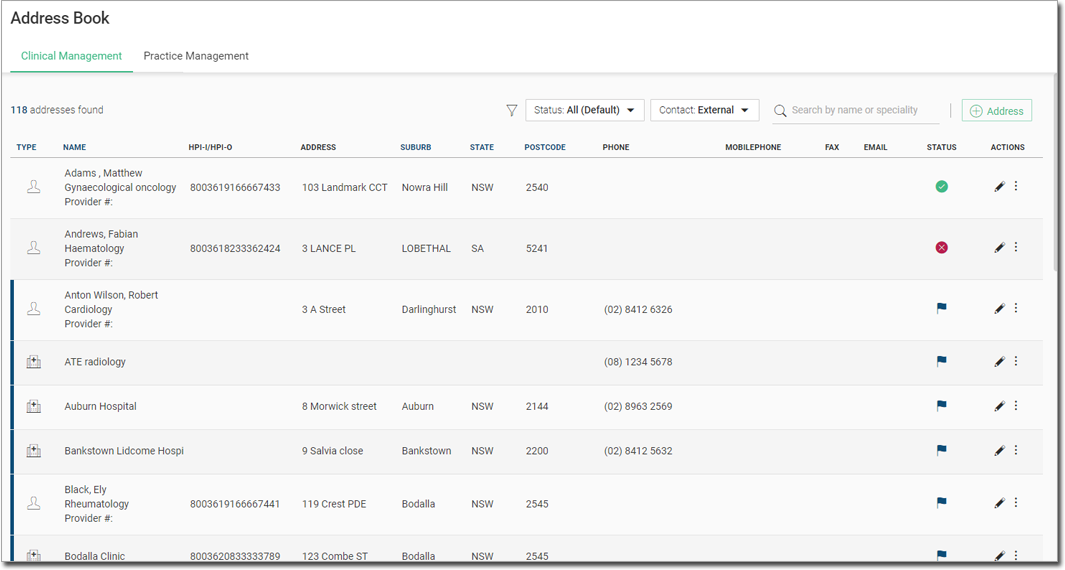
Toggle between the Clinical Management and Practice Management
books via the links available on the top of the window.

Alternatively, click on Billing from the Setting menu, and click
on the Address
book option.
Address book under the Admin Logon:
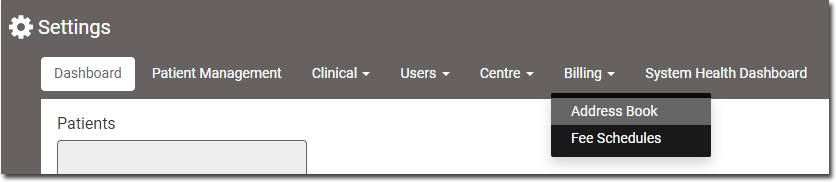
Address book under the Practice
Manager's Logon:

Address Book Legend
 Approved
 Inactive
 Awaiting Approval
 Organisation
 Internal Contact
 External Contact
Adding New Addresses
You can add the contacts using the Address book available in the settings menu under the Helix logon. Alternatively the contacts can be added through the billing section under the Practice Manager's Logon or from the Letter Writer under the HCP logon.
Clinical Management Address Book
1. On
the top-right of the screen click  button.
o Click
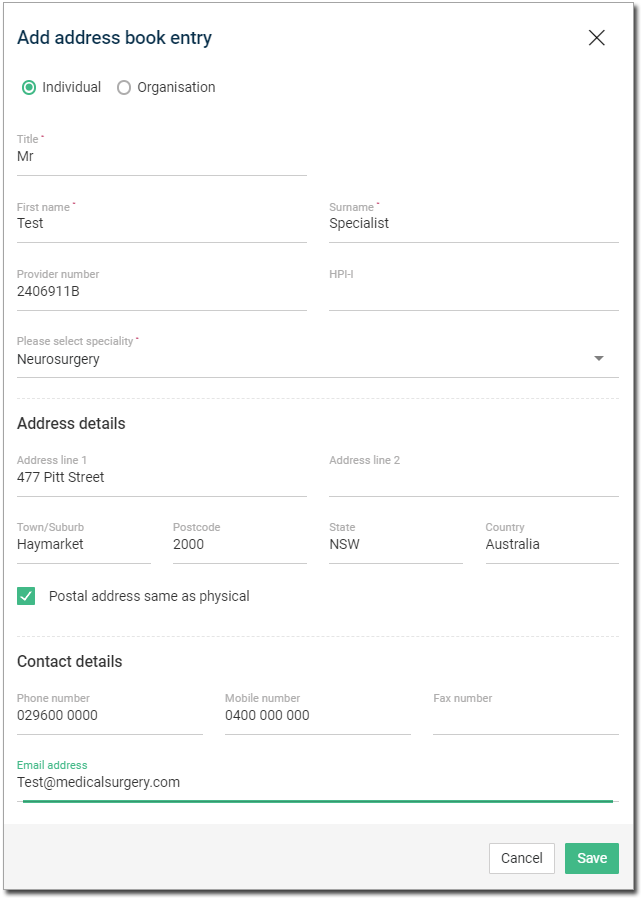
on “Individual” when adding an individual’s contact details e.g.
Specialist details.
o Click
on “Organisation” when adding an organisation’s contact details
e.g. a new Laboratory or Hospital.
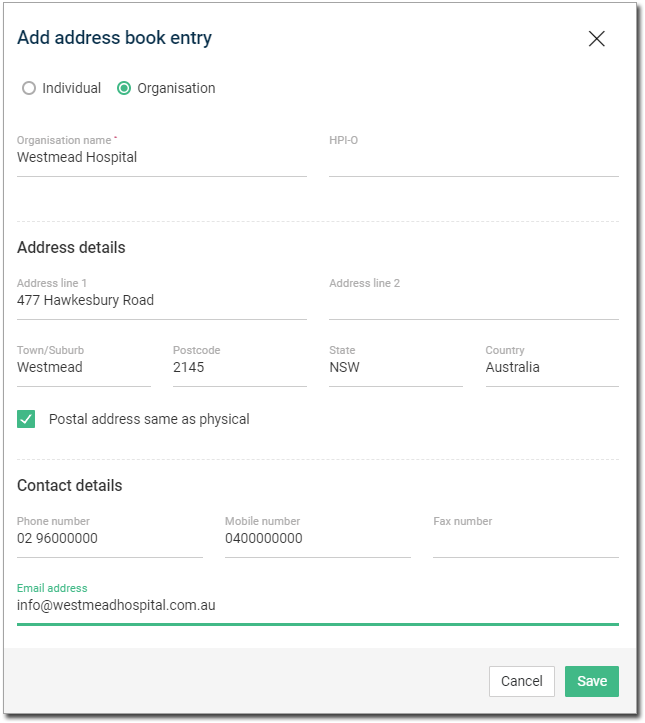
2. Ensure that all mandatory fields are filled-in.
3. Click
 to save contact details or
  to discard changes.
Practice Management Address Book
1. At
the top-right of the screen click the button.
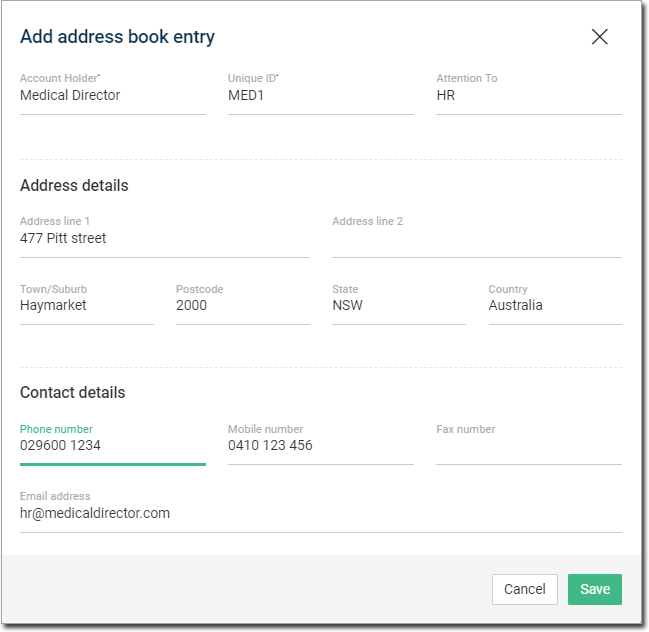
2. Ensure that all mandatory fields are filled-in.
3. Click
to save contact details or to discard changes.
Editing Addresses
Within the Address Book, simply click the pencil icon or click on the address to edit it. The process is the same for both Clinical and Practice Management Address Book.
1. From the list, select the contact you want to update, and under “Actions” click on the “Edit” icon.
o Alternatively,
single-click on the selected contact. The edit window will also
appear.
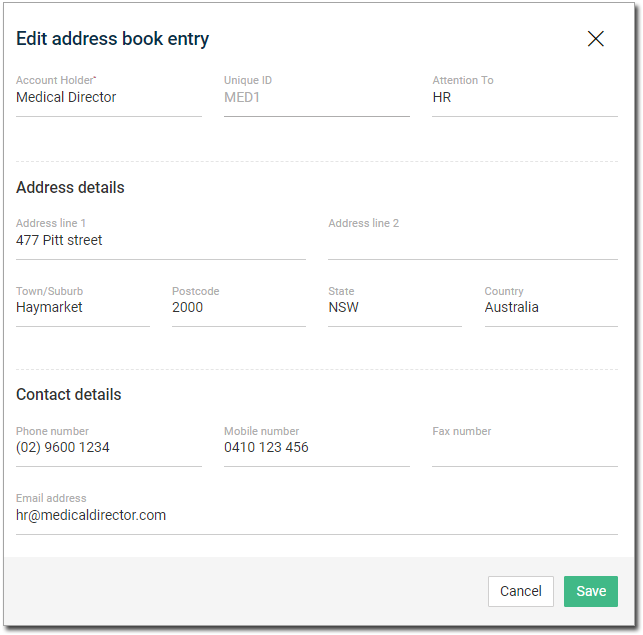
2. Update the address book accordingly.
3. Click
on to save the changes
to the contact in the address book.
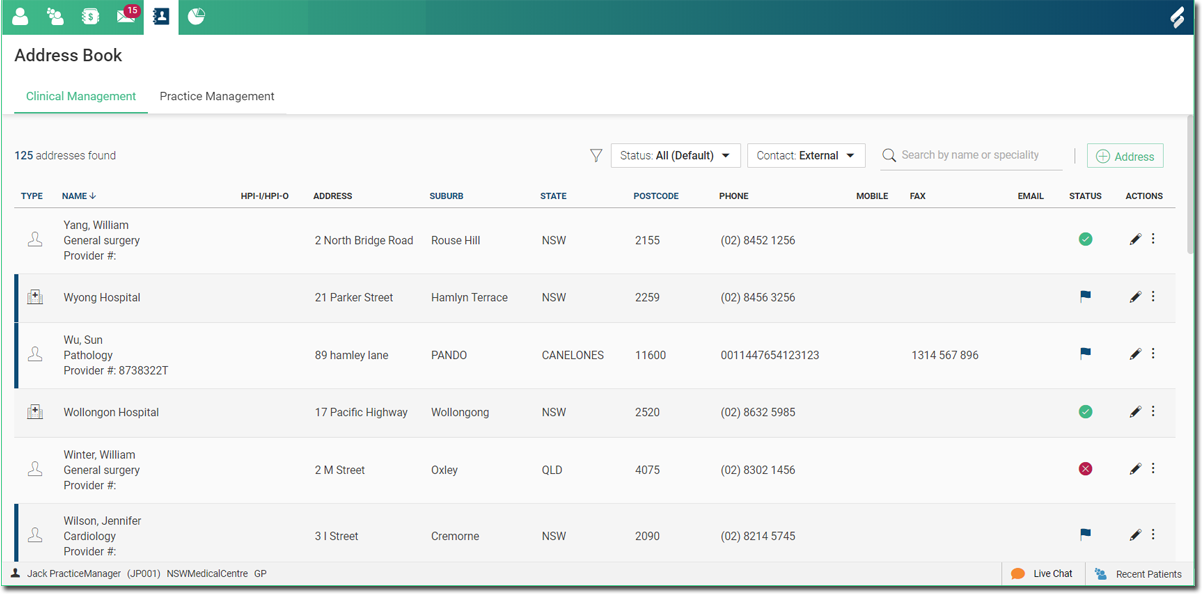
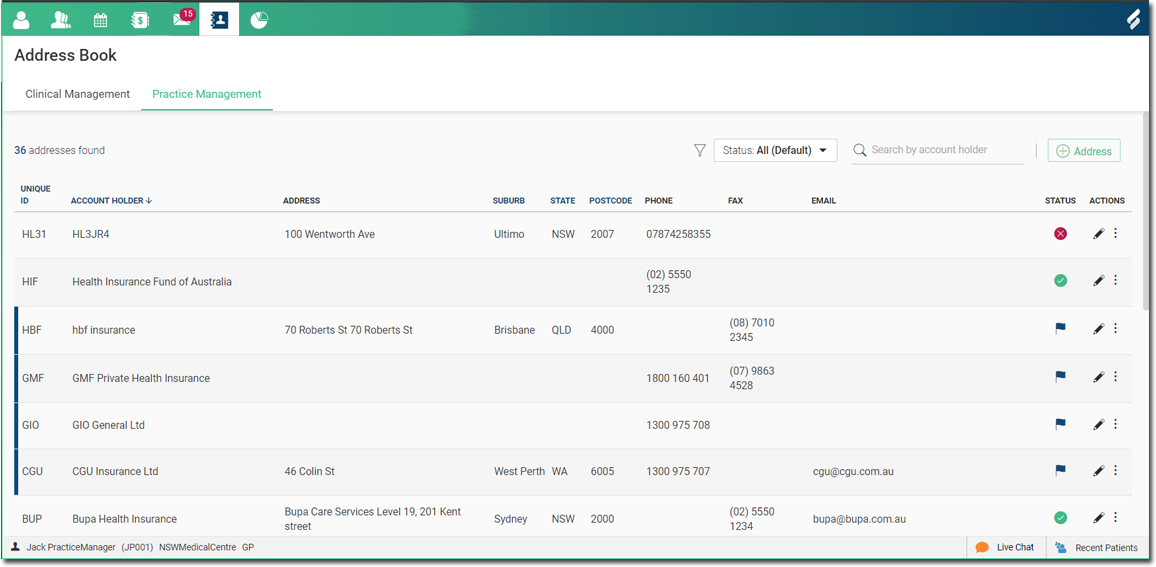
Viewing Contacts
Access the Address Book by clicking on Settings at the lower-left side of your log-in details. Choose the address book by clicking on it on the needed section. By default the All option is chosen and displays the addresses that are still waiting approval.
The Addresses can be filtered either using the Status or the Contact type:
Status Filter
o All (Default) – The default view shows all addresses regardless of status. All addresses waiting for approval are shown first.
o Approved Only – Shows only approved addresses.
o Inactive Only – Shows only inactive addresses.
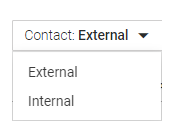
Contact Filter (For Clinical Address Book only)
o External - The default option. This shows external contacts only.
o Internal - This shows internal (Helix users) contacts only.

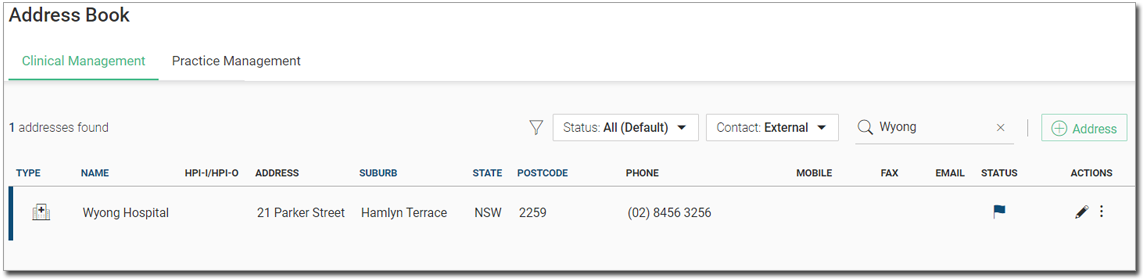
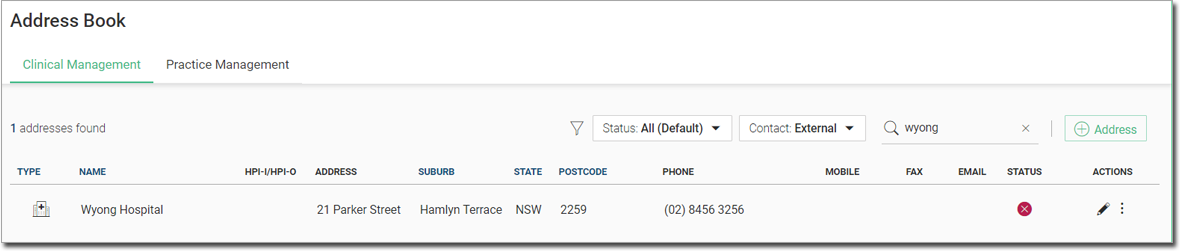
Searching and Sorting Contacts
Clinical Management Address Book
o You
can search for the contact name or speciality in the Address Book.
In the example below, we have searched the address book for "John".
This displays all the address with the name "John" in
it.

o Sorting
contacts can be done by clicking on any clickable table header.
In the Clinical Address Book, the following headers are available:
Type, Name, Suburb, State and Post Code.
Practice Management Address book
o You
can search for the account holder in the Address Book. In the
example below, we have searched the address book for account "Bakers".
This displays all the address with the account name "Bakers"
in it.

o Sorting
contacts can be done by clicking on any clickable table header.
In Practice Management, the following are available: Unique ID,
Name, Suburb, State and Postcode.
Approving/Deactivating Addresses
Although any user can add new addresses to the Address Book, it may be that your practice does not want to use particular addresses in preference to others. As such, Helix provides a mechanism for approving/denying addresses added to the Address Book.
Overtime, your Address Book may start to have duplicate or contain invalid contact details. To help you manage your Address Book, Helix allows you to approve/deactivate contact information.
NOTE: By default, all saved contacts are in status waiting for approval.
To approve an address,
click the ellipses button  under the actions
section.
under the actions
section.
Now choose the option  from the drop down.
The address is flagged as approved in the status section.
from the drop down.
The address is flagged as approved in the status section.

To decline an address,
click the ellipses button under the actions
section.
Now choose the option  from the drop down.
The address is removed from approved status. It is still available in the Address Book, and can be searched for by name.
The address cannot be used for correspondence i.e. it will no longer be available for users to access.
The address is flagged as inactive.
Status
o A
Blue flag
indicates that the contact is awaiting approval.
o A
Green
tick indicates that the address has been approved.
o A
Red cross
indicates that the address has been deactivated.