With a patient selected in the Waiting Room, press F5. The Record Visit window appears.
1. Ensure that you have a selection in the Seen by Dr. drop-down list. If you selected a Practitioner for the patient via the Waiting Room, this field will already be populated.
2. Ensure that you have a selection in the Location drop-down list. If you selected a Practitioner for the patient via the Waiting Room, this field will already be populated.
3. (Optional) Modify the Consult Time and Consult Date using the associated controls, if necessary.
4. Via the Invoice To drop-down list, select 'Patient'.
5. Enter Service Items as necessary. If you are unsure of the fee number for a given item, you can search the standard item list by pressing Ctrl+S.
o To add additional items, click 
o To delete a service item, select the item and then click 
6. (Optional) You may modify the fees for individual items by clicking in the Fee column and typing a new amount.
7. (Optional) Enter a Gap figure for given Service Items as necessary. This will change the Fee amount. You may also change the Fee amount which will in turn affect the Gap amount.
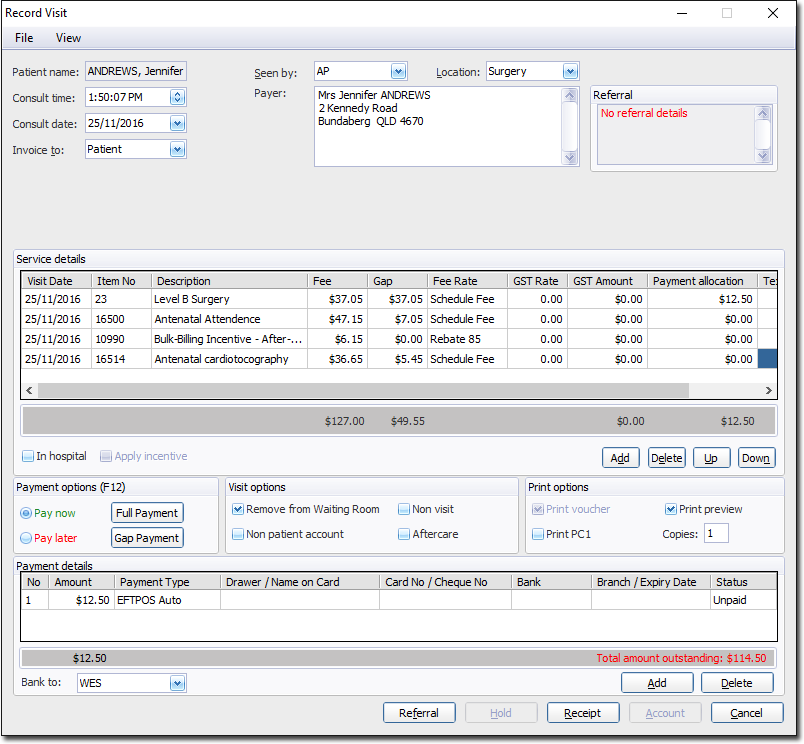
8. For each Service Item ensure you select an associated Fee Rate. To do this, click in the Fee Rate field for the service item. A drop-down list of Fee Rates will appear, from which you can make the appropriate selection. The image above indicates that a fee rate of Schedule Fee has been selected for service item 23.
9. In the Payment Options section of the window select the Pay Now option.
10. In the Payment Options section of the window click  Note that for Medicare Easyclaim, gap payments referred to here can be a part payment for a service and not necessarily the gap amount between the Medicare benefit and the amount charges by the provider.
11. Select a Payment Type from the associated drop-down list. See Payments and Payment Types for more information.
12. Click Receipt to process the payment.

Note that the Cheque refund method option is selected. This is the only option available for 'Gap' payments. The Medicare payment will be returned to the claimant as a cheque addressed to the health service provider.
13. Enter the residential address details for the claimant if necessary. Alternatively you can tick the Use Medicare Address check box to use the claimant's residential address details as recorded with Medicare.
14. Click ![]() The claim is processed. Note that if the claim includes items not supported by Medicare Easyclaim, the claim will be sent via Medicare Online. The
The claim is processed. Note that if the claim includes items not supported by Medicare Easyclaim, the claim will be sent via Medicare Online. The  button will save the claim to be sent later. Store-and-Forward claims are sent via Medicare Online.