Backup
Before You Begin
o During the backup process, you will be asked to specify a location to save the backup to. You can either choose to accept the default location, or specify one of your own. If you choose the latter option, it is advisable that you create that location (directory) now, if you haven't already done so.
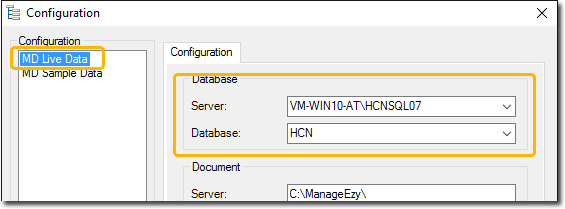
o Do you run multiple MedicalDirector databases? If so, you will need to know the name of the Server / Database combination you wish to backup. This can be determined via the System Configurations Manager. Ensure you get settings for your Live configuration. Make a note of these settings.
o If you wish to backup your Clinical/Pracsoft database, you can proceed directly to the instructions now.
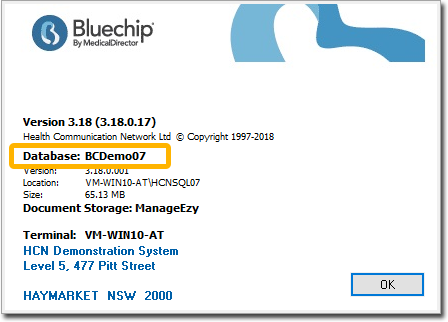
o If you wish to backup your Bluechip database, you will first need to determine its name. To do this, within Bluechip select Help > About. Make a note of the database name, as you will need it later. Proceed to the instructions now.
Procedure
1. Open SQL Server Management Studio:
From the Task Bar (if available)
![]()
From the Start Button (Windows 8 and above)
-
Click Start

-
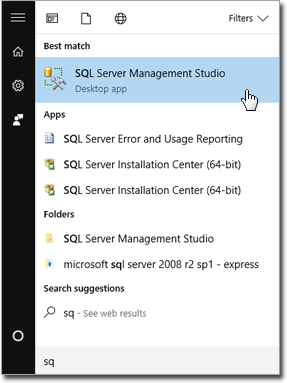
Type "SQL Manage". Locate and click SQL Server Management Studio.
2. SQL Server Management Studio opens, and you are prompted to log in. Select the HCNSQL07 option, and click 

3. SQL Server Management Studio opens. Expand the Databases list.
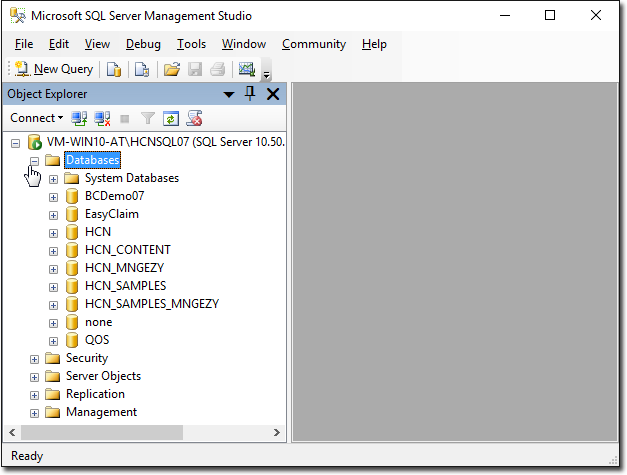
4. Locate the database you wish to backup.
o For Clinical/Pracsoft, this will be the HCN database.
o For Bluechip, you will need to know the name of your database.
5. Right-click the database, and then select Tasks > Back Up.
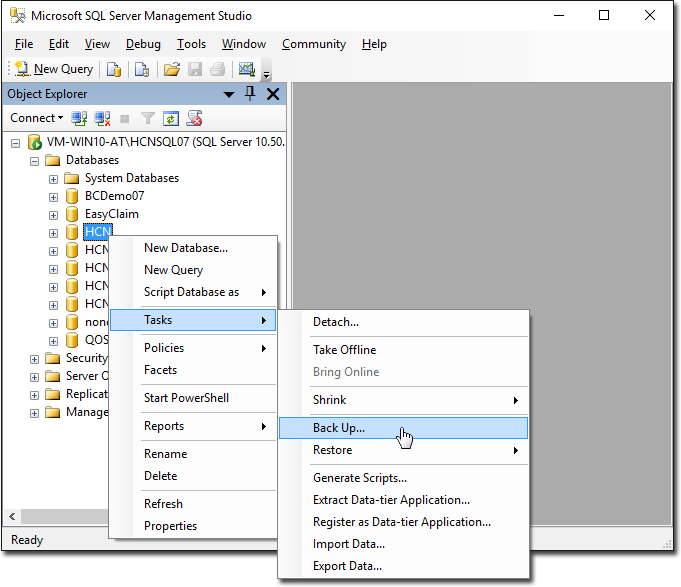
The Back Up Database window appears.
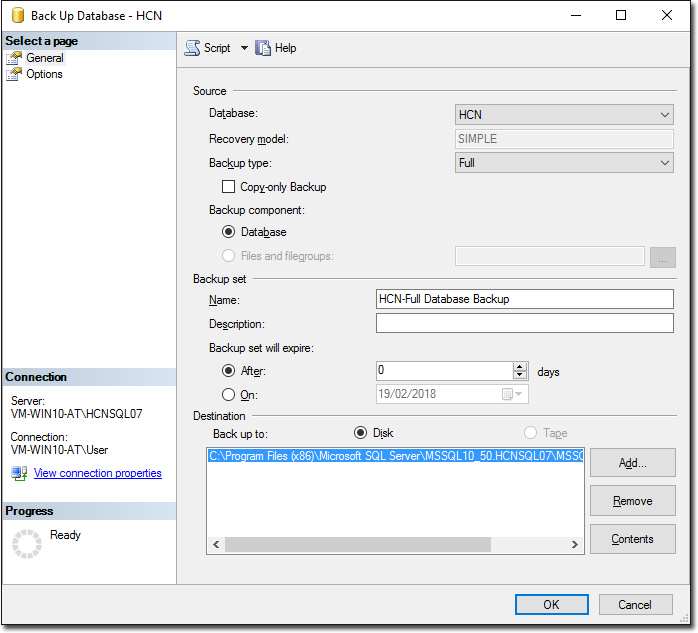
6. Locate the Destination section, and the Back up to path. Note that a default backup path and backup name is selected for you. You can choose to either:
o Accept the default path/name combination. If you select this option, jump now to Step 13.
o Specify a custom path/name combination. If you select this option, continue now to Step 7.
7. To specify a custom path/name combination, you must first remove the default provided. Click  to remove it from the list.
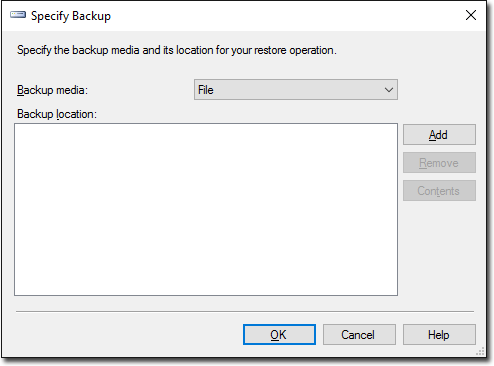
8. To specify a custom path/name combination, click  The Select Backup Location window appears.
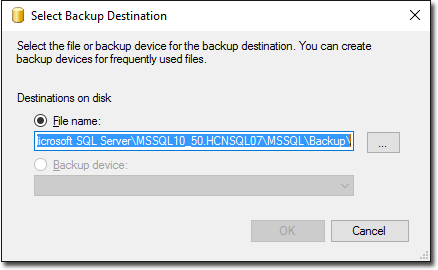
9. Click  You will be prompted to select the location to which the backup will be saved.
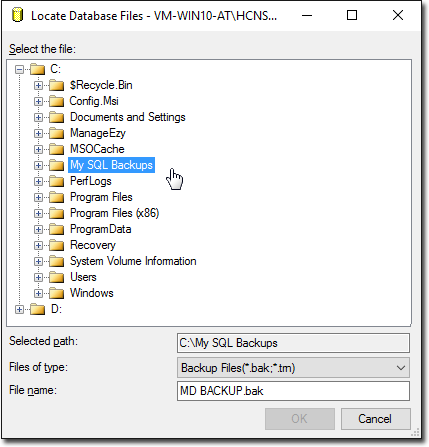
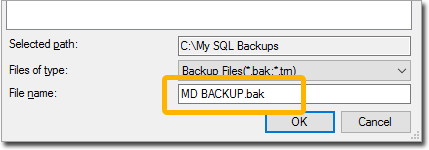
10. Name the backup file.
o Ensure you use the .bak file extension - you must enter this as part of the name.
11. Click  You will be returned to the Select Backup Location window.
12. Click You will be returned to the Back Up Database window.
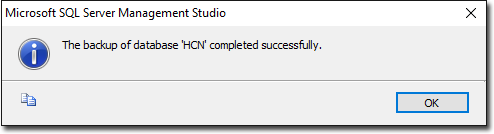
13. Click to start the backup. When completed, a confirmation will appear.
14. Click and close SQL Server Management Studio.
o It is recommended that you then copy this backup file to an external hard drive.
Restore
Before You Begin
o Before performing the restore operation, stop the following Services (if listed) via Windows Control Panel > Administrative Tools > Services. To stop a service, locate and right-click it, and select Stop.
• HCN Automatic Update Service
• HCN Blue Chip Fee Activation Services
• HCN Integration Services
• HCN Service Manager
• HCN SMS Scheduler Service
• MD Communication Services
• MD DC AutoUpdater
• MD DC Service
• MD Integration Message Broker
• MD Integration Message Broker Host
• MD SMS Scheduling Agent
• MDInsights Data Collection
• MDInsights Quartz Manager
• MDXi
• SMS Scheduled Agent
o Third-party software may have services listed which connect to the HCNSQL07 Instance (i.e. Clinical / Pracsoft), and these services should be stopped also.
o If you are restoring the database to an existing server, where the MedicalDirector applications are already installed, you can proceed directly to the instructions now.
o If you are restoring the database to a new server, where the MedicalDirector applications have not been installed yet, you must install the applications before restoring your database.
o If your backup file resides on an external device, it is highly recommended you copy the backup file to the local computer before running the restore operation i.e. do not restore directly from the device itself.
Procedure
1. Open SQL Server Management Studio:
From the Task Bar (if available)
![]()
From the Start Button (Windows 8 and above)
-
Click Start
-
Type "SQL Manage". Locate and click SQL Server Management Studio.
2. SQL Server Management Studio opens, and you are prompted to log in. Select the HCNSQL07 option, and click
3. Locate and right-click Databases, and select Restore Database.
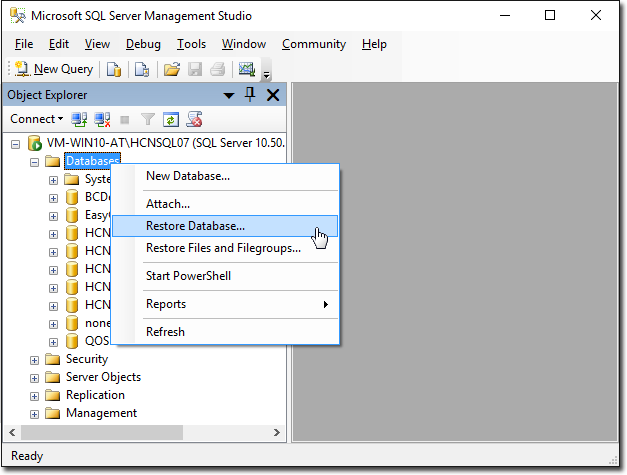
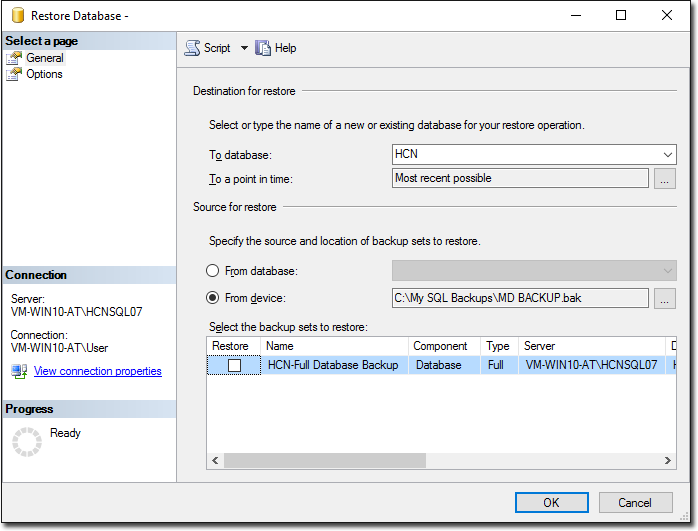
The Restore Database window appears.
![]()
4. Within the To Database field, select or type the name of a new or existing database for the restore operation.
o You may wish to rename the database if, for example, you have relocated the database to a different Practice, and now want to call the database something that relates to the new Practice.
• For Clinical/Pracsoft databases, it is recommended you select the database name from the list provided. You do also have the option to simply type a new name for the database.
• For Bluechip databases, you must specify the database's name by typing it in.
5. Within the Source for Restore section, indicate the location of the database you wish to restore:
o You would select From Database if advised by MedicalDirector Customer Service when, for example, you had required assistance to isolate and resolve an issue with your database.
o You would select From Device under normal circumstances. A 'device' can include any external device, but can also refer to a hard drive on your computer or network. If your backup file resides on an external device, it is highly recommended you copy the backup file to the local computer before running the restore operation i.e. do not restore directly from the device itself.
In our example, we have chosen to restore the HCN database from a device.
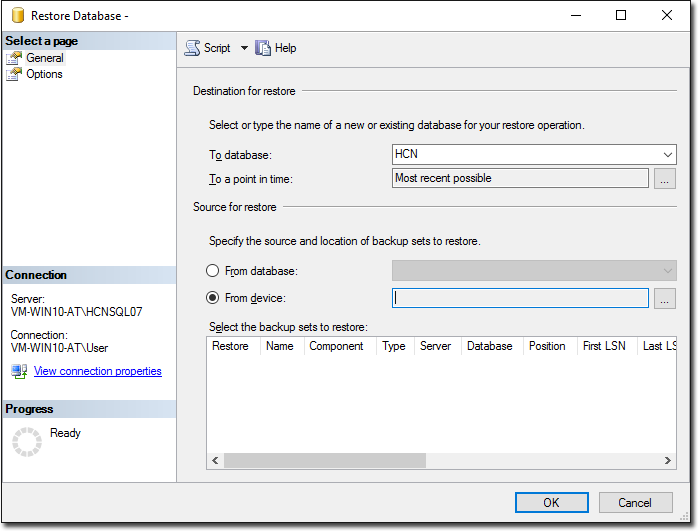
6. In the image above, locate and click  to the right of the From Device field. The Specify Backup window appears.
7. Click  The Locate Backup File window appears. Locate and select the backup file you wish to restore.

8. Click You will be returned to the Specify Backup window, with your selected backup file listed.
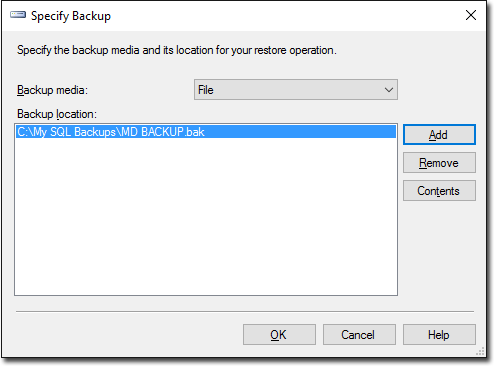
9. Click You are returned to the Restore Database window, where your selected backup file is now listed.
10. Ensure you place a tick in the Restore check box for the database file you wish to restore.
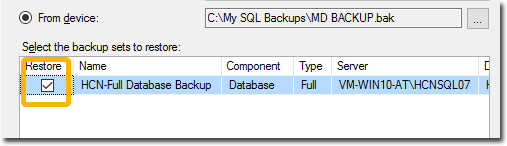
11. Click to commence the restore operation. When completed, a confirmation will appear.
12. With the backup now restored, ensure you restart any services you stopped earlier.