Overview
Recall Management settings is where you can:
o Create and manage SMS templates for your centres.
o Create and manage customised Recall reasons that are shared amongst all your centres.
o Send different recall SMS messages for different recall reasons by mapping recall reasons to SMS templates.
Accessing Recall Management Settings
1. Log into Helix as an Admin or Practice Manager user.
2. Locate
and click ![]() at the lower left.
at the lower left.
3. Select
the Settings option.

4. Select
the Recall Management
option.

Enabling SMS for your Centre
1. Access Recall Management Settings.
2. Select the SMS templates option in settings.
3. Select
the centre you wish to enable SMS for.

4. Use
the toggle to enable SMS for recalls for the selected centre.

Managing Recall SMS Templates for your Centre
1. Access Recall Management Settings.
2. Select the SMS templates option.
3. Select
the centre you wish to manage SMS recalls for.
4. Ensure
the Enable SMS for Recalls
toggle  for the
centre is enabled. If this toggle is disabled, you will be unable
to edit existing templates for the selected centre, nor create
new ones.
for the
centre is enabled. If this toggle is disabled, you will be unable
to edit existing templates for the selected centre, nor create
new ones.
5. The
Centre SMS Templates section
displays the templates available to the selected centre. The template
flagged with a tick is the default.

6. Select
the Centre SMS template you wish to manage to display its settings.
The example below shows a customised Annual Health Check template
we have selected.

Creating/Editing SMS Templates
1. Access Recall Management Settings.
2. Select the SMS templates option.
3. Select the Centre for which you wish to manage templates. Note that templates are saved per centre - they are not shared between centres.
4. Ensure that you have enabled SMS for recalls for the selected centre.
5. To
edit an existing template, select it from the Centre
SMS Templates panel on the left-hand side. Alternatively,
if you wish to create a new SMS template, click 
6. Using the example below for guidance, ensure you have completed the following in the template:
o Named the template.
o Completed
both the Original recall SMS
section and Follow up Recall
SMS section. These sections can be free-typed into, plus
you can click  to insert a variety of field
codes which will auto-populate with data upon sending the SMS.
to insert a variety of field
codes which will auto-populate with data upon sending the SMS.
7. Click
 to save any modifications.
8. (Optional) You may also wish to make this template the default for the selected centre, See Setting the Default SMS Template.
Deleting SMS Templates
Note that you cannot delete your centre's default SMS template. If you wish to delete the default template for your centre, you must first flag another template as the default.
Note also that if you have any recall reasons mapped to the template you delete, those recall reasons will be mapped to your default SMS template instead.
1. Access Recall Management Settings.
2. Select the SMS templates option.
3. Select the Centre for which you wish to manage templates. Note that templates are saved per centre - they are not shared between centres.
4. Ensure that you have enabled SMS for recalls for the selected centre.
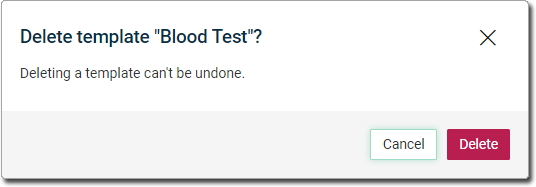
5. Locate
the template you wish to delete from the list of Centre
SMS templates, and click its corresponding  button. You will be
prompted to confirm this action.
button. You will be
prompted to confirm this action.
Setting the Default SMS Template
For each centre you manage, you can set one of your SMS templates as the default for the centre.
1. Access Recall Management Settings.
2. Select the SMS templates option.
3. Select the Centre for which you wish to manage templates.
4. Ensure that you have enabled SMS for recalls for the selected centre.
5. From
the Centre SMS Templates
section, select the template you wish to make the default for
this centre. In our example, we have selected 'Blood Test'.
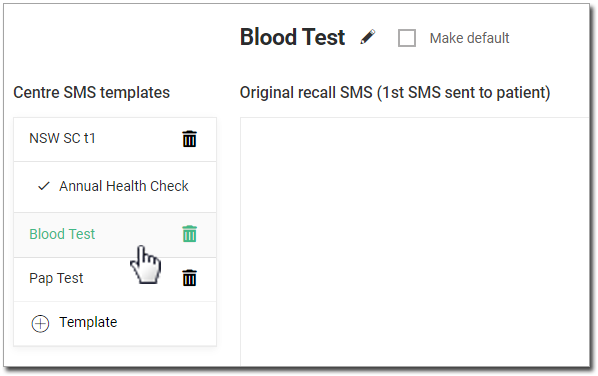
6. Tick
the Make Default check
box. 
7. Click
to confirm.
Creating/Editing Recall Reasons
Helix comes provided with a variety of recall reasons to choose from, but you can also create your own.
1. Access Recall Management Settings.
2. Select the Recall Reasons menu item, as shown in the following image.
o Before creating a new recall reason, you can check to see if it already exists using the Search recall reasons box.
o You
can delete or edit a customised recall reason using the following
buttons: 

3. To
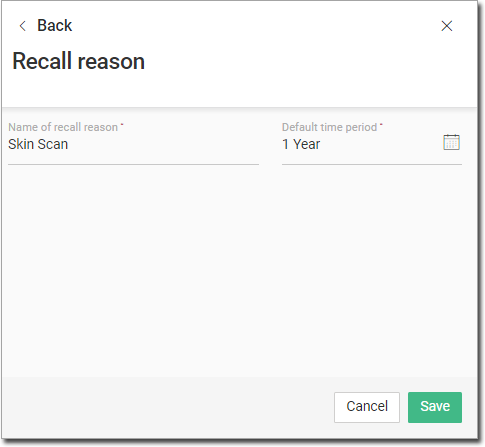
create a new recall reason, click  . The Recall Reason panel appears.
![]()
4. Enter
a descriptive name for the recall reason, and indicate the default
time period for the reason.
5. Click
to confirm.
Deleting Recall Reasons
Helix comes provided with a variety of common recall reasons, and you can create your own. Customised recall reasons can be deleted, whereas the supplied reason cannot. If you delete a recall reason, the recalls you created with it will still be available for action by a clinician or practice manager. However, you will not be able to create any new recalls based on a deleted recall reason, nor can you repeat a recall that was based on a deleted recall reason.
1. Access Recall Management Settings.
2. Select
the Recall Reasons option.
3. Locate
the recall reason you wish to delete, and click . You will be prompted
to confirm this action.

Mapping Recall Reasons to SMS Templates
You can send recall notifications to patients via SMS from Helix. And, rather than sending patients a generic SMS message to remind them of the recall, you can tailor the SMS message to suit the type of recall.
For example, you can create a recall reason called "Annual Blood Test", and an SMS reminder message / follow-up message combo called "Annual Blood Test", and then link the two. Then, when you wish to inform a patient that they're due for a blood test, you simply send them the Annual Blood Test recall reminder, and Helix sends them the associated SMS message.
1. Access Recall Management Settings.
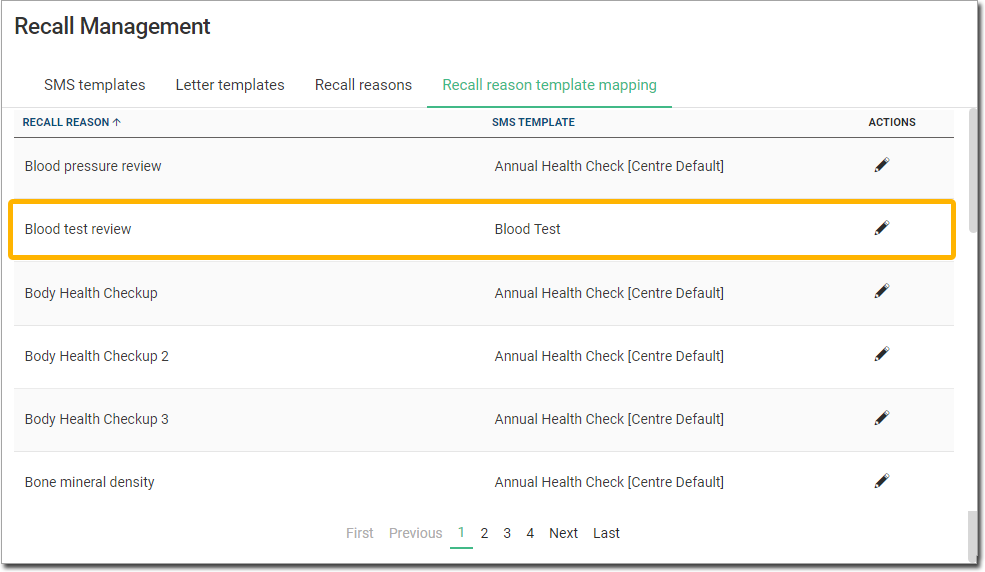
2. Select
the Recall Reason Template Mapping
menu item, as shown in the following image. Note in the
example below, all our Recall Reasons are mapped to our Centre
Default SMS template called "Annual Health Check". Every
recall reason is mapped to your default SMS template unless you
specify otherwise.

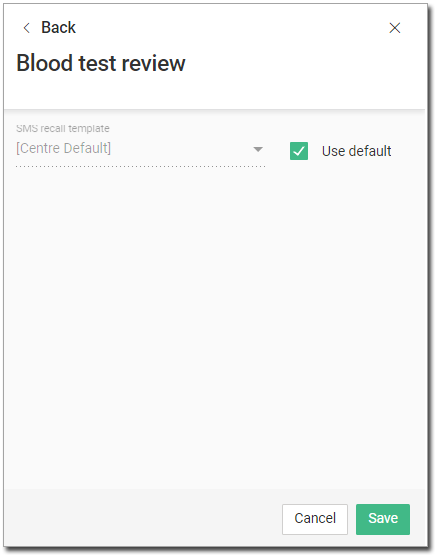
3. Locate
the recall reason you wish to map to an SMS template and click
its corresponding button
to edit it. In the example below, we have selected to edit our
Blood Test Review recall mapping. Notice that our Blood Test Review
recall is currently mapped to our Centre's default SMS message.
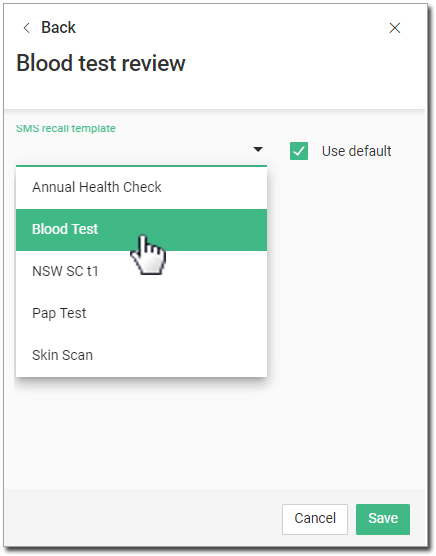
4. Remove
the tick from the Use Default
check box, and then locate and select the SMS Recall Template
you with to use instead. In our example, we have selected our
Blood Test SMS template.
5. Click
to confirm. The list
of mapped recall templates now displays the new link you created.