![]()
A reserved appointment is essentially a period you can keep spare, for any purpose.
To add a Reserved Appointment:
1. Open the Appointment module by either;
o Clicking ![]()
o Waiting Room > Appointment Book.
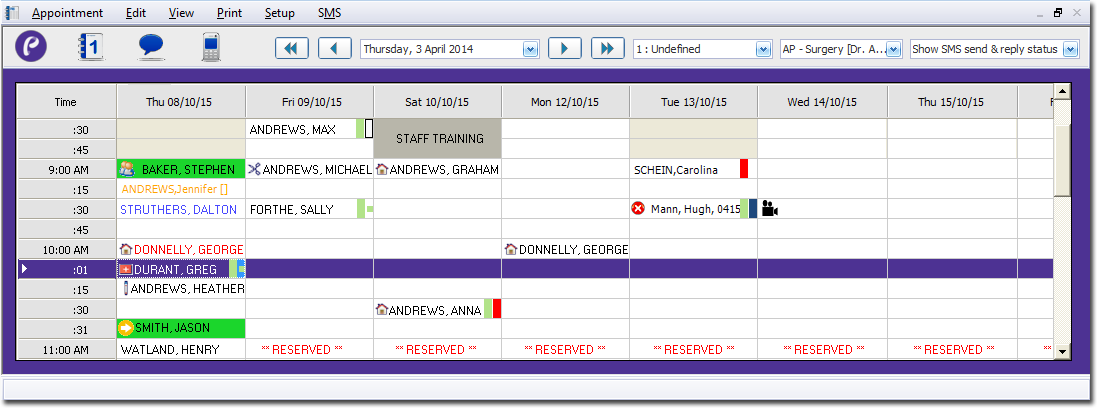
2. If you have multiple Appointment Books in use, select the Appointment Book you wish to use via the associated drop-down list.
3. Select the Practitioner for whom you wish to assign the reserved appointment, using the associated drop-down list. The image above indicates that the appointment schedule for Dr. A Practitioner is currently selected.
4. Then either;
o Select Appointment > Add Reserved Appointment, or
o Right-click a free appointment slot and select Add Reserved Appointment from the menu that appears.
5. The Add Reserved Appointment window appears.

6. Select a start and end date for the period of reserved appointment slots.
7. Indicate how often you wish the reserved appointments to recur. The example above shows that the appointments will recur every week. Other options include minutes, hours, days, months and years.
8. Click  A list of reserved appointments is displayed in the Appointment List section. If possible, reserved appointments are scheduled for the same time slot as the original, or at the next available time slot
9. To delete a specific appointment from the list of reserved appointments, select the appointment from the list and click  Note that you cannot select multiple appointments simultaneously.
10. Click  to confirm your selections and close the window. Once this window has been closed, the reserved appointments are treated as individual appointments; it is no longer possible to deal with them as a group of reserved appointments. Also, each day you open the Appointment Book you will be given the option to clear any reserved appointments for the day.