
Most visits are paid for at the time the visit is recorded. However, there may be times where you need to make a payment or receipt-off an account at a later time, such as when you have held accounts. Note that before you can receipt-off a held account, you must first process the held account.
To Record Payments and Receipt-off Accounts:
1. From the Waiting Room, select Accounts > Receipts/Payments.
The Payment/Receipts for Selected Patients/Institutions window appears.
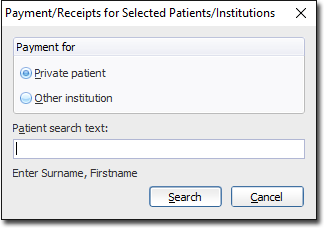
2. Select whether the payment is for a Private Patient, or Institution.
3. Enter the patient's (or institution's) name.
4. Click Search You may be presented with the Select Patient window if there are multiple matches, or the search could not find an exact match. The Receipt window appears.
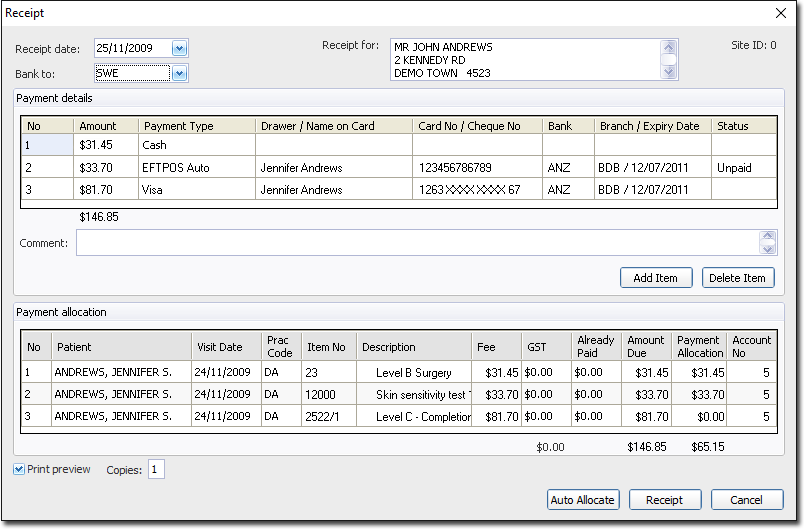
5. Enter a receipt date via the associated calendar tool. The default date is the current day.
6. Select a bank account for the funds via the Bank To drop-down list. The bank account for the patient's practitioner appears by default.
7. The Payment Allocation section of this window indicates the services items for which payment is due. Within the Payment Details section, enter payment information. A patient can make a single payment or a combination of payment types, to cover their due service item fees.
For example, in the image above Jennifer has three service items to pay for, totalling $146.85. Jennifer could have made a single payment to cover the three items. Instead, she chose to pay $31.45 in cash to cover the cost of item 1, $33.70 using EFTPOS Auto for item 2, and $81.70 on her credit card for item 3. Essentially, you can record a single payment type or different payment types to cover the cost of any number of service items.
8. Now that you have entered details of the patient's payment, you must now indicate which service items are being paid for with the payment (note that the patient may not wish to pay for all items at this time). To do this, in the Payment Allocation section, locate the service item you wish to allocate payment to and either;
o Double-click the Payment Allocation field for that item to allocate the full value of that item, or
o Single-click the Payment Allocation field for that item and type a dollar value (without the $ symbol) that you wish to allocate.
For example, the image above indicates that payments have been allocated for items 1 ($31.45 in the Payment Allocation column), and 2 ($33.70), but no payment has yet been allocated to item 3 (the payment allocation value for this item is still $0.00). This is reflected in the totals at the bottom of the window; the total amount due is $146.85, and payment allocations made (so far) total $65.15. Jennifer has made enough payments to cover the cost of item 3, so to allocate payment for this item, you would double-click on the $0.00 value in the Payment Allocation field for it.
9. (Optional) Indicate whether you want to see a Print Preview of the receipt, before printing, and how many copies of the receipt you wish to print.
10. To process the payment(s), click Receipt If you chose to make any payments via EFTPOS you will be prompted accordingly.
11. If you chose to view a print preview of the receipt, you will see this now. Alternatively the receipt will be printed to your designated printer.