Searching for Users
1. Locate
and click ![]() at the lower-left.
at the lower-left.
2. Select
the Settings option.

The Settings window appears.

3. Within
the Users section, click
 The User
Management window appears.
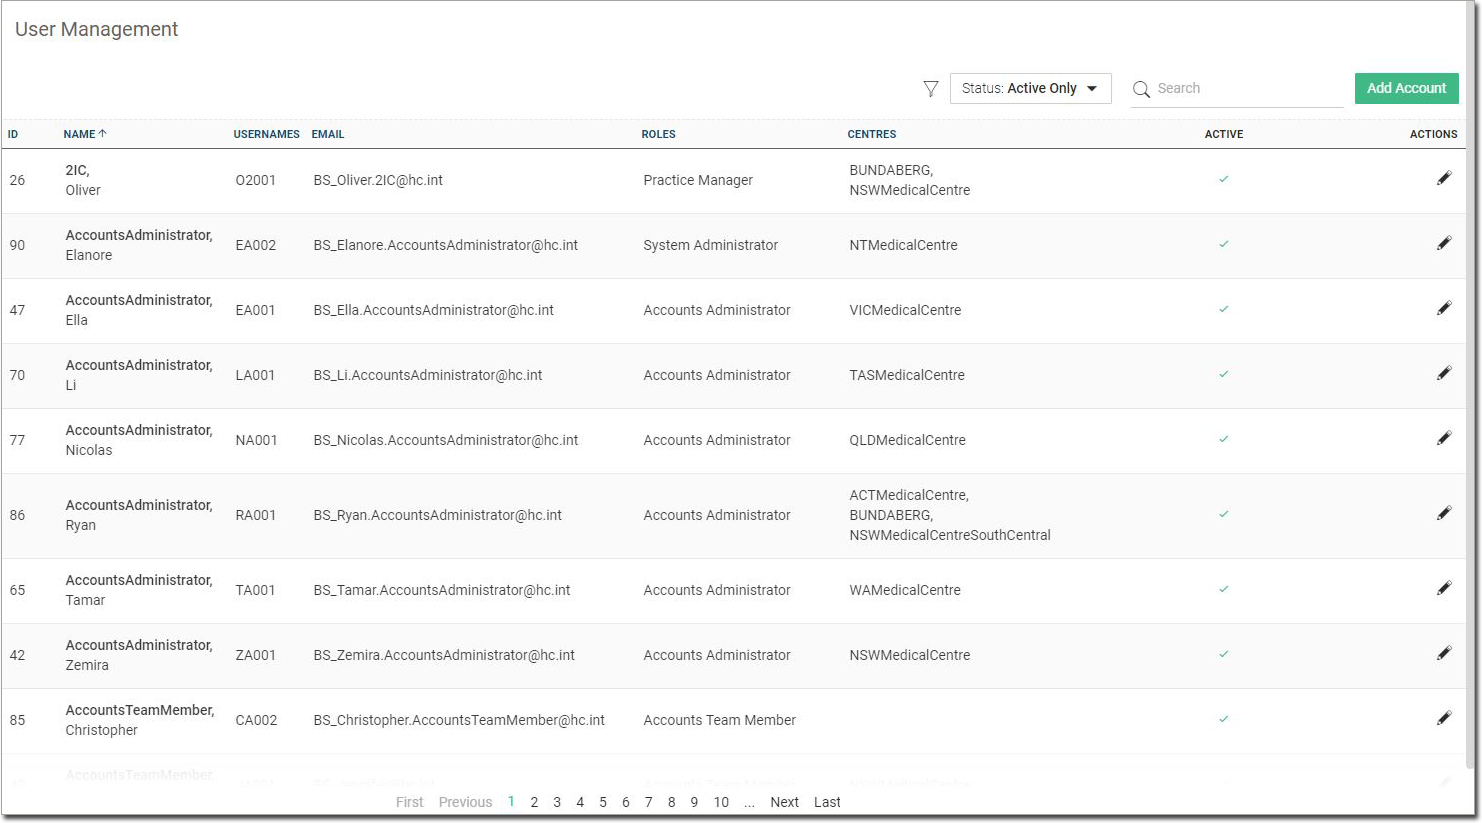
The User
Management window appears.
o Change the Status drop-down to include inactive user accounts that would not normally show in the results.
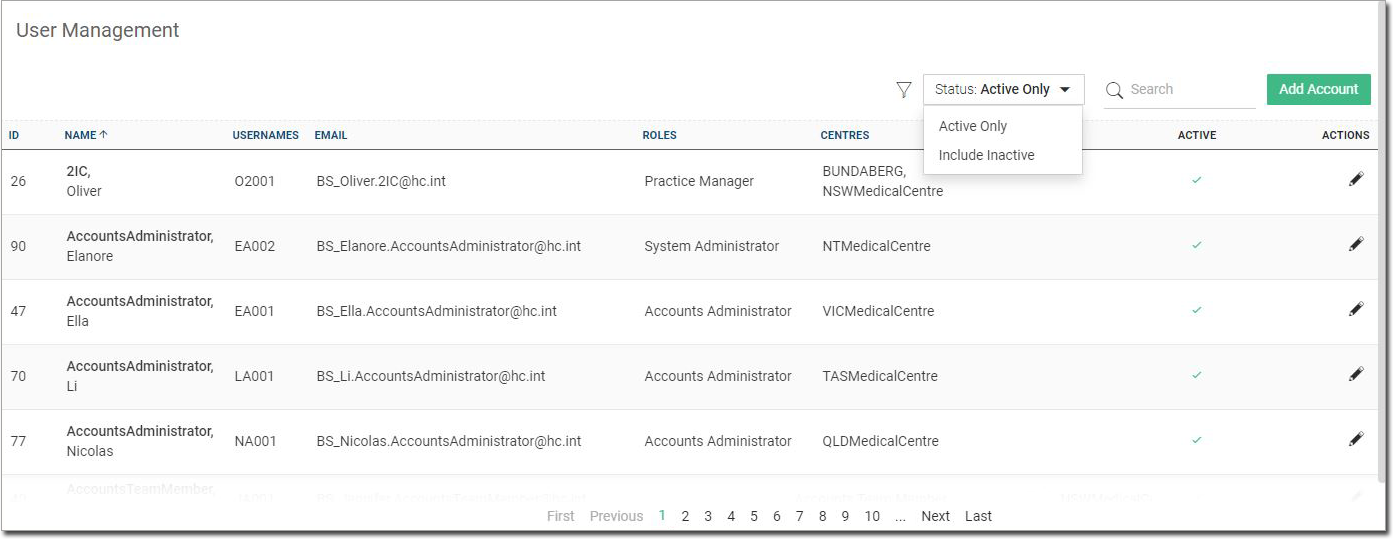
4. Enter a user name, user code, role, centre, or state in the Search for a User field. The list is filtered dynamically.
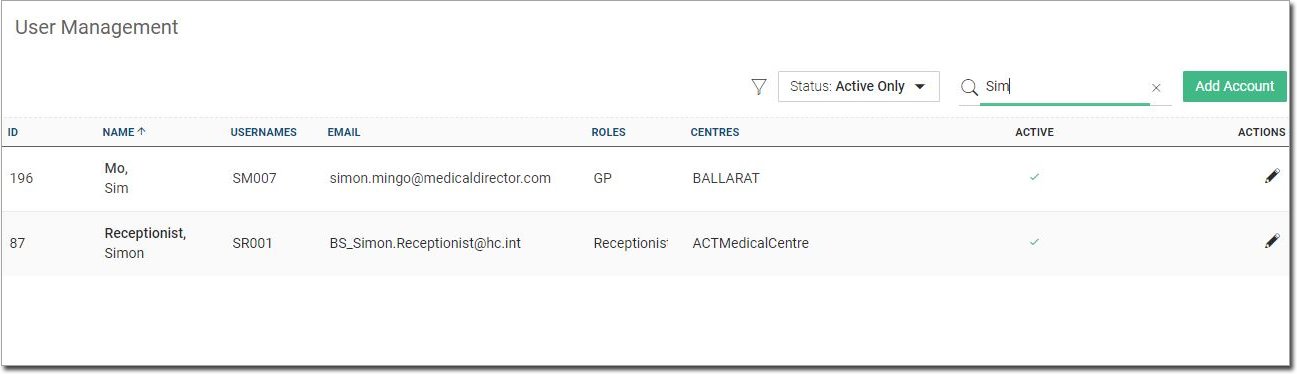
o Name search example (can be
used for searching by user's 'name').
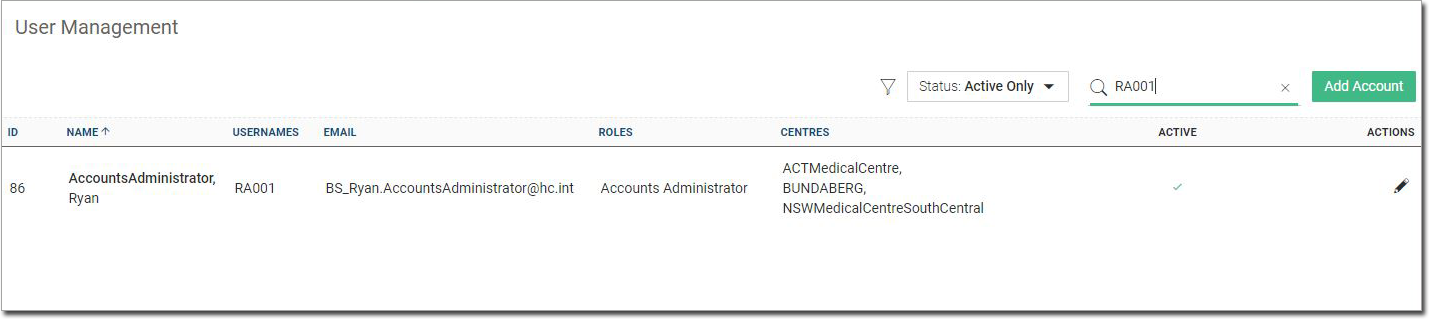
o Username search example (can
be used for searching by user's 'username').
o Email search example (can be
used for searching by user's email address).

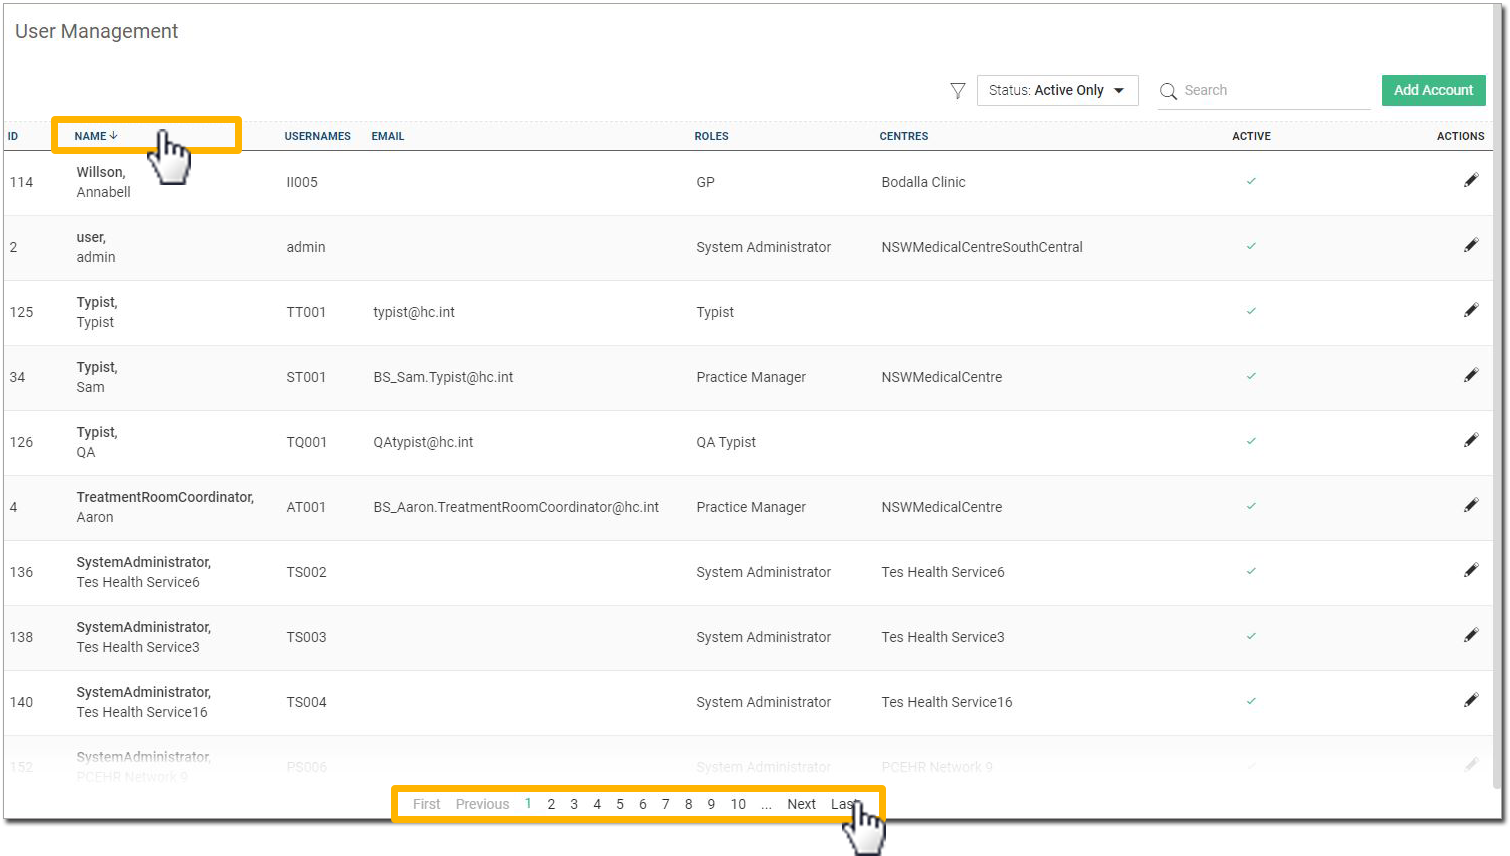
o Sort
any column alphabetically by clicking on the column name. Navigate
to different pages of results using the navigation buttons at
the bottom of the window.
Add a User
When adding a user record, you will;
1. Locate
and click ![]() at the lower-left.
at the lower-left.
2. Select
the Settings option.
The Settings window appears.
3. Within
the Users section, click
The User
Management window appears.
4. Click
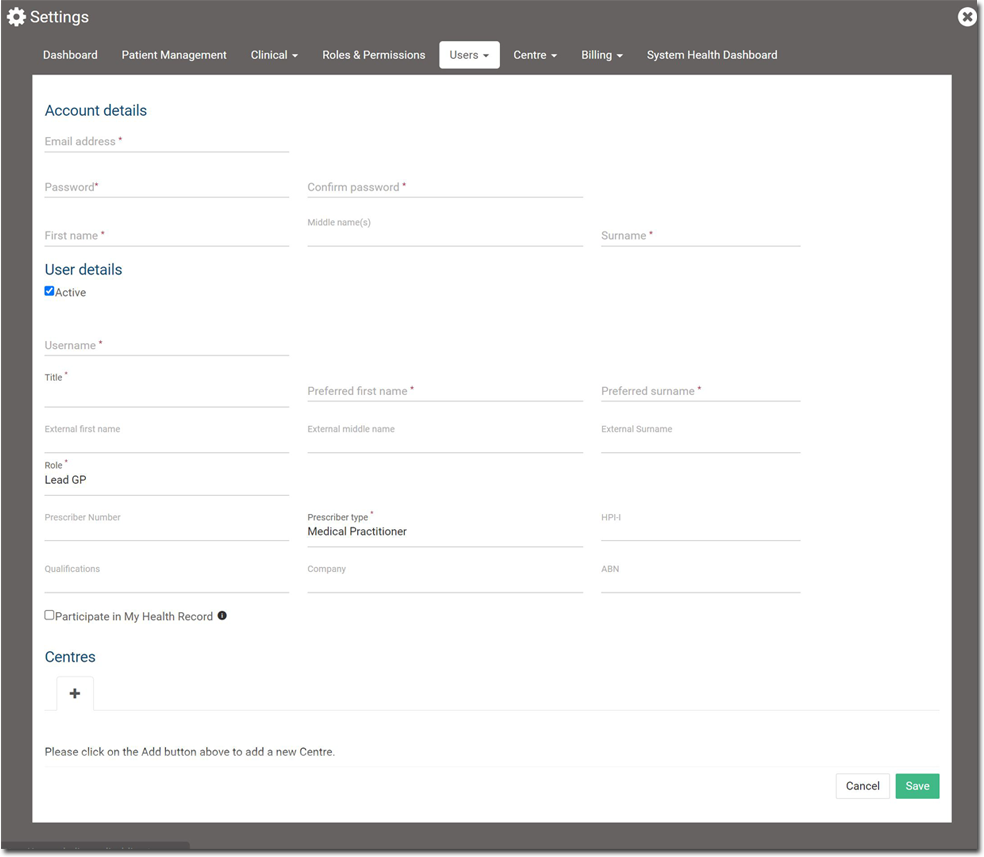
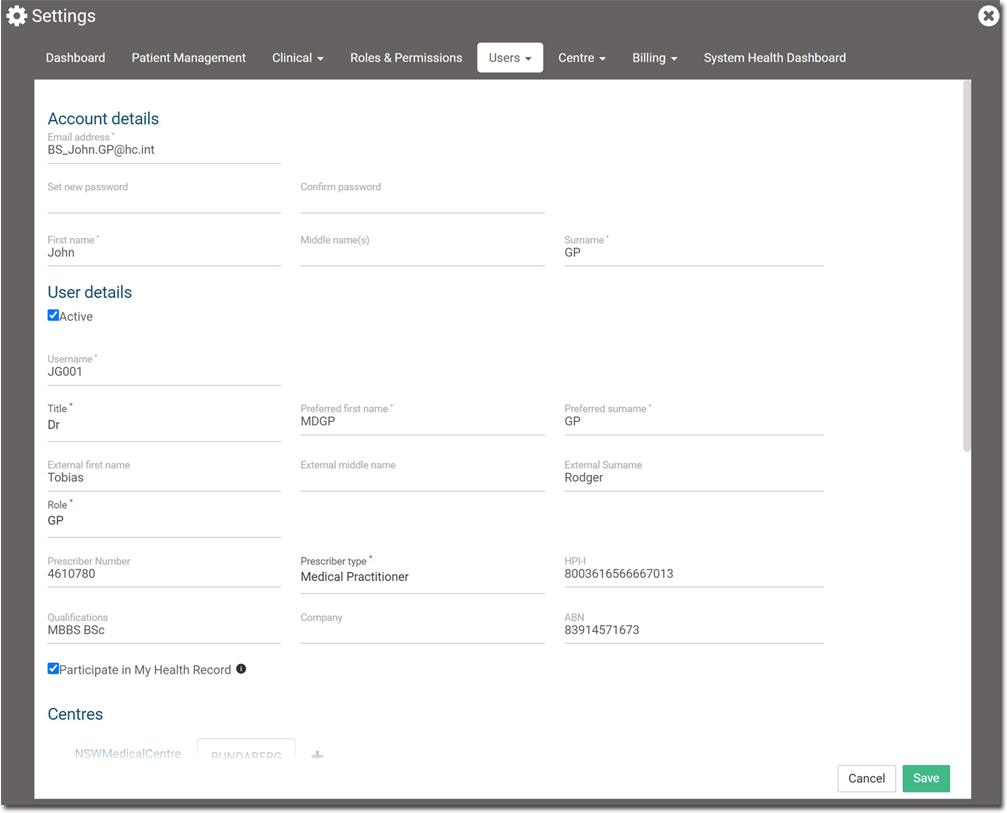
 The Add User form appears.
o Choose the role required from the Role drop-down.
o Depending on the role selected, complete any mandatory fields.
o Participate in My Health Record check box is provided which can be ticked based on the need and the role selected
• Indicate which Centre(s) this user belongs to.
• Locate
the Centres section at
lower-left of the window, and click 
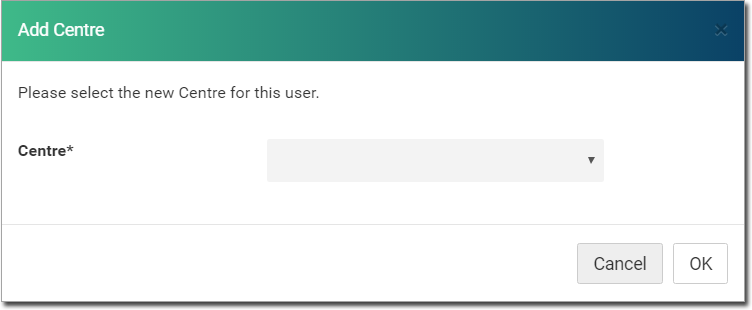
• Select
a centre from the drop-down list and click 
5. (optional)
Add more centres if required.
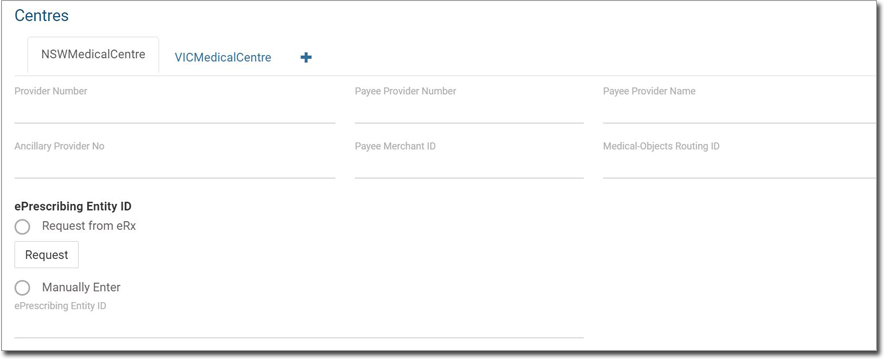
6. (optional)
For practitioner roles,
extra fields are provided, available for each centre. In our example,
this HCP works a two centres; NSWMedicalCentre and VICMedicalCentre.
7. Indicate which Work Area(s) this user belongs to.
o Locate
the Work Areas section
at lower-left of the window, and click
o Complete as much information as possible.
• Cost Centre is required.
o Indicate which Fee Schedules this HCP uses.
• The default is the schedule used by the centre.
• You can create customised fee schedules (referred to as Override Schedules), and indicate that the HCP uses these instead.
o Add more Work Areas if required. Each Centre can have multiple Work Areas associated with it.

8. Click
 to confirm your selections,
and save the user record.
to confirm your selections,
and save the user record.
Edit a User
1. Locate
and click ![]() at the lower-left.
at the lower-left.
2. Select
the Settings option.
The Settings window appears.
3. Within
the Users section, click
The User
Management window appears.
4. Search for the user whose record
you wish to edit and click 
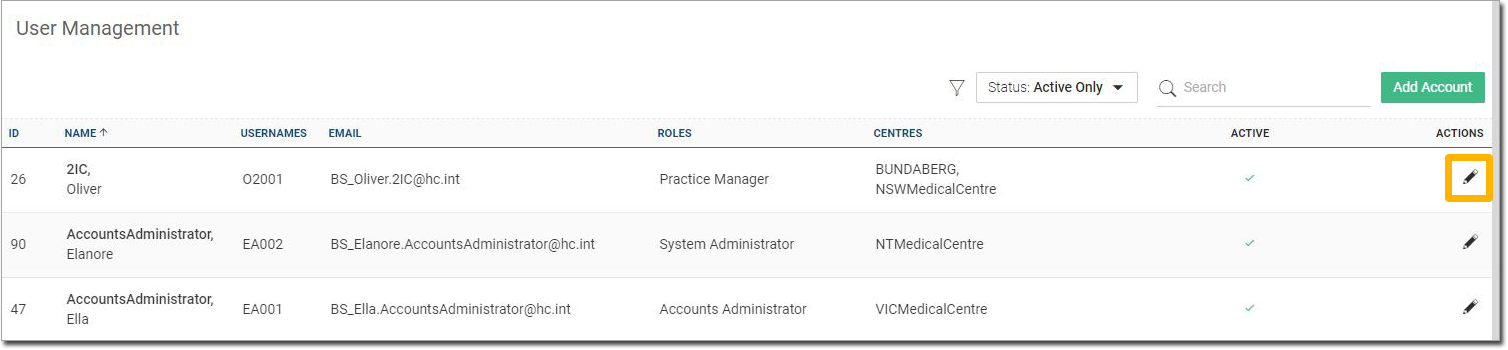
5. Make
the necessary changes to their record.
6. Click
 to confirm your selections, and save the
user record.
to confirm your selections, and save the
user record.