Scheduling a Telehealth Appointment
1. Start a new appointment as normal.
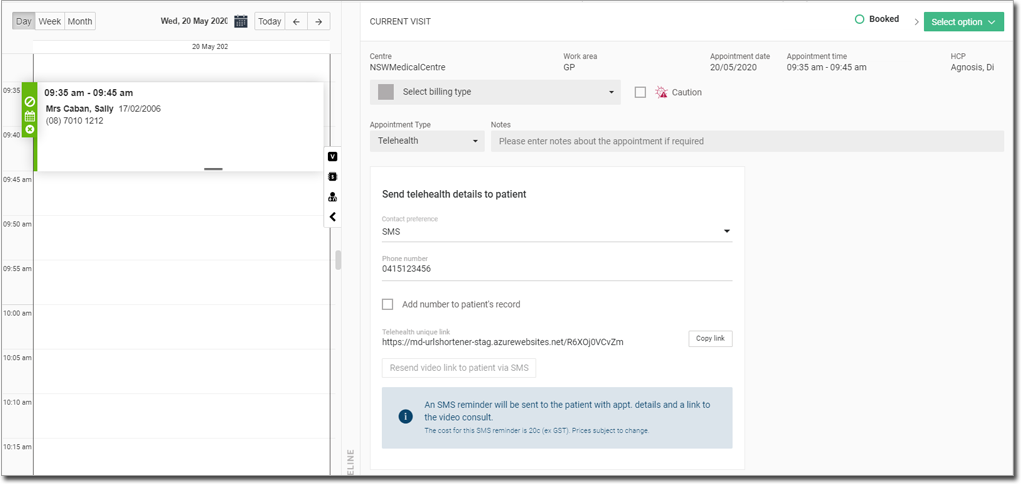
2. Select the Telehealth Appointment Type.
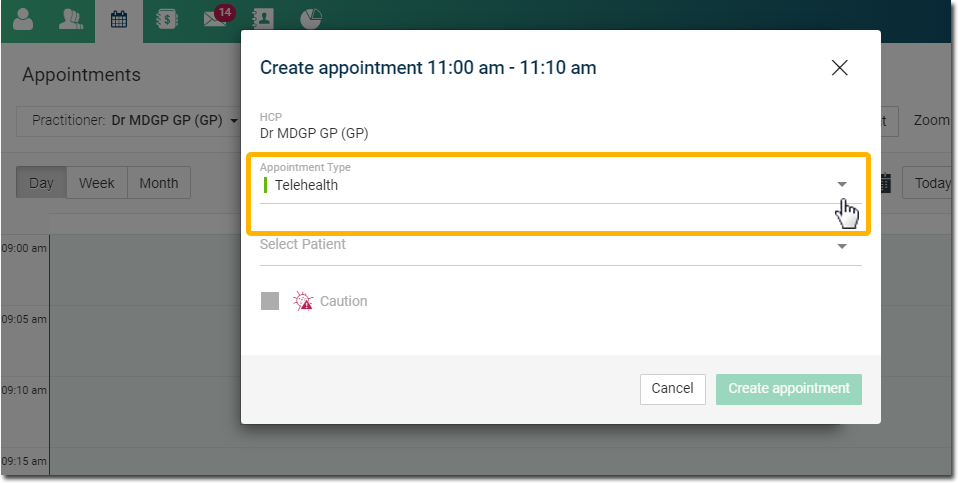
3. Upon selecting a patient, the details section is expanded.

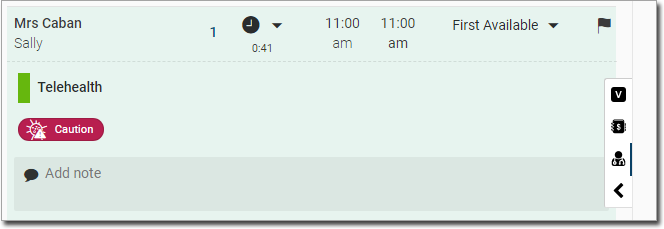
4. (Optional) Tick the Caution check box to flag the appointment with a "Caution" label to warn administration staff and practitioners to check the Notes for more information on the patient. The flag can be added or removed whilst in the appointment book and queue in the details screen.
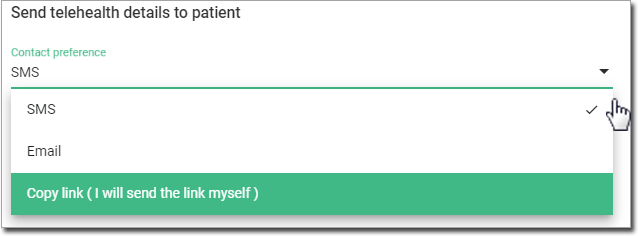
5. Select a method for sending the Telehealth session details to your patient.
o For SMS/Email options you will also need to indicate the recipient's mobile number or email address.
o If you need to change the method after the appointment has been scheduled you can do so via the Visit window shown in the next step.
6. Click  to create the appointment.
o The appointment is scheduled.
o For information on how to conduct a Telehealth appointment, see below.
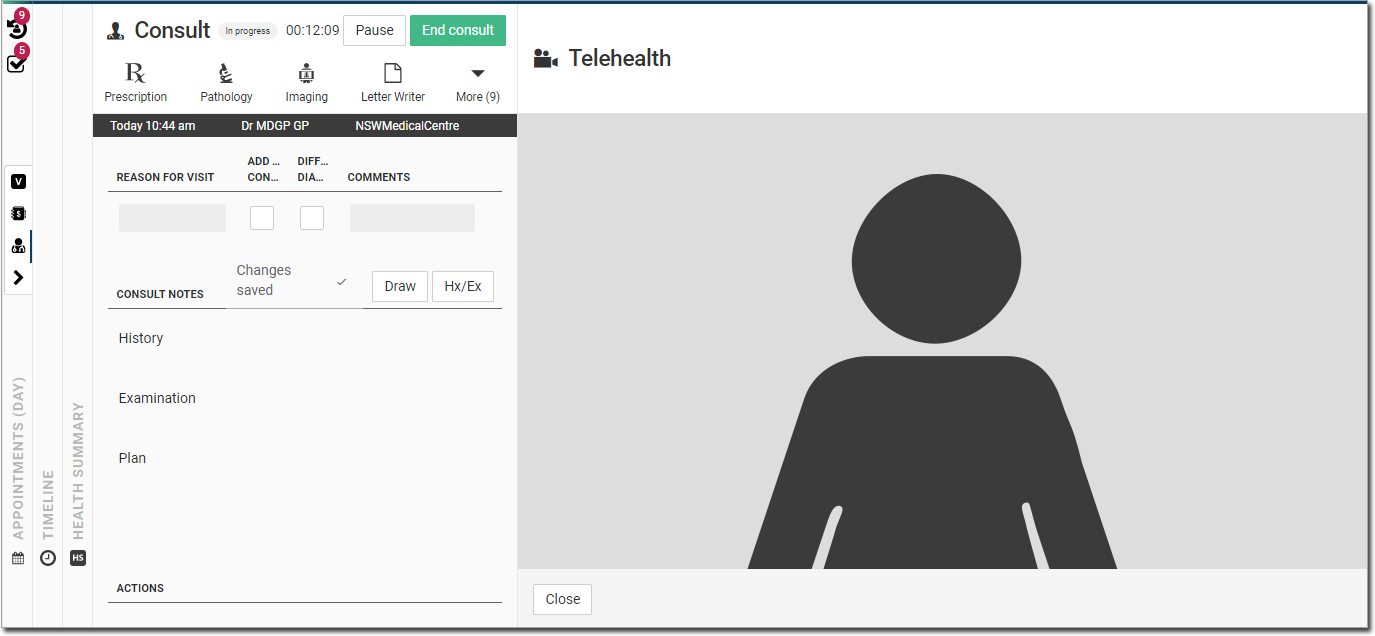
Conducting a Telehealth Appointment
1. Ensure your patient has received the unique video chat link you create when you scheduled it earlier.
2. Start a new consult for the patient, as normal.
3. Locate and click  within the Consult panel.
4. When presented with the Telehealth video window, click  to commence the chat.
5. The video chat commences. Conduct the consultation as normal, and close the video chat when you have finished. See Consultations for more information.