About Customised Recall Protocols
When you record a recall notification for a patient, you can enter a customised term or description of the recall reason (or protocol), as opposed to using those supplied with Clinical.
A caveat of using customised recall protocols is that patient records associated with them might not appear in the results of recall searches you conduct.
For example, if you had entered a customised recall reason of URGENT RESULT, and you later conducted a search for recalls that use the supplied criteria of 'URGENT TEST RESULT', any records that used your customised reason would not appear in the search results.
To account for this, the Merge Clinical Lists utility allows you to easily search for and replace any customised entries with those supplied with Clinical.
There are three stages to managing the recall protocols used in your database:
1. Determining which customised recall protocols you wish to keep (generally those currently in use).
2. Locating and deleting any user-defined recall protocols that are not currently in use, and which you do not wish to make available for future use.
3. Replacing the remaining customised recall protocols with the supplied protocols.
Whilst you cannot prevent a user from free typing a customised recall protocol in future, most users will use the list supplied to them if it is well maintained. It is recommended that you consider tidying up your recall protocols periodically by following this guide.
Important
The following procedure for replacing your customised recall protocols with the supplied protocols cannot be reversed. As such, it is recommended that you conduct this procedure outside of work hours, and after you have conducted a backup of your MedicalDirector database.
Stage 1: Determining Which Customised Recall Protocols To Keep
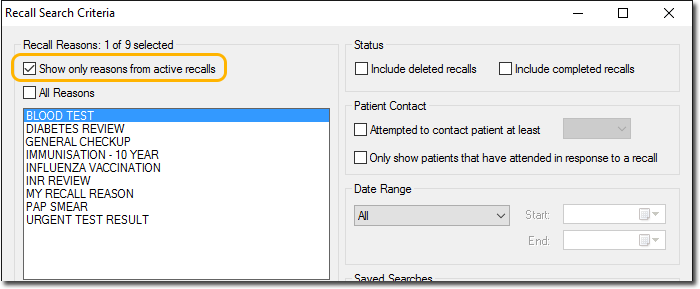
From the Clinical main window, select Search > Recalls. The Recall Search Criteria window appears.
To see all recall protocols currently in use, tick the associated check box to filter the list of reasons. Make a note of any customised protocols used, as you will need this for Stage 3.
Stage 2: Deleting Unwanted User-Defined Recall Protocols
To delete any unwanted user-defined recall protocols (supplied protocols cannot be deleted):
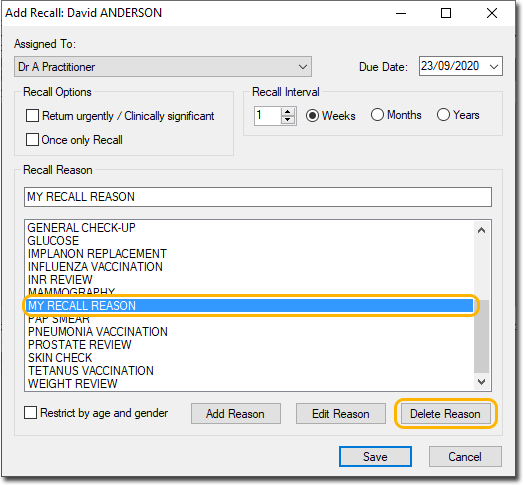
1. From
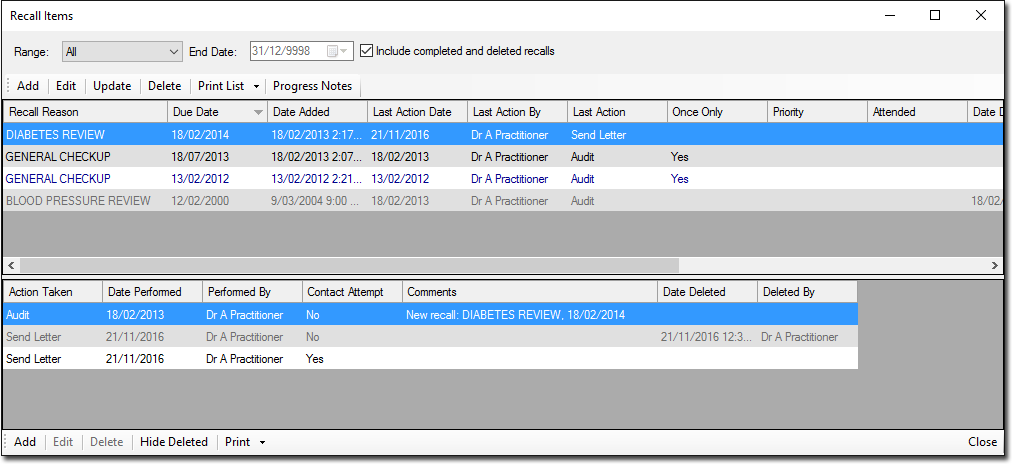
within a patient’s record select Clinical
> Recall. The Recall Items
window appears.
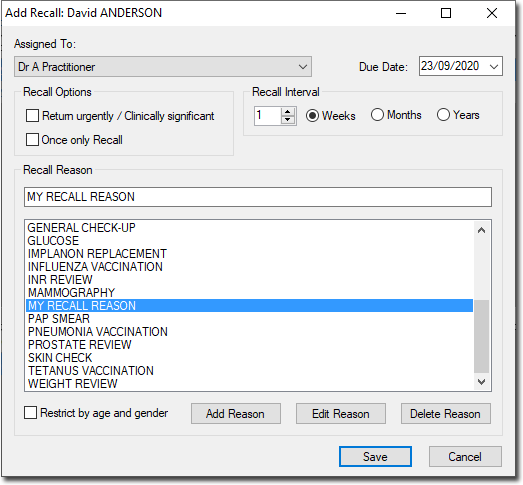
2. Click Add. The Add Recall window appears.
3. Select
the user-defined recall reason you wish to remove from the list, and then
press the DELETE key on your keyboard, or click 
Stage 3: Merging Unwanted Recall Protocols
1. Locate and double-click the MedicalDirector Maintenance icon on your desktop.
2. Within the Database Tasks menu, click Clinical.
3. Double-click Merge Clinical Lists.
If this is the first time you have tried to run the Merge Clinical Lists utility during this session of working in MedicalDirector Maintenance, you will be prompted to select a Configuration, and enter your Username and Password.

4. The Merge Clinical Lists window appears.
5. Via the Show Clinical List for drop-down menu, select Recall List.
o The right-hand side of this window displays the total of all supplied and customised recall protocols.
o The left-hand side of this window displays the total of all supplied and customised protocols that have actually been used in your database.
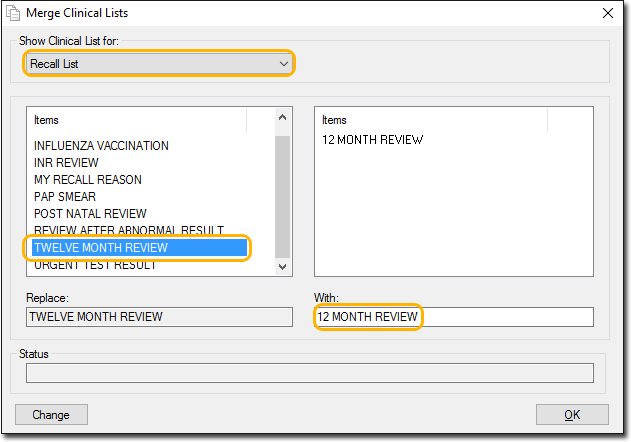
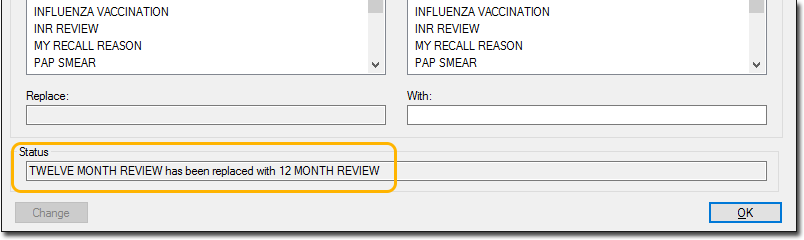
The example above shows a customised recall reason ‘TWELVE MONTH REVIEW’ on the left, and the recall reason we wish to merge it into on the right. Although you may add numerous customised recall reasons to Clinical, they will not appear in this left-hand list until you actually associate them with a patient’s record in Medical Director.
6. In the example above, we want to replace all instances of TWELVE MONTH REVIEW (the customised protocol one of our users created) with 12 MONTH REVIEW (the supplied protocol).
o Within the left-hand list of items, locate and select the customised entry you wish to replace.
o Within the right-hand list of items, locate and select the supplied entry you wish replace it with.
7. Click

o You will
be prompted to confirm this action.
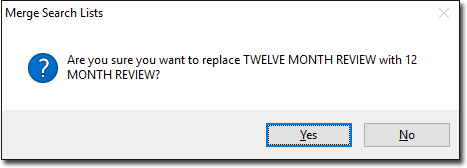
o A search of your database is conducted, and every instance of your customised protocol is replaced with the supplied protocol.
o Confirmation
and details of the successful replacement will appear in the Status text
box.