Configuring the Device
1. Ensure you are using the correct EasyOne device and that it is connected to your computer. These instructions are for the EasyOne with USB Cradle Only.
2. Ensure that the EasyOne Device is turned off.
3. Ensure that you have instructed the EasyWare software to use the USB Cradle. To do this:
Run the EasyWare software.
Select FILE > PREFERENCES.
From the EasyWare Preferences window ensure you have selected the USB Cradle Option.
Click OK to confirm.
Close the EasyWare software.
Performing a Test in Clinical
1. Select
Tools > Tool
Box > Respiratory Function
from the patient's record. The Respiratory
tab appears.
2. Click
 to
use the Easyone Spirometer with Serial Cable device to record
values.
to
use the Easyone Spirometer with Serial Cable device to record
values.
3. Click
 The
Available Spirometer Machines window is displayed if more than
one device is installed. Select the device you wish to use from
this window.
The
Available Spirometer Machines window is displayed if more than
one device is installed. Select the device you wish to use from
this window.
4. The EasyWare software window appears.
5. You should also see a smaller EasyWare window containing instructions. Do NOT close this window yet.
6. Switch
on the EasyOne Device.
Once active, you should notice the EasyWare software Synchronization
in Progress window briefly as the EasyWare software and EasyOne
device are synchronised. This may take a moment to display.
7. Once the automatic synchronisation is complete, click OK on the smaller, instructional window.
8. The Edit Patient Data window appears. Ensure that this is the correct patient record you wish to work with. If not begin the process again. If the patient record is correct, click OK.
On the EasyOne Device:
1. Remove the EasyOne device from the Cradle. The Device window displays the MAIN menu, and Perform test should be highlighted.
2. Press the ENTER button.
3. The SELECT TEST screen appears.
4. Select RECALL, and press the ENTER button.
5. The SEARCH TEST window appears, and LAST TEST should be highlighted.
6. Press the ENTER button.
7. The Patient Record window appears. Ensure that this is the correct patient record. If not begin the process again. If it is correct, press the ENTER button. The TEST menu appears.
8. Initiate the Pre Test, by selecting FVC and pressing the ENTER button on the device.
9. The BASELINE SETTING window appears.
10. Press the ENTER button.
11. When prompted by the device, conduct the test. Once the test is complete a graph of results is displayed in both the device window and On-Line Test window on your computer.
12. On the device, press the ENTER button.
13. A Session Quality window appears. At this point you may RETRY the test, or QUIT. Select an option and press the ENTER button.
14. When you choose to quit the Pre Test you are presented with the Session Quality window again.
15. To conduct a Post Test, select POST and press the ENTER button.
16. Conduct the Post tests by following the same steps to complete the Pre Tests.
17. To save the tests, return the EasyOne Device to the Cradle.
18. Wait a moment for the EasyWare software and EasyOne Device to synchronise, as previously.
19. Once the synchronization is complete, close the EasyWare software.
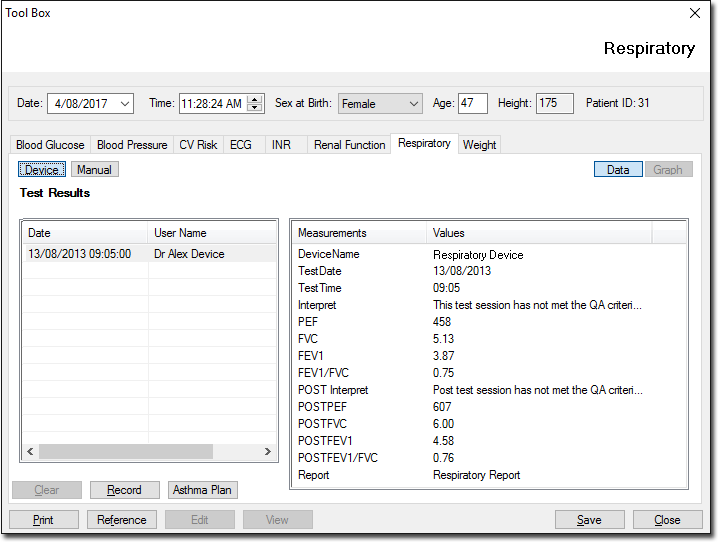
20. Data should be transferred to Clinical, confirmed by the Spirometry Results window that is displayed. Close this window. The results are displayed in the Respiratory tab in Clinical.
Using the Graph View
o Click
 to display the patient's record in graph format. Use the scroll bar to
view different sections of the graph.
to display the patient's record in graph format. Use the scroll bar to
view different sections of the graph.
o Click
 to print the sections of the graph displayed on the screen.
o Click
 to close the Graph window and return to patient's Clinical window.