See also: Assessments
A Care Plan is a patient's record of treatment by multiple health care professionals. Once a Care Plan is created it can be opened and amended for twelve months, after which it will expire and a new plan must be created. Care Plan templates are also available via Letter Writer.
1. From within the Clinical Window, select Assessment > Care Plan. The Obtain Patient Permission screen appears.
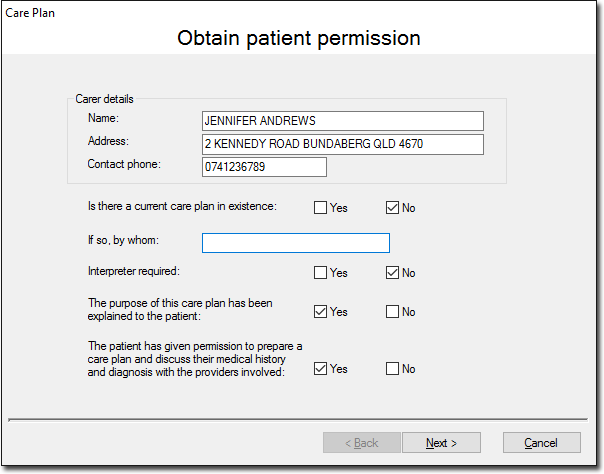
o Indicate whether you wish to open and edit an existing Care Plan.
o Enter/Edit information as necessary.
2. Click Next when you are ready to proceed. The Update the Patient's List of Current Problems screen appears.
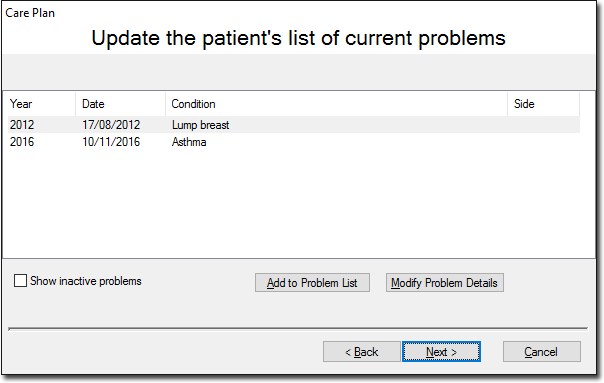
3. Click Add to Problem List to add details of any current problems to this list, or highlight an existing problem and click Modify Problem Details to edit an existing problem.
4. The New History Item window appears (or Edit History Item window, if you have chosen to edit an existing item).
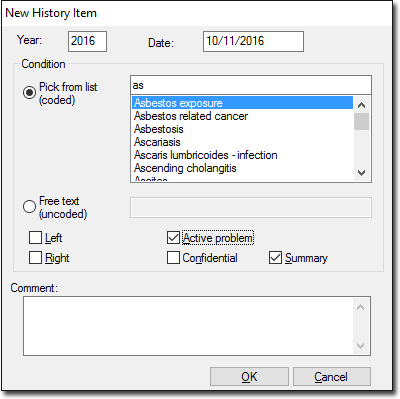
o Select a diagnosis from the coded list by typing the diagnosis into the associated text box. As you type, like entries will appear in the list, and you can select one of these.
o Alternatively you can enter a custom diagnosis in the Free Text text box.
o Select options from the set of check boxes and/or enter a comment if you desire.
5. Click OK when you are ready to continue. You are returned to the Update the Patient's List of Current Problems screen.
6. Click Next to continue. The Create the Needs List window appears.
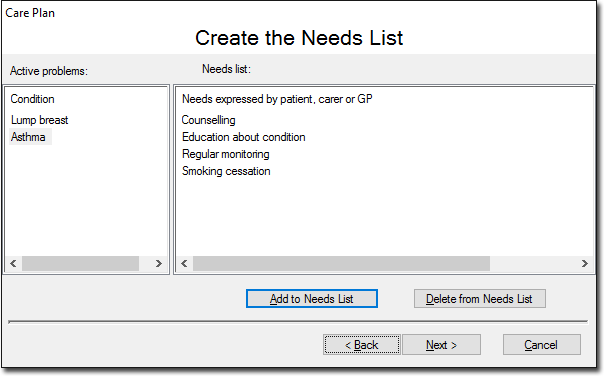
This window displays the patient's active problems and the needs expressed by either the patient, carer or GP. The needs list is not specific to any particular selected active problem i.e. all needs are displayed in this list despite any active problem being selected.
7. To add a need, click Add to Needs List. The Care Plan Needs window appears.
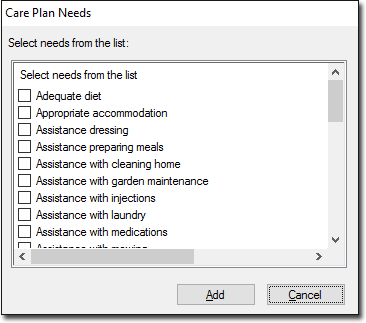
Select needs as necessary and click Add to confirm your selection. Selected needs are added to the Needs List. Note that it is not possible to add customised needs to the list. Click Next when you are ready to continue.
8. The Build the List of Tasks... window appears.
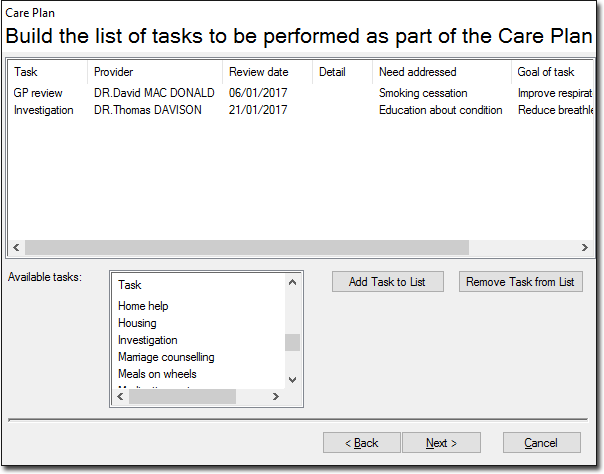
To add a task to the list either;
o Double-click the appropriate task in the Available Tasks list, or
o Click Add Task to List.
9. The Care Plan Task window appears.
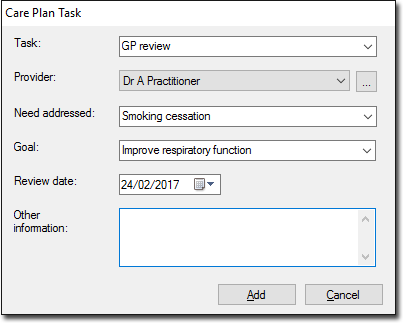
o Select or free-type a task from the Task list. This is a required field.
o Select a provider from the Provider list. This is a required field. If the provider you want is not listed, you must add them to your Address Book.
o Select a Review Date. This is required data.
10. Click Add to confirm your selections. You will be returned to the Build the List of Tasks... window. Click Add if you wish to add further tasks.
11. Click Next when you are ready to continue. The Finalise Details to be Included in the Care Plan window appears.
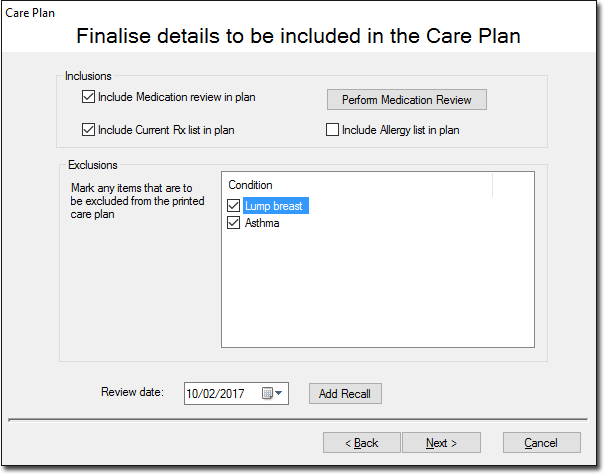
o Select check boxes to include or exclude the details in the Care Plan.
o Click the Perform Medication Review button to perform a Medication Review.
o (Optional) Click Add Recall to create a Recall for the patient.
12. Click Next to continue. The Print Copies... window appears.
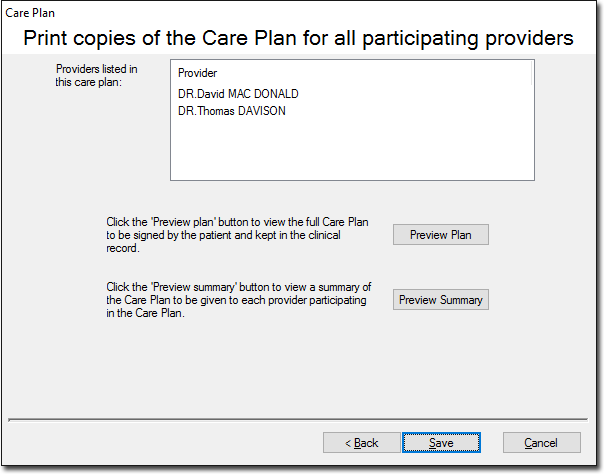
o Click Preview Plan to view the full Care Plan, to be printed and signed by the patient. This will be saved with the patient's clinical record.
o Click Preview Summary to view a summary of the Care Plan to be given to each participating provider.
o Click Save to save a copy of the plan to the patient's record and print the required copies. The Care Plan closes at the completion of this process.