Bluechip supports multiple EFTPOS Terminals. In order to use the TYRO EFTPOS Device you will be required to reconnect and configure your Device for each workstation.
1. Select Setup > Practice > EFTPOS AUTO. The EFTPOS Auto Setup window appears.
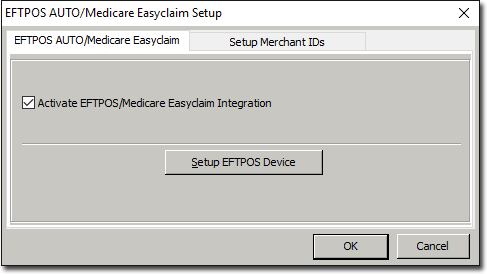
2. Tick the Activate EFTPOS Integration check box.
3. Click 
4. Locate the Terminal Connection Window.
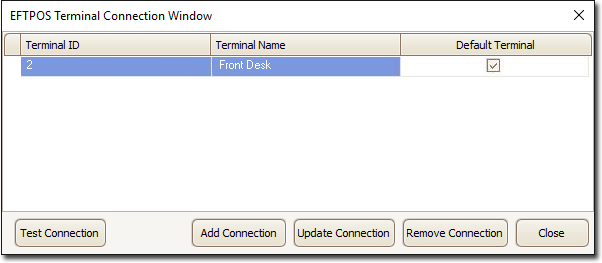
5. Click  . The Connect PC to an EFTPOS Device window appears.
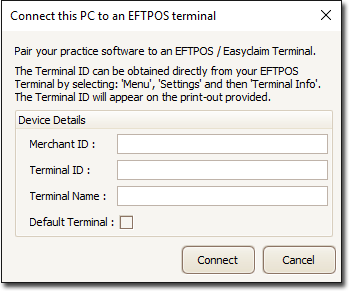
6. Enter your Merchant ID. Your Merchant ID is supplied by TYRO and is accessible via the EFTPOS Terminal by Selecting Menu > Merchant Info on the Device.
Note: if your practice has multiple merchants/Practitioners you only need to to enter the first Merchant ID, the system will automatically connect all other merchants.
7. Enter the Terminal ID for the EFTPOS Device connected to your computer network. The Terminal Information is supplied by TYRO and is accessible via the EFPTOS Terminal by selecting Menu > Merchant Info on the Device (each EFTPOS Device connected to your network has a unique ID).
8. Create and enter a Terminal Name for the EFTPOS Device. This is usually something that identifies the EFTPOS Device from others (i.e Front Desk). It is advisable to create a unique name for each of your EFTPOS Terminals.
9. (Optional) Tick the Default Terminal check box to indicate that this particular EFTPOS Device will be the default used for processing EFTPOS Receipts on this computer. This is particularly handy if you have multiple EFTPOS Terminals in your practice. This setting can be changed at a later time. Before clicking the Connect button it is advisable to perform the following steps in preparation for connection:
10. On the EFTPOS terminal, select Menu > Configuration > Intergrated EFTPOS > Pair with POS.. You will be prompted to enter a password (this is your ADMIN Password).
11. The terminal will ask if you want to Reset Key. Before answering, click the Connect button on the computer first.
12. If you have not yet paired any other computers to the Terminal answer 'Yes' to Reset Key question on the terminal, otherwise answer 'No'. You will be returned to the Terminal Connection Window.
13. Click Test Connection on the EFTPOS Device (you must exit the menu on the Tyro Device to perform the test connection). A window advising that Terminal Status and name of Terminal will appear.
14. Close the EFTPOS device connection window.
15. Select the Setup Merchant IDs tab.
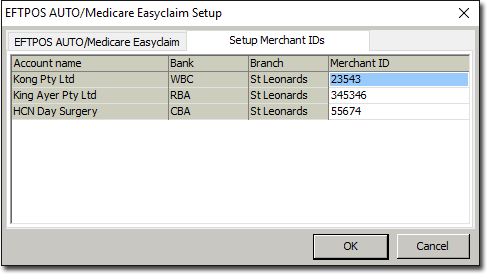
16. You will be required to add the Merchant IDs for each Bank Account. This information can be obtained from the TYRO Terminal Printout by selecting Menu > Merchant Info on the Device.
17. Click  when complete.
Additional Information regarding Proxy Server Setup can be entered from the EFTPOS Auto Setup Screen.
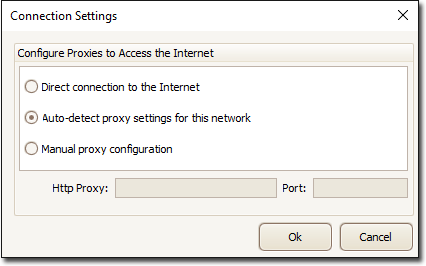
Direct connection to the Internet is applicable to anyone who does not use a proxy server
Auto-detect proxy settings for this network retrieves the proxy details from the Windows Internet Options. This is the default setting.
Manual Proxy configuration is for users who wish to specify a proxy server. Selecting this options required the entry of a proxy address and port. To simplify proxies requiring password authentication, Tyro automatically uses the user's Microsoft Windows login and password.