Letterhead templates govern the actual letterhead that appears on invoices, receipts, statements and transaction listings. They also govern what is displayed at the bottom of these reports, the content of which may vary depending on the class of the patient.
Because billing in Bluechip is based on a per-Practitioner Location (or Room) basis, there must be a separate letterhead template for each room in the system. Bluechip is pre-configured with a letterhead template for each Practitioner and each Room at your practice. However, you would need to create a new template if you were to add a new Practitioner to the system.
The following example shows a typical Letterhead template:
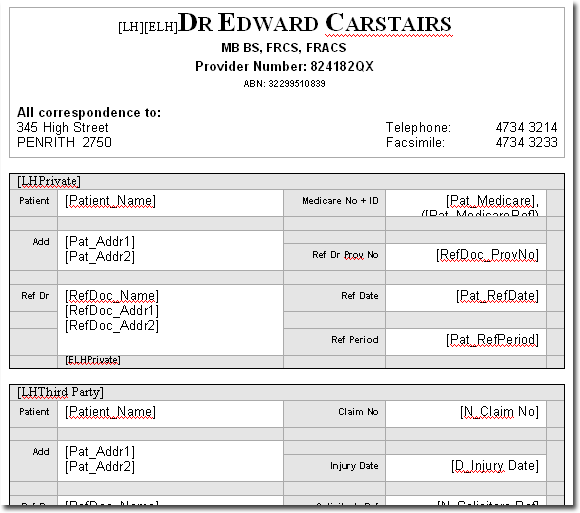
o Notice the text [LH] and [ELH] at the beginning of the template. These field codes indicate the start of the LetterHead. These codes do not appear on printed documents.
o With the exception of the [LH][ELH]fields, this section of the template can be customised in any way. If you intend to add an image to your letterhead, see also Linking to Images in Document and Letterhead Templates.
o The grey section of the template begins with the field [LHPrivate]and ends with the field [ELHPrivate]. This section governs what will appear at the bottom of any printed invoices, receipts, transaction listings or statements, for patients whose account class is Private (in this example).
o There must be one footer section for each account class (type). If any class in your system is not represented in this template, then invoices, receipts, transaction listings and statements for that class of patient will print without any of the appropriate details appearing at the bottom. Because there is a separate footer for each account class, different information can be displayed in this section, depending on the class of the patient.
To Manage Letterhead Templates
1. Select Setup > Templates > Letterheads. The Letterhead Setup window appears.
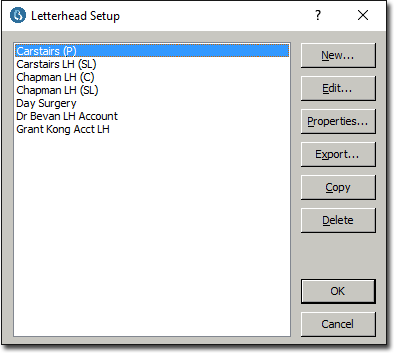
o To add a letterhead template, continue now to Step 2.
o To edit a letterhead template, locate and select the letterhead template and then click  Your template is opened in Microsoft Word, where you can make the necessary changes. If you intend to add an image to your letterhead, see also Linking to Images in Document and Letterhead Templates.
o To copy a letterhead template, locate and select the letterhead template and then click  You will be prompted to give the copy a name, a default title, and to select which practitioner it relates to, after which you will be returned to the Report Setup window where your new letterhead template will be available.
o To export a letterhead template, locate and select the letterhead template and then click  You will be prompted to select a location to export the template to. This also gives you an opportunity to rename the template, if you desire.
o To delete a letterhead template, locate and select the letterhead template and then click  You will be prompted to confirm this action.
2. Click  The New Letterhead Template window appears.

3. Enter a name for the template.
4. (Optional) Enter a default title for the template.
5. Select a practitioner to associate this template with, from the associated drop-down list.
6. Click  to confirm your settings. The New Letterhead Template window closes, and Bluechip opens Microsoft Word, ready for you to design your new letterhead template.
7. Modify your letterhead template as necessary. When you have finished, simply close Microsoft Word, and you will be returned to Bluechip, where the letterhead template is now ready for use.