Invoicing for a Patient Claim Account
1. Open a patient record and select Accounts from the menu.
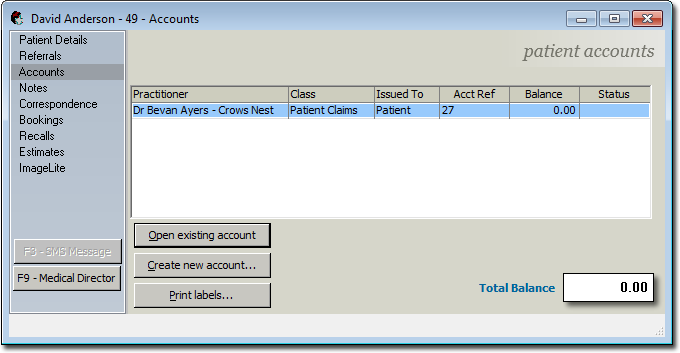
2. Within the list of accounts, locate and double-click the Patient Claims account. The details of the Patient Claims account are presented to you.

3. Select the Invoices tab.
4. Click  You may be prompted to initiate a patient verification for the patient. The Medicare Verification window appears if one of the following conditions is met;
o The Always option is selected on the Patient Verification Tab of the Patient Claim batch settings, or
o The Verify Patient Before Invoicing check box is ticked on the Patient Details window.

If the verification is unsuccessful, you may continue to issue the invoice regardless, or cancel as required. After the OPV has been completed, Medicare may return details of updates to patient information. These updates can be automatically applied to the patient information held in Bluechip, at your discretion. Other advisements as to the eligibility of the patient to receive benefits may also be supplied.
5. If you chose to continue with verification, select the Servicing Practitioner via the associated drop-down list, and click  The Medicare Australia - Online Patient Verification window appears.
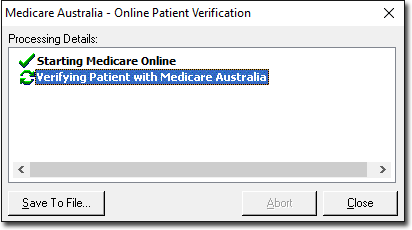
o To save the file, click 
o To abort the verification, click 
o To skip the verification or proceed after verification and continue to the new invoice, click 
6. The New Invoice window appears. Add Service Items to the invoice as desired. See Creating Invoices for an overview of invoicing.
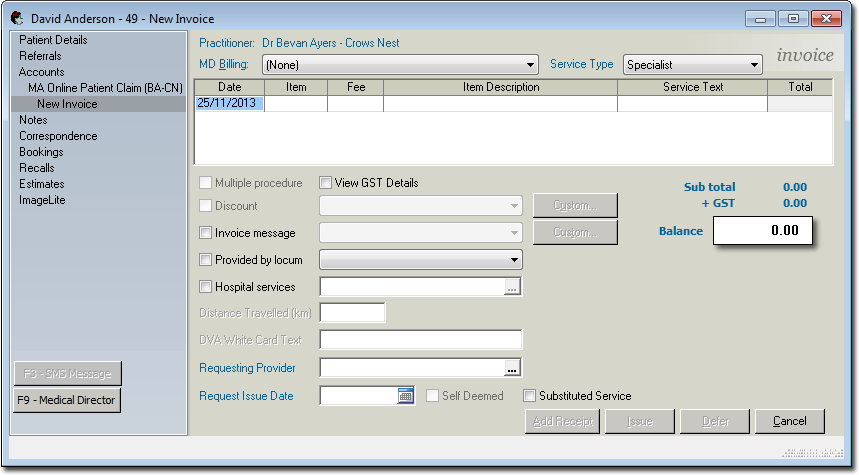
o Via the Service Type drop-down list, indicate the type of service the practitioner has performed for this invoice. A practitioner's service types are managed via General Practitioner Settings.
o If the service is provided in-hospital, tick the Hospital Services check box and select an associated hospital via the  button.
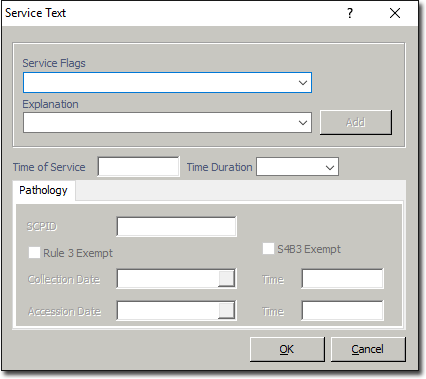
o To add information for a given Service Item (which is sent to Medicare along with the Service Item), locate the Service Text field and click the associated button to call the Service Text window. Select the information required from the drop-down menu or enter text and click See Service Details (Managing) for more information.
7. When you are ready to issue the invoice, click 
8. The Select Referral window appears. Select the appropriate referral details and click 
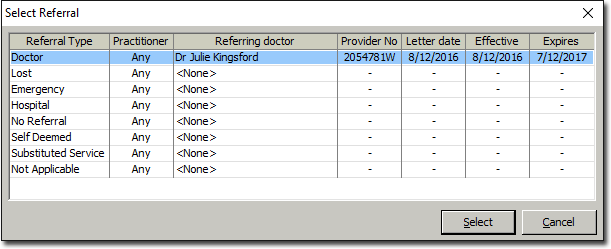
o Select the appropriate referral details and click
o Medicare Online requires the selection of a current referral from the list of entered referrals, or a referral override type (where applicable). The Override referral types are only shown when creating invoices for Medicare Online account types. The Hospital referral type is also not allowed to be used for non-hospital services.
o In addition to these restrictions, the servicing provider cannot be the referring Practitioner. In this instance a referral override of 'Self Deemed' must be used.
9. You are prompted to issue the invoice. Click
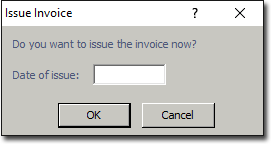
10. You will be prompted to print an invoice for the patient, after which the invoice is issued to Medicare, and is waiting on processing.
11. This concludes the steps necessary for creating a Medicare Online Patient Claim. Refer now to Sending Invoices to Medicare Online.