Before configuring your ECLIPSE Access and Patient Verification settings, ensure you have created a batch type for Inpatient Medical Claiming.
1. Select Setup > Practice > Batch Types. The Batch Setup window appears.
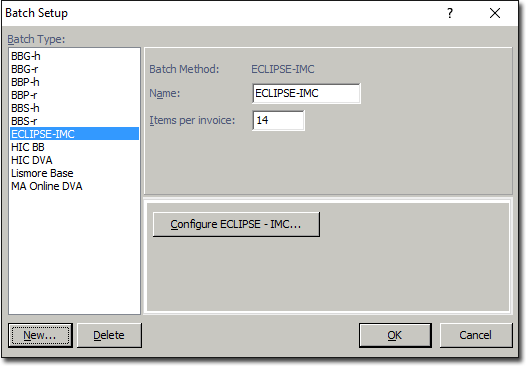
2. Select the batch type you created for Eclipse IMC, as shown above.
3. Click  The Eclipse - IMC Setup window appears. Select the Location and Authentication tab.
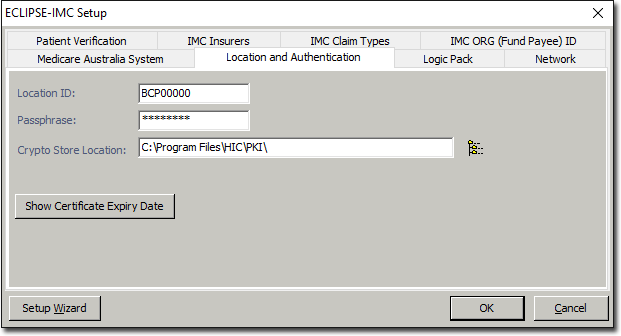
It is at this time you must enter the Location ID, Passphrase and Crypto Store Location for your encryption certificate. This information will be supplied to you by Medicare. It may be that you already have this information recorded if you have already configured Bluechip for Medicare Online claiming.
4. Select the Patient Verification tab as shown below.

5. Within the Patient verification prior to invoicing through Medicare ECLIPSE section, select whether you wish to conduct a patient verification for every claim ('Always'), or only for those patients for whom you have indicated a verification must take place ('When required for patient'). This latter setting is made via the Patient Details window.
6. Within the Patient verification prior to invoicing through Medicare ECLIPSE section, indicate the type of verification you wish to make, from the following options:
o Medicare only: verifies the Medicare details of the patient.
o Fund only: verifies the Health Fund details of the patient.
o Medicare and Fund: verifies both the Medicare and the Health Fund details of the patient.
7. Ensure the Enable Health Fund capability validation... check box is ticked, as shown above. This checks whether the Health Fund selected for the claim participates in Medicare ECLIPSE.
8. Select the IMC Insurers tab.
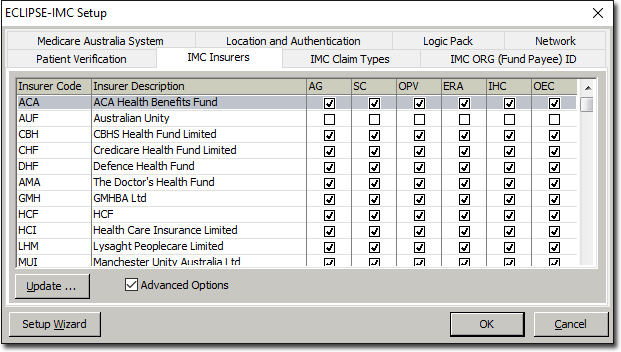
Note that the Advanced Options check box on this window toggles display of the AG, SC, OPV and ERA columns.
9. Click  to update the supplied list of IMC Insurers. This requires an active Internet connection. You need only do this once initially, but it is recommended that your perform this update monthly. Updating the list will;
o Add any new insurers to the list
o Indicate which insurers are available for In-Hospital Claiming
o Indicate which insurers can validate an Online Eligibility Check
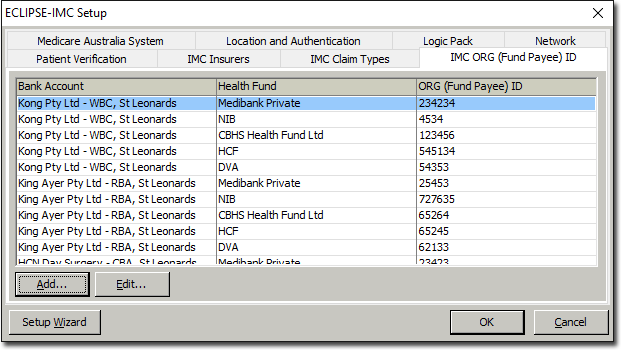
10. (Optional) Select the IMC ORG (Fund Payee) ID tab.
Some Health Funds may issue you a different ORG ID for each bank account you use. You can record these IDs via this tab.
![]()
11. Click  The ORG (Fund Payee) ID window appears.
![]()
12. Select a Bank Account / Health Fund combination you wish to record an ORG (Fund Payee) ID for.
13. Enter the ORG (Fund Payee) ID issued to you by the Health Fund.
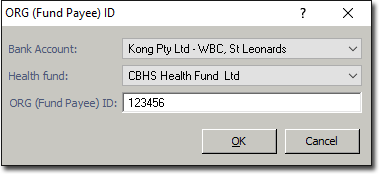
14. Click  to save. The IMC ORG (Fund Payee) ID tab now displays the new entry. Record others as necessary.
Note that prior to Bluechip 2.11, it was not possible to record multiple ORG IDs for a practitioner i.e. previously, each practitioner could have only one ORG ID recorded against their name, regardless of how many bank accounts they used.
If you upgrade to Bluechip 2.11, the ORG ID recorded for a practitioner previously (in earlier versions), will now be saved against any of their bank accounts on the IMC ORG (Fund Payee) ID tab, if there is more than one bank account. Please check this tab, ensuring that the correct ORG ID for each bank account for each practitioner is recorded.
The ORG (Fund Payee) ID appears within the Invoice / Payment Details section during claim submission:

15. You can now proceed with the IMC Setup Wizard.