This Pracsoft Set-up Guide is intended to assist new customers with configuring the minimum required setup for your Practice. It is recommended that you read this guide thoroughly beforehand, to assist you in gathering the information needed for Pracsoft first-time use. Note also that you may need assistance from your Systems Administrator with some of the settings outlined following.
Beyond the basics presented in this guide, consider the guide Getting Started with Pracsoft to quickly become familiar with MedicalDirector Pracsoft’s core functionality.
o Detailed tutorials are found in the Online Help
o Knowledge Base articles are also available from the menu at left
o Should you require further assistance, please contact MedicalDirector Customer Care on 1300 300 161
Before You Begin
Initial Set-up Requirements
o MedicalDirector Pracsoft Licence Key.
o Your bank account details and Merchant ID (optional – obtained from your TYRO EFTPOS Device if you use one).
o Details of at least one practitioner, including Provider No. and Payee Provider No (if different).
o At least one installed printer.
o The latest MBS Fees update, and update guide.
o Your Practice letterhead details.
o Ensure you are using the correct Windows date format for your Invoices and Medicare Claims to be processed correctly; the Regional Option is set to English (Australia), and the short date format is dd/MM/yyyy
Online Claiming Requirements
o If you intend to perform online claiming, register for and obtain your PKI certificate(s).
eHealth Requirements
o Ensure your practice is registered for ePIP.
o Obtain a Healthcare Provider Identifier – Organisation (HPI-O) number. For information, visit the Medicare for Healthcare Professionals web site.
o Obtain a Healthcare Provider Identifier – Individual (HPI-I) number. For information, visit the Medicare for Healthcare Professionals web site.
o Obtain IHI Signing and IHI Encryption certificates (if you have not already done so for online claiming), ensuring they have been updated for access to HI Service.
o Obtain the installation guide: ‘PIP eHealth Incentive Requirement - 1 Healthcare Identifiers’
See also Easyclaim and Online Claiming with Pracsoft
Opening Pracsoft for the First Time
Registering Pracsoft
1. Locate
and double-click the Pracsoft icon ![]() on your
Desktop. Pracsoft will open and you will be prompted to log on.
on your
Desktop. Pracsoft will open and you will be prompted to log on.
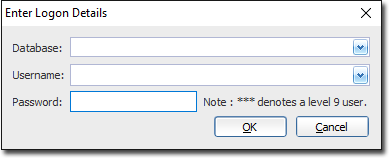
2. To register Pracsoft, select MD Live Data from the databases drop-down list.
3. When
prompted, enter the Licence details exactly as supplied to you
by MedicalDirector.
![]()
o Click Validate
o Click Save
o Click Close
4. Pracsoft
prompts you to log in. As this is the first time you have run
Pracsoft, there will not be any users in your database. Click
 to
continue. You will be able to add a new user shortly.
to
continue. You will be able to add a new user shortly.
Adding Bank Account Details
On opening Pracsoft for the first time you will be prompted to add at least one bank account.
1. Via
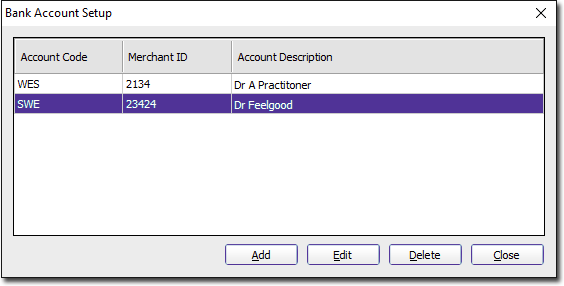
the prompt, click The Bank
Account Setup window appears.
2. Click
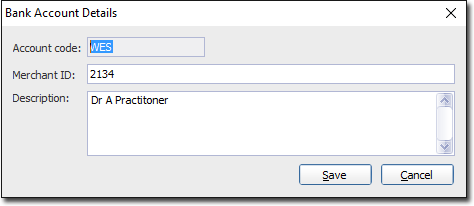
 The
Bank Account Details window
appears. Insert the following details:
The
Bank Account Details window
appears. Insert the following details:
o Account Code: Max of 3 characters.
o Description: Printed at the top of your banking summary.
o Merchant ID (optional): Supplied by TYRO, for use with EFTPOS Auto or Medicare Easyclaim.
3. Click

4. Click

Create a Letterhead
You will be prompted to create a letterhead. This can be modified later.
1. Click
2. Name
the letterhead and click
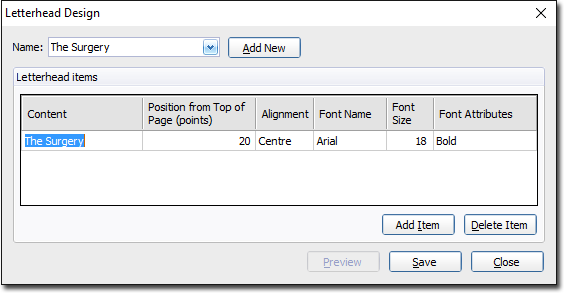
The name appears in the ‘Name’ section and ‘Letterhead Items’
section - the area in which you design your letterhead.
In our example above;
o The first line of text on the printed letterhead will be ‘The Surgery’.
o This text will appear 20 points (distance) from the top of the page.
o The font is 18-point Arial, bold, centered.
3. To
add a new line to your letterhead, click 
o Edit
the Position, Alignment and Font style to suit. Click to confirm.
4. Click
when
you are happy with the letterhead design.
Add a Practitioner
You will be prompted to add a user to your database. It is very important that you understand the types of user records that can be created in Pracsoft. See Practitioner and User Records for a detailed explanation.
The following steps describe adding a Practitioner to Pracsoft. This particular practitioner will have Level-9 security access - at least one active user with level-9 (full) access is required.
1. Click
when
prompted. The User List
window appears.
![]()
2. Click
to
add a new user. The User Details
window appears.
![]()
3. Add the following details:
o User ID: Enter the initials of the Practitioner or other relevant code.
o User Type: Practitioner.
o Full Name: Enter the name as you wish it to appear in correspondence and on invoices.
o Security Level: Ensure Level-9 is selected. See Security Levels for more information.
o Summary Data View: Select the appropriate option (only available to ‘Practitioners’);
• All Doctors Billings: All billing information per day is accessible via the Day Sheets.
• Own Billings: Own billing information per day is accessible via the Day Sheets.
• None Allowed: Billing information will not be accessible.
4. Click
Enter
a password, and then click again. You will be prompted to enter the
Practitioner’s details.
5. Click
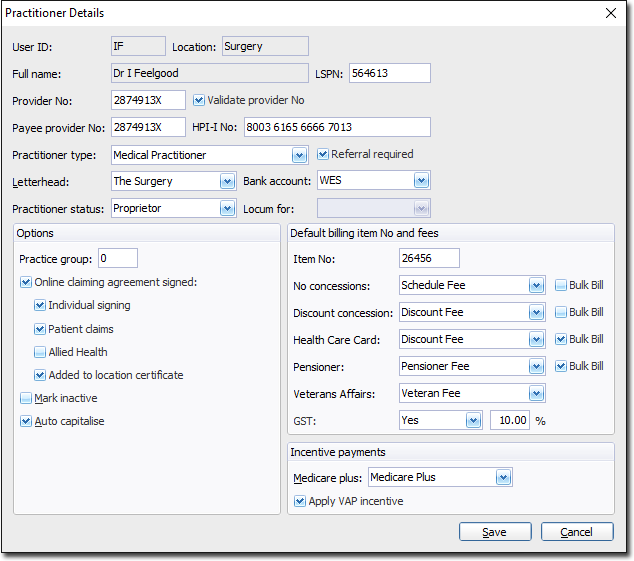
 The
Practitioner Details window
appears. Complete the following required details:
The
Practitioner Details window
appears. Complete the following required details:
o Location: e.g. ‘Surgery’, ‘Room 1’ etc.
o Provider Number / Payee Provider Number: Required for issuing an account / Bulk Bill.
o Practitioner Type: ‘GP’ or ‘Specialist’.
o Letterhead Code: Practitioners (other than locums) may have their own or share a practice letterhead.
o Bank Account Code: Practitioners (other than locums) may have their own bank account.
o Practitioner Status: Select the most appropriate description.
o HPI-I No: Healthcare Provider Identifier-Individual.
See Practitioner Details for more information about this window.
6. Click
when
you have finished entering the Practitioner’s details. You can
always edit this later. You will be returned to the User List
window.
7. Click
to
continue. Add more users later via Admin
> User List.
8. You
will be returned to the original Logon window, where you can now
select the practitioner you just created, enter their password,
and click
o After
logging on, cancel the SMS Reminder prompt by clicking  See SMS
Reminders - About and Registration for more information.
See SMS
Reminders - About and Registration for more information.
Adding Institutional Payers
An institutional payer is essentially a third party, such as an insurance agency that pays the patient’s bill.
1. Select
Admin > Institutional Payers.
The Select Institutional Payer
window appears.
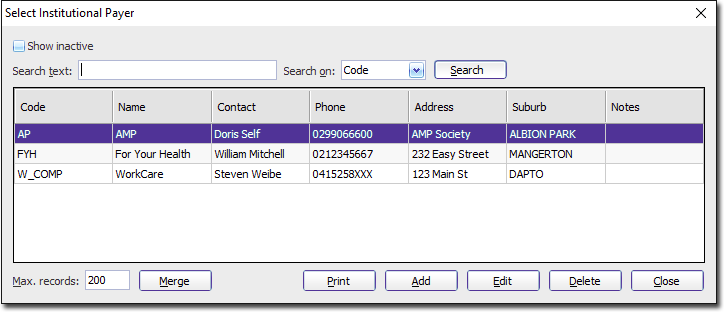
2. Click
to
add a new Institutional Payer. The Institutional
Payer Details window appears.
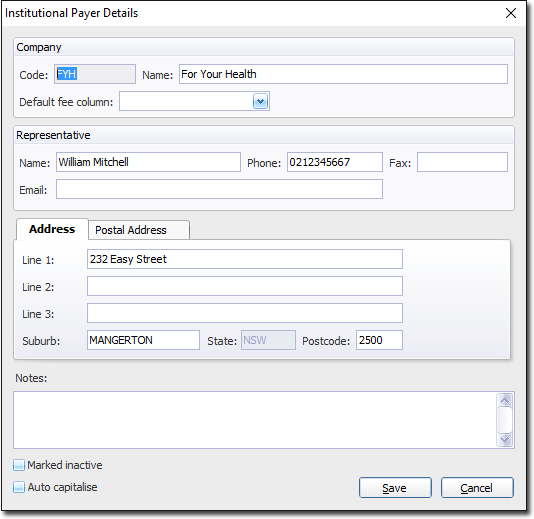
o Add/Edit information as desired, ensuring you enter a code to identify this Institutional Payer from others.
o In the Default Fee Column drop-down list you may select the fee rate applicable to this Institutional Payer. If the fee rate you desire is not available in the list, you must add it first (explained following).
3. Click
to
confirm.
Importing and Managing Fees
Importing Fees
See Updating MBS Fees in Pracsoft for instructions.
Creating Customised Fees
1. Select
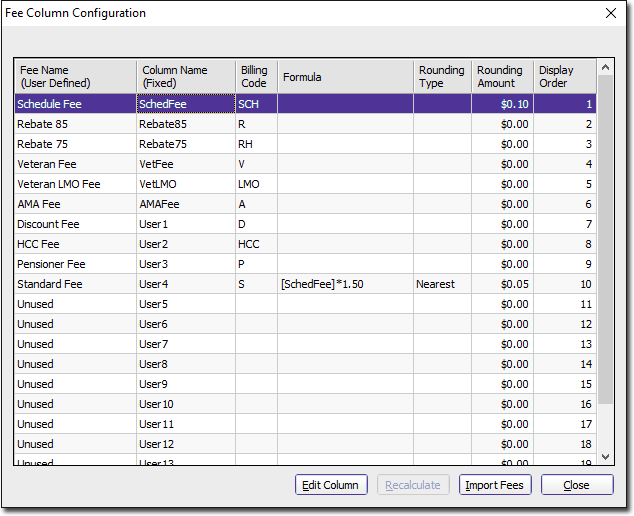
Setup > Fee Columns.
The Fee Column Configuration
window appears. Each row in this window represents a different
fee column in the Fee Listing window.
2. Select
a fee row to edit and click 
o 'Unused' rows at the bottom are for your customised fees.
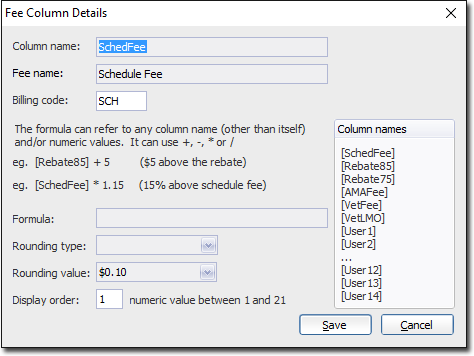
3. The Fee Column Details window appears.
o Enter a Fee Name and a Billing Code.
o Optionally enter a formula to calculate the fee. For example, a formula for 1.5 times the Schedule Fee (i.e. 50% greater), type [SchedFee]*1.5. The mathematical operators +, -, * and / are supported.
o Optionally select a Rounding Type and Value as appropriate from the drop-down lists supplied. For example, using a combination of Rounding Type and Value, you could round-up fees to the nearest 10 cents.
o Enter the Display Order to modify the position of this fee column in the Fee Listing window.
4. Click
Adding Fees
You may not wish to wait for MedicalDirector's biannual fee release, or you may wish to create or modify a customised fee. To account for this, Pracsoft provides a facility for managing fees.
1. Select
Admin > Fees to open
the Fee Listing window.

2. Click
A new fee row appears at the bottom of the list of
fees.
3. Begin entering the fee's definition by starting with the item number. This can be either:
o An item number supplied by Medicare Australia, or
o A customised number.
4. Press the tab key on your keyboard to move to the next field.
o If the number you have entered is customised, enter a description for the fee and enter the fee amount(s). It is recommended that you do not add an amount to any Medicare Australia columns (Schedule Fee, Rebates, etc.) as this customised fee will be Practice-specific, and cannot be billed to Medicare Australia.
o Note also that a message may appear indicating that the data will be truncated - this simply refers to 'description' text too long for the Description field. Select OK to automatically shorten the description.
5. Click
to
save your changes.
Managing GST
Select Admin > Fees. The Fee Listing window appears.
o By default, for each Registered Practitioner who uses GST, each Service Item has GST applied to it automatically when recording a patient's visit.
o For non-GST Service Items, tick the check box in the GST Not Applicable column.
Recalculating Fees
If you have created a fee formula for a customised fee, or the standard fee columns have changed after updating them, you will need to recalculate each customised fee column.
1. Select
Setup > Fee Columns.
The Fee Column Configuration
window appears.
2. Select the row corresponding to the fee you wish to calculate. This will activate the Recalculate button.
3. Click

o If you have entered an inaccurate formula, an error message is displayed. Click OK to close the error message. Fix the formula and recalculate again. No fee amounts are altered if a formula is incorrect.
Applying Fees to Practitioners
For each practitioner you must nominate the fee columns that apply to the various patient concession levels.
1. Select
Admin > Practitioners.
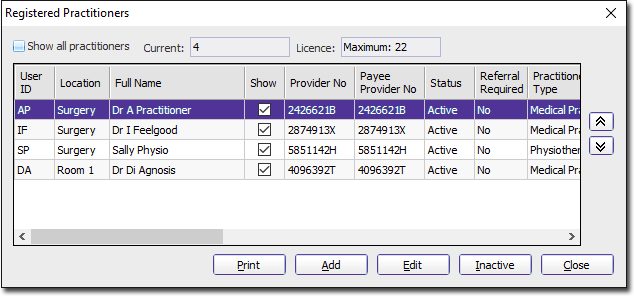
2. Double-click
the practitioner record you wish to edit. The Practitioner
Details window appears.
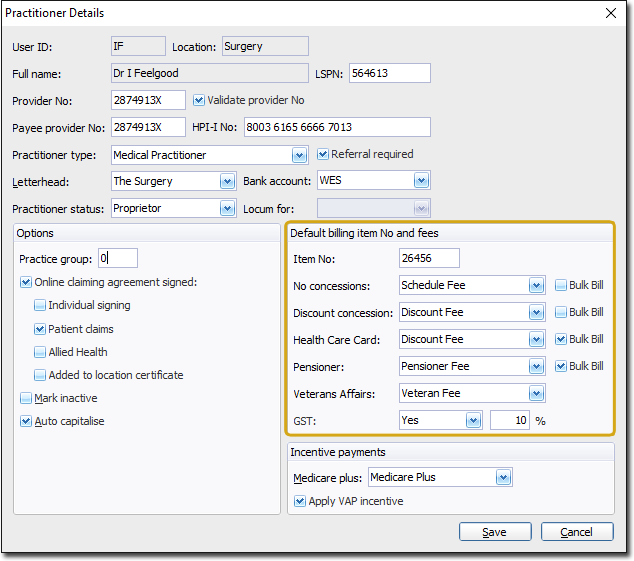
3. Locate
the options/values relating to 'Billing'. Select the appropriate
values from the drop-down lists provided. Note that this is also
where you indicate the practitioner’s GST preferences. Click
Applying Fees to Institutions
For institutional payers you may nominate the default fee columns that are charged.
1. Select
Admin > Institutional Payers.
The Select Institutional
Payer window appears.
2. Select
an institutional payer from the list and click  The Institutional Payer
Details window appears.
The Institutional Payer
Details window appears.
3. Select
the appropriate fee for this institution from the Default
Fee Column drop-down list. Click
Appointments and Appointment Books
Creating New Appointment Books
A default Appointment Book is provided with Pracsoft. You should consider carefully whether you need to create further Appointment Books, as once created they cannot be deleted, although they can be flagged as 'inactive'.
1. Select Waiting Room > Appointments to open the Appointments module. The default Appointment Book appears.
2. Select
Setup > Manage Appointment
Books. The Manage Appointment
Books window appears.
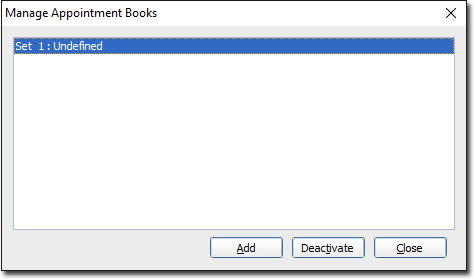
3. To
create a new Appointment Book, click
The Add New Appointment
Book window appears.
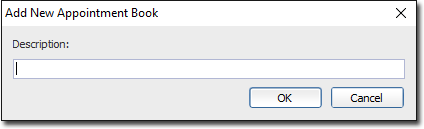
4. Enter
a description for the Appointment Book; simply name it if you
wish. Click
to confirm.
Synchronising Practitioners in the Appointment Book
Practitioners must be added to the Appointments module before you can schedule appointments for them.
The recommended method of adding practitioners to the Appointments module is to synchronise the Appointments module with Pracsoft. This copies all registered practitioners from Pracsoft to the Appointments module.
Alternatively you can manually add a practitioner to the Appointments module. Note that if you use this method but do not synchronise with Pracsoft, patients you appoint these new practitioners may not be visible in the Waiting Room. Therefore, it is highly recommended that if you manually add a practitioner to the Appointments module, you also add them to Pracsoft, and then perform a synchronisation.
To Synchronise the Appointment Book:
1. Open
the Appointment module by clicking the ![]() button,
and then select Setup > Practitioners.
button,
and then select Setup > Practitioners.
2. Click
 You
will be prompted to add any practitioners from Pracsoft that are
not currently available to the Appointments module.
You
will be prompted to add any practitioners from Pracsoft that are
not currently available to the Appointments module.
o If
you created a practitioner in the Appointments module first, and
then added them to Pracsoft, and are now trying to synchronise
the two, you should not
be prompted to add them again i.e. Pracsoft should see the identical
records, and automatically synchronise them when you click
o If you do get prompted to copy a practitioner from Pracsoft to the Appointments module when they are already in the Appointments module, this suggests that Pracsoft thinks they are two different records, usually because the Practitioner Code and Location information you entered for these records is somehow different.
• In this case, click the No button to ignore the prompt request.
• Then, go back and check that the Practitioner Code and Location information for this practitioner in the Appointments module is identical to that recorded in Pracsoft. If there is even a slight difference, you must edit this information via the Appointments module (a practitioner's information cannot be altered in Pracsoft itself).
• Then, try to synchronise again - this time you should not be prompted to copy them from Pracsoft.
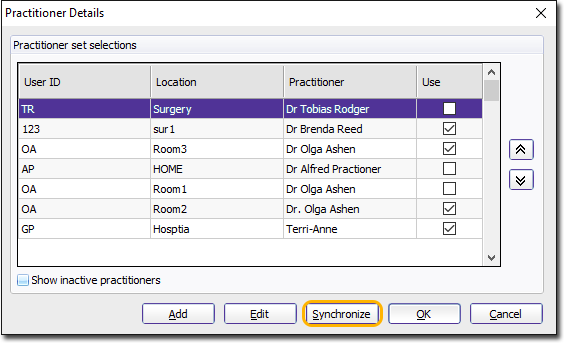
3. The Practitioner Details window will now display the new practitioner(s) brought over from Pracsoft.
4. To
ensure these practitioners are visible to the Appointment Book,
tick the Use check box.
Click
to confirm.
Online Claiming
Setup the Location Store
Consult Easyclaim and Online Claiming Error Codes for Pracsoft
Setup Location Certificate details in Pracsoft
On the Server:
1. From
the Pracsoft main screen select Setup
> Workstation Settings.

2. Click
 and browse to the location where you want
to store the hic.psi.
and browse to the location where you want
to store the hic.psi.
On the Workstation(s):
1. From
the Pracsoft main screen select Setup
> Workstation Settings.
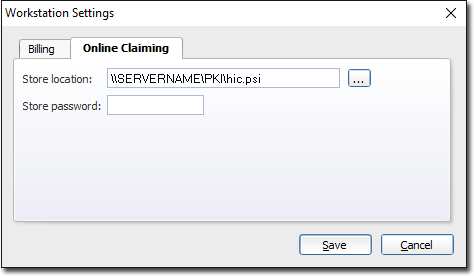
2. Click
and
browse to the location of the hic.psi on the server.
3. Enter and save the Store password.
Activate Online Claiming in Pracsoft
1. From
the Pracsoft main window, select Setup
> Global Settings.
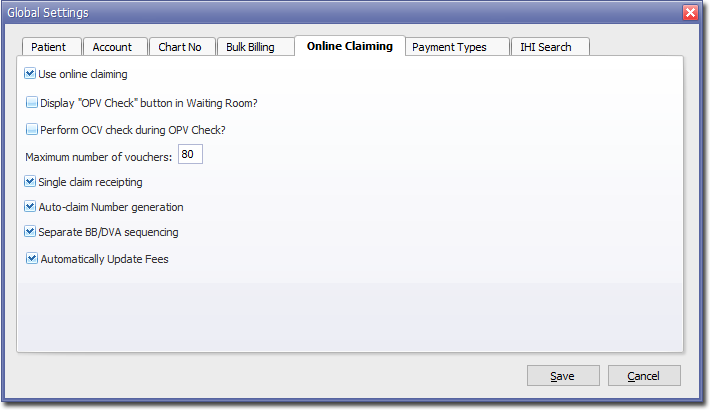
2. Tick the Use Online Claiming check box.
3. Ensure that:
o Medicare Australia Server = www2.medicareaustralia.gov.au/pext
o Medicare Australia Recipient = ebus@medicareaustralia.gov.au
4. It is recommended that you also tick:
o Single Claim Receipting
o Auto-Claim Number Generation: Claim numbers will be automatically incremented and displayed when batching.
o Separate BB/DVA Sequencing: Different letters used to distinguish Medicare and DVA claims.
5. Select
the Bulk Billing tab.
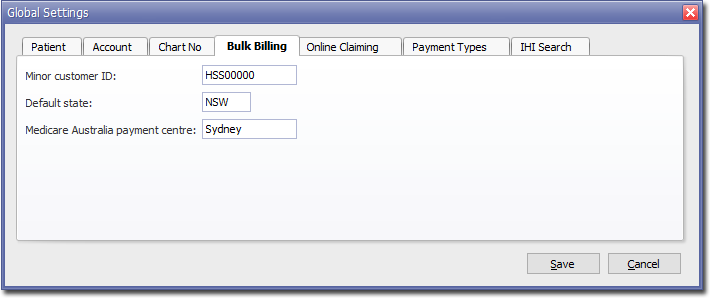
6. Enter
your Minor Customer ID (also known as the HSS number). Click
Setting up Practitioners to use Online Claiming
1. From
the Pracsoft main window, select Admin
> Practitioners.
2. Select
the Practitioner you wish to edit from the list and click The Practitioner Details window
appears.
3. Tick Online Claiming Agreement Signed so the practitioner’s claims appear in the online claiming window.
4. Tick Added To Location Certificate.
5. (Optional) Tick Patient Claims to send private invoices and receipts to Medicare Australia.
6. (Optional) Tick Individual Signing (using the iKey/Smartcard token), if their individual certificate is installed.
7. Indicate
the practitioner’s Incentive
Payment preferences.
8. Click
o Repeat these steps for all practitioners who wish to use online claiming.
9. Close and reopen Pracsoft.
Other Important Settings
Printers
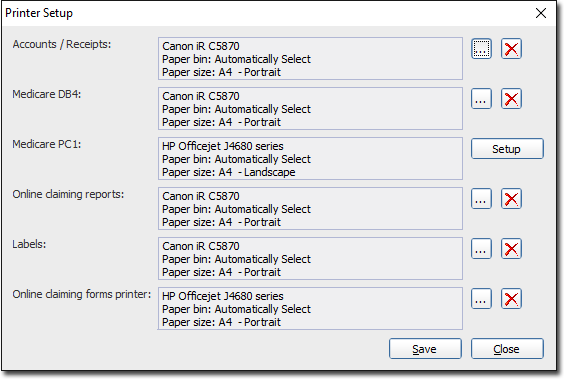
You can configure printers in Pracsoft so that the correct format is used for each type of print job, without affecting your default Windows printer settings.
Within Pracsoft select Setup
> Printers. To edit the printer settings for a particular
function click the button
or Setup button for that
function.
o Accounts/Receipts: Printed using the selected settings (printer, tray destination and paper size).
o Medicare PC1: Pre-printed stationery supplied by Medicare. For multi-tray printers, specify the correct tray. To configure printing Medicare PC1 forms, consult the MedicalDirector Pracsoft Help (press F1).
o Online Claiming Reports: Must be printed ‘Landscape’ to fit all details.
o Labels: Select the appropriate printer, tray and settings as desired.
o Online Claiming Forms/Medicare DB4: The form patients sign for Bulk Billing or DVA billing, on A5/A4 plain paper.
Practice Address Details
Before recording a visit for a patient you must enter the Practice’s address details.
1. Select
Setup > Practice Details.
The Practice Details window
appears.

2. Enter a minimum of Practice Address, City/Suburb, Postcode and State. The option to ‘Use practice suburb and postcode as default for new patients’ will automatically populate the suburb and postcode of all new patients with that of the Surgery.
eHealth Settings
Please consult the guide PIP eHealth Incentive Requirement - 1 Healthcare Identifiers