See also: Upgrade Process Checklist
SQL Server – Information for all Users
Both Clinical and Pracsoft use Microsoft SQL databases. Clinical and Pracsoft require two SQL Server Instances.
o HCNSQL07 - Required. Hosts the clinical and financial data.
o ESP - Required. Used by functionality such as MedicalDirector Insights, and if your practice uses a TYRO device.
The MedicalDirector DVD / ISO (4.0 and later) come supplied with Microsoft SQL 2014 Express. A new Server Role installation will create the SQL Server instances for you automatically but will not upgrade existing installations. Microsoft SQL 2014 Express is a free product and contains all the features of full SQL but has some limitations including a maximum individual database size of 10GB, a limit set to 1GB RAM and a single Socket CPU, up to 4 cores. This is sufficient for most General Practices.
The following scenario assumes that you are running either full SQL, or SQL Express. In either case, you need only upgrade Clinical and/or Pracsoft by following the instructions contained in this document.
If you have obtained a copy of Full SQL 2014, 2016, 2017 or 2019 and are currently running Clinical and/or Pracsoft within SQL Express, you can upgrade to Full SQL 2014, 2016, 2017 and 2019 either before upgrade to Clinical / Pracsoft 4.2 or later1. In both cases ensure you make a valid Full MedicalDirector Backup before proceeding to follow the instructions supplied by Microsoft to upgrade both SQL Express Instances HCNSQL07 and ESP to your version of Full SQL 2014, 2016, 2017 or 20192.
If your practice is running an older version of SQL e.g. SQL 2005 Express please contact MedicalDirector Customer Service.
1 The minimum supported version for MedicalDirector Clinical / Pracsoft 4.2 is Microsoft SQL 2008 R2 SP3.
2 This requires running the SQL installer twice.
Upgrading MedicalDirector Clinical / Pracsoft
o Ensure you have performed a backup before continuing.
o If you receive any error messages during the installation routine, contact MedicalDirector Customer Service immediately for assistance. It is recommended that you do not attempt to resolve any issues without assistance from MedicalDirector Customer Service.
o Perform the upgrade routine on the Server computer first, after which you can perform the upgrade on all workstation computers where you run Clinical and/or Pracsoft.
o Installation via RDP, remotely, is not recommended. However, it may be used to install onto a Server Operating System as long as the installation does not require a restart. Some pre-requisites require a restart, which may result in a new remote install not being successful. The DVD must be in the physical DVD drive of the Server computer, you must be logged into the RDP session as the Administrator and the installation must be run through the Add / Remove Programs control panel.
1. If
you have downloaded the installation from the MedicalDirector
website, browse to and double-click Setup.exe. Alternatively,
you can obtain a DVD by contacting MedicalDirector
Customer Service.
For Terminal Server Users:
o If the MedicalDirector Installer window is open, click the Cancel button to close it now.
o When installing onto a Terminal Server, the software cannot be installed directly from the DVD, or it may not be available to all users.
o Ensure there are no active or disconnected sessions listed within the Session Manager. If there are, you must remove them before beginning the install or they may not be able to use the software successfully.
o Advise all users not to log into the Terminal Server (recommend temporarily blocking access) until the installation has completed successfully. Failing to do so may result in the installation process failing or those users that do log in may not be able to use the software successfully.
o The installation of software must always be performed whilst the Server is in ‘Install Mode’. This is usually achieved by launching the MedicalDirector Installer through Add / Remove Programs by clicking on the Add New Programs button, then browse to and double-click Setup.exe on the DVD. During this procedure a Window should open instructing that it not be closed until the install has been completed.
o Refer to your Operating System help or Microsoft for more information on installing software onto a Terminal Server.
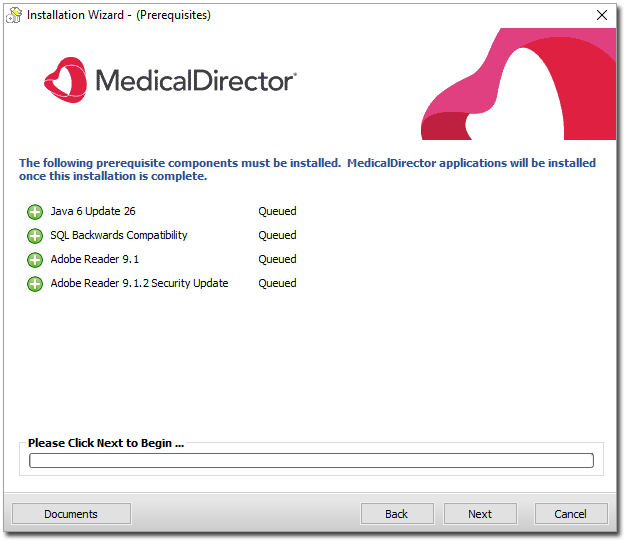
2. The Prerequisites window appears. When you are ready to continue, click the Next button.
3. You will be presented with a list of Important Installation Tasks. Information about each of these tasks is available by clicking on an associated link. It is recommended that you read this information and perform any tasks as necessary.
o Once you are satisfied that you have performed the tasks necessary to continue with the installation, tick the associated check box to acknowledge that you have read and understood these recommendations and then click the Next button to continue.
o Failure to address these issues may result in being unable to install the software.

A Note about Antivirus Software and Firewalls:
Virus scanners look for two things;
o Known file signatures that matches a virus, and
o Virus-like behavior. Some virus scanners confuse activities involved in the installation of software with being virus-like.
Firewalls have been known to be a major source of installation issues. For example, they can block the discovery of Databases that need upgrading. As there are numerous Antivirus / Firewall products available, and they are constantly changing, it is impossible to reliably detect them.
4. You will be presented with the MedicalDirector Subscription Agreement.
o Read the Subscription Agreement, and if you agree to the terms, tick the associated checkbox, and then click the Next button to continue.
5. At this stage the Installation Wizard will determine if your system requires the installation of additional third-party software, and if so you will be prompted accordingly. If it is determined that you do not need to install any further third-party software, proceed now to Step 7.
o If it is determined that you do need to install additional third-party software, click the Next button to proceed with the installation(s). The installation routines for each listed application will commence in sequence, with the overall progress displayed in the main window. Note that this process may take some time, depending on the requirements of the third-party software, and the number of applications you will be required to install. Note also, that this process may require you rebooting the computer, after which the Clinical/Pracsoft Installation Wizard will continue.
For Terminal Server Users: If the computer has restarted and the MedicalDirector Installer has restarted, click the Cancel button to close the MedicalDirector Installer. Launch the MedicalDirector Installer through Add / Remove Programs again, as described in Step 1 above, to ensure the Terminal Server is returned to ‘Install Mode’ before continuing.
o You
will be prompted upon the completion of all required third-party
software installations as to whether they were successful. If
any were unsuccessful, please consult your Systems Support for
assistance.
6. You will be prompted to confirm that you have performed the following important installation tasks, before the installation can proceed;
o Closed all MedicalDirector Clinical, Pracsoft, and Appointment Book applications.
o Uploaded all patient data to the server (if you are using Mobility).
o Performed a full MedicalDirector Backup.
You must indicate that you have performed these operations by ticking the associated check box before you can proceed. When you are ready to continue, click the Next button.
7. You will be presented with an installation summary. It is recommended that you review it. When you are ready to proceed, click the Begin button.
8. The installation commences and you will be able to monitor its progress. Secondary installation windows may appear periodically as individual components are installed.
9. You will be prompted when the installation is complete. Click the Finish button to exit the MedicalDirector Installation Wizard.
10. (Optional)
If you also intend to install Bluechip with Clinical, you will
need to install the legacy ManageEzy Document Management System.
This comes supplied with the Installation Wizard, and is accessed
via the Tools button.

If the Installation Wizard detects that the ManageEzy Document
Management System is not installed, the following button will
be available to you. Click it to install ManageEzy.
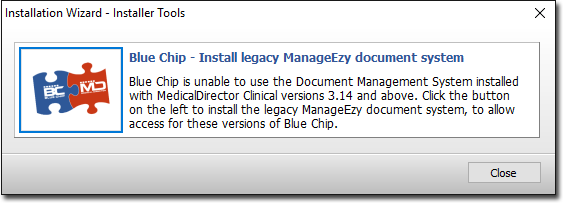
If this button appears unavailable (greyed-out), then ManageEzy
is already installed. After ManageEzy has been installed, you
can commence installing Bluechip.
Proceed to all workstation computers running Clinical and/or Pracsoft and run the upgrade on each of them.