1. Open File Explorer, and then locate the file or folder you want to take ownership of. This example uses "C:\Data", but this check (and any changes) would most commonly be done on:
o The MedicalDirector Application install directory:
• "C:\Program Files (x86)\Health Communication Network\"
• C:\ManageEzy
• C:\Program Files (x86)\Common Files\PKI
o The Health Communication Network registry key in "HKEY_LOCAL_MACHINE\Software\WOW6432NODE\"
2. Right-click the file or folder, and select Properties.
3. The Properties window appears. Select the Security tab.
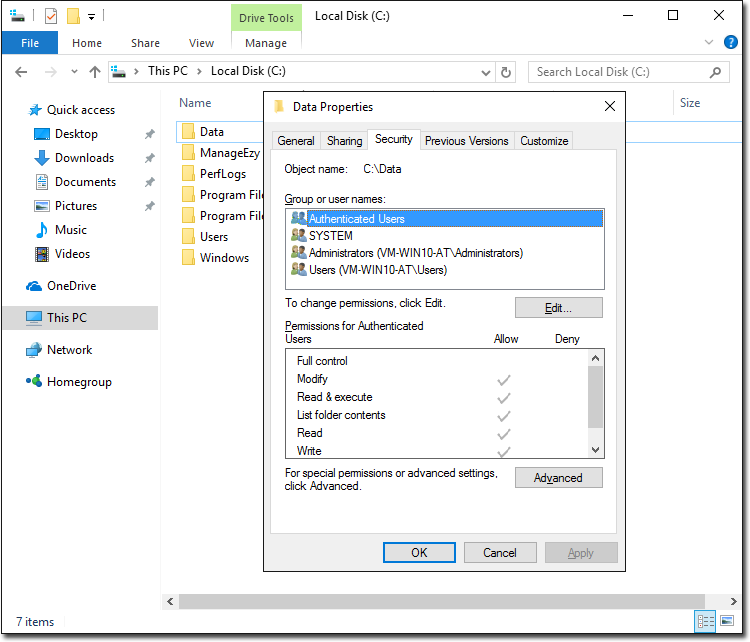
It is expected that the following Groups or user names have Full Control on the MedicalDirector Install Directory and Registry Key noted in Step 1.:
o Administrators
o Authenticated Users
o USERS
o SYSTEM
Check for the presence of these entries in the Group or User Names section of the Security Tab, clicking on each in turn to ensure that Full Control is ticked in the Permission for Authenticated Users section. In the example above, we can see that Authenticated Users is selected, and that it does not have Full Control.
4. If any of these Groups or user names is not listed or does has not have Full Control of this folder it will be necessary to add additional permissions. Click 
5. The Advanced Security Settings window appears. Click 
6. The Permission Entry window appears.
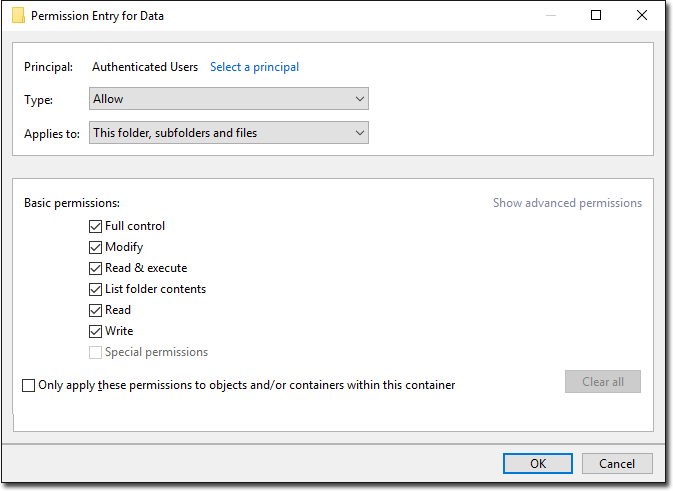
7. Click the Select a Principal text, and then select the account to be edited by typing its name in the text box provided and clicking  In our example, we have entered 'Authenticated Users'.

8. You are returned to the Permission Entry window. Locate and tick the Full Control permissions check box.
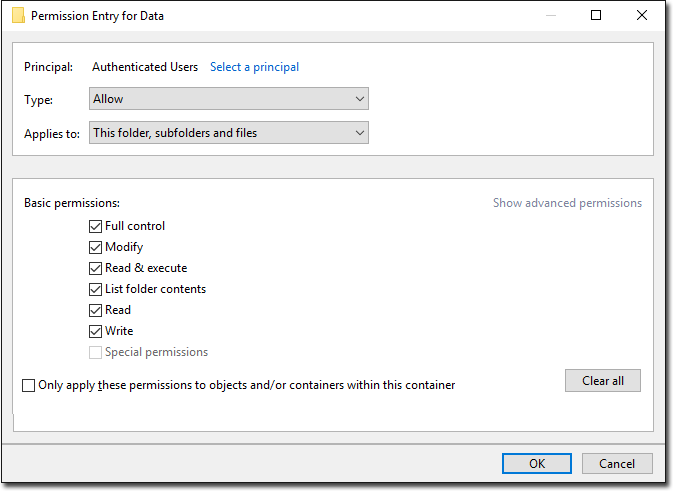
9. Click  Repeat the above steps for each additional User/Group that needs to be modified or added. Then proceed to Step 10.
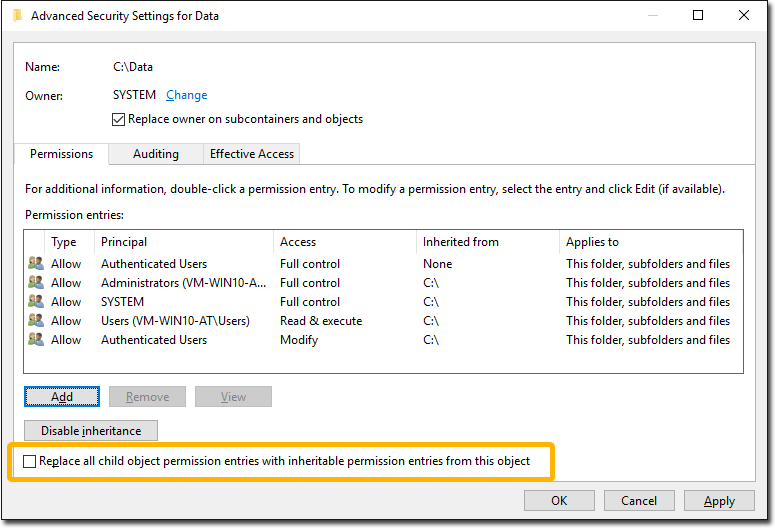
10. Locate and click the check box labelled Replace all existing inheritable permissions on all descendants with inheritable permissions from this object. This takes the permissions of the 'parent' object, and applies them to 'descendant' objects. When cleared, permissions on each object, whether parent or its descendant, can be unique. Click to get full access to the file or folder.
11. Click  and then
You have completed the steps necessary for granting full access to this folder in Windows 8/10 using the File Explorer app.
|
|

12. Right-click the file or folder, and select Properties.
13. The Properties window appears. Select the Security tab.
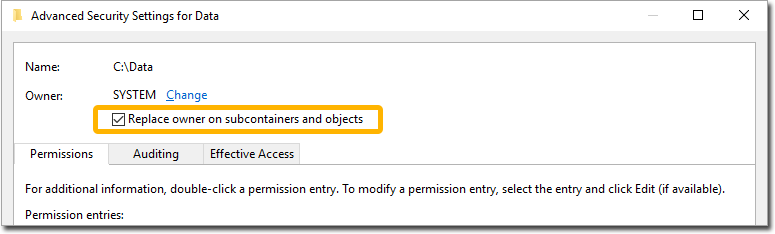
14. Click The Advanced Security Settings window will appear. Here you can verify the current Owner and change the Owner of the Folder if not SYSTEM
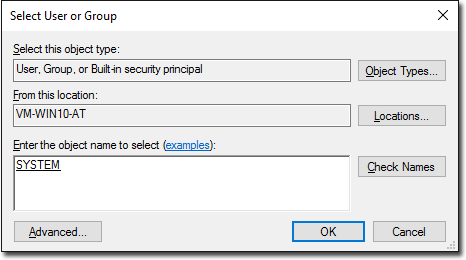
15. Click the Change link next to the Owner label. The Select User or Group window will appear.
16. Select the user account SYSTEM via the Advanced button (or just type SYSTEM in the text box provided, as shown below). Click
17. To change the owner of all subfolders and files inside the folder, tick the check box labelled Replace owner on subcontainers and objects.
18. Click and then
You have completed the steps necessary for changing the owner of this folder in Windows 8/10 using the File Explorer app.